Meal Prep Frozen Smoothie Packs

Meal Prep Frozen Smoothie Packs

Print
clock clock iconcutlery cutlery iconflag flag iconfolder folder iconinstagram instagram iconpinterest pinterest iconfacebook facebook iconprint print iconsquares squares iconheart heart iconheart solid heart solid icon

Meal Prep Frozen Smoothie Packs


5 Stars 4 Stars 3 Stars 2 Stars 1 Star

No reviews

  • Author: Amy MS, RD, LDN
  • Total Time: 5 minutes

Description

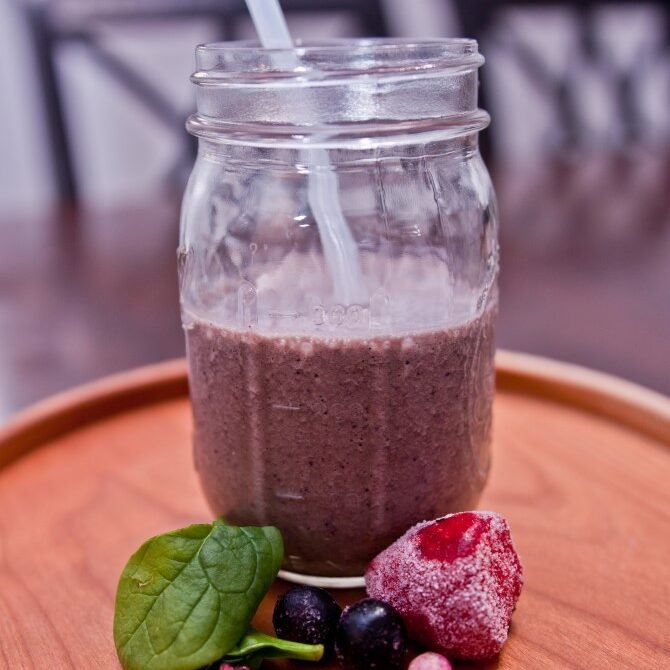
Streamline your mornings with these easy Meal Prep Frozen Smoothie Packs! Perfect for busy schedules, these packs combine fresh fruits, veggies, and other nutritious ingredients to create delicious smoothies in minutes—just blend and go. Ideal for a quick, healthy breakfast or snack!

Ingredients

Units Scale
  • 1 cup Greens (Spinach, Kale, Romaine etc)
  • 1 1/2 cups Fruit (Fresh or Frozen- whatever you like! (Mango, Pineapple, Berries etc)
  • Optional Dry Add-ins: Flaxseed, Chia Seeds, Protein Powder

To Mix Up Smoothies:

  • 1 1/22 cups Milk of Choice

Instructions

  1. To a large freezer bag or freezer safe container, add the greens, fruit and add-ins of your choice.
  2. Seal and store in the freezer until you are ready for a smoothie!
  3. To make the smoothie, add 1 1/2-2 cups of milk and the contents of your prepped smoothie bag.
  4. Blend until smooth. Enjoy!

Equipment

  • Prep Time: 5 Minutes
  • Category: Breakfast, Smoothie
  • Method: Blend
  • Cuisine: American
Recipe Card powered byTasty Recipes

Almond Coconut Granola

Almond Coconut Granola

Print
clock clock iconcutlery cutlery iconflag flag iconfolder folder iconinstagram instagram iconpinterest pinterest iconfacebook facebook iconprint print iconsquares squares iconheart heart iconheart solid heart solid icon

Almond Coconut Granola


5 Stars 4 Stars 3 Stars 2 Stars 1 Star

No reviews

  • Author: Amy MS, RD, LDN
  • Total Time: 35 minutes
  • Yield: 12 Servings 1x
  • Diet: Vegan

Description

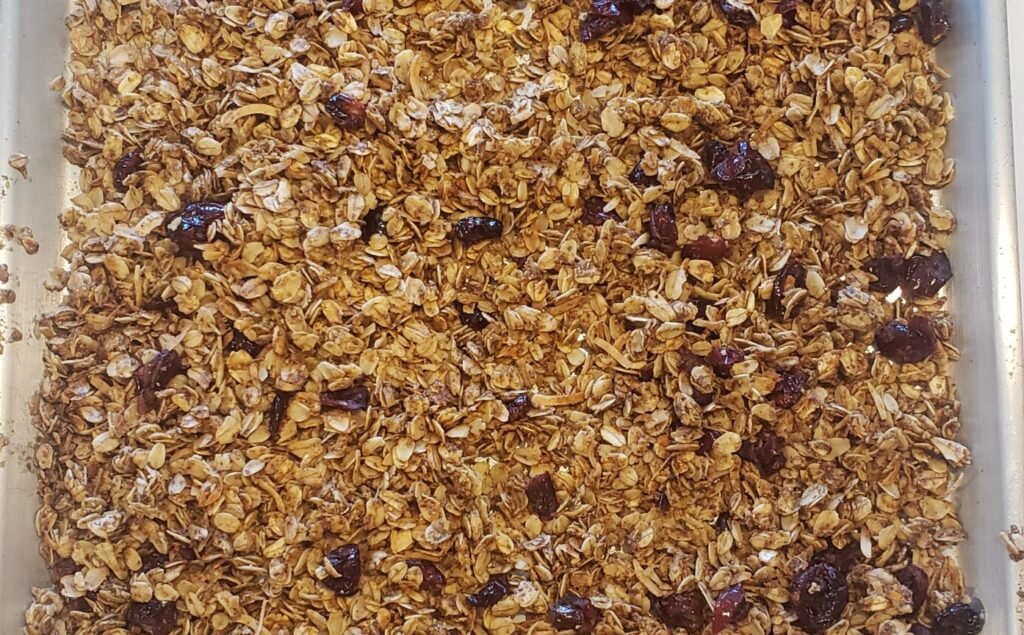
Crunchy and flavorful, Almond Coconut Granola is a wholesome blend of nuts, coconut, and lightly sweetened oats. Perfect for breakfast, meal prep or snacking!


Ingredients

Units Scale
  • 4 cups Old Fashioned Oats
  • 1 cup Unsweetened Shredded Coconut
  • 1 1/2 cups Sliced Almonds
  • 1/2 cup Ground Flaxseed
  • 1 1/2 tsp Cinnamon
  • 1 tsp Cardamom
  • Pinch Salt
  • 1/2 cup Maple Syrup
  • 1/2 cup Coconut Oil
  • 2 tsp Vanilla Extract
  • 1/4 tsp Almond Extract

Instructions

  1. Preheat oven to 325° F. Place a silpat or parchment paper over a large sheet tray, set aside.
  2. To a large mixing bowl add the oats, coconut, almonds, flaxseed, cinnamon, cardamom, and salt. Stir together with a spatula and set aside.
  3. In a microwave safe bowl, melt the coconut oil. Then add the maple syrup, vanilla extract and almond extract. Stir to combine.
  4. Pour the liquid mixture over the oats mixture and stir together thoroughly with a spatula.
  5. Spread the granola mixture evenly onto a large sheet tray and bake for 25 minutes, stirring halfway through at around 12 minutes.
  6. After 25 minutes remove the granola from the oven and using the back of a sturdy spatula, press the mixture down to help it clump together and create clusters. Allow to cool completely.
  7. Mix together and then allow the granola to cool before serving.
  8. Store the granola in an airtight container.
  9. Serve over Greek Yogurt or enjoy plain as a snack!
  • Prep Time: 10 Minutes
  • Cook Time: 25
  • Category: Breakfast
  • Method: Bake
  • Cuisine: American

Nutrition

  • Serving Size: 1/12
  • Calories: 348
  • Sugar: 10g
  • Sodium: 75mg
  • Fat: 26g
  • Carbohydrates: 26g
  • Fiber: 7g
  • Protein: 7g
  • Cholesterol: 0mg
Recipe Card powered byTasty Recipes

Peanut Butter Cup Overnight Oats (Protein-Packed)

Peanut Butter Cup Overnight Oats (Protein-Packed)

Print
clock clock iconcutlery cutlery iconflag flag iconfolder folder iconinstagram instagram iconpinterest pinterest iconfacebook facebook iconprint print iconsquares squares iconheart heart iconheart solid heart solid icon

Peanut Butter Cup Overnight Oats (Protein-Packed)


5 Stars 4 Stars 3 Stars 2 Stars 1 Star

No reviews

  • Author: Amy MS, RD, LDN
  • Total Time: 5 minutes
  • Yield: 1 1x
  • Diet: Vegetarian

Description

Peanut Butter Cup Overnight Oats are a creamy, protein-packed breakfast that tastes almost like dessert! Perfect for meal prep and busy mornings.


Ingredients

Units Scale
  • 1/2 cup Unsweetened Soy Milk
  • 1/4 cup Greek Yogurt
  • 1 Tbsp Maple Syrup
  • 2 Tbsp Peanut Butter
  • 1 Tbsp Cocoa Powder
  • 1/4 tsp Vanilla Extract
  • 1 Tbsp Hemp Hearts
  • 1/2 cup Old Fashioned Oats
  • 1 Tbsp Semi-Sweet Mini Chocolate Chips

Instructions

  1. Into a mason jar add the soy milk, Greek Yogurt, maple syrup and peanut butter. Give the mixture a thorough mix with a whisk or fork.
  2. Then add the cocoa powder, hemp hearts, oats and finally the chocolate chips and stir to fully combine.
  3. Pop a lid onto the jar and place it into the refrigerator overnight.
  4. The next morning, unscrew the top and dig in! Enjoy!
  • Prep Time: 5 Minutes
  • Category: Breakfast
  • Method: No Cook
  • Cuisine: American

Nutrition

  • Serving Size: 1
  • Calories: 472
  • Sugar: 18g
  • Sodium: 212mg
  • Fat: 29g
  • Carbohydrates: 39g
  • Fiber: 7g
  • Protein: 23g
  • Cholesterol: 8mg
Recipe Card powered byTasty Recipes

Cheesy Veggie Egg Bites

Cheesy Veggie Egg Bites

Cheesy Veggie Egg Bites

Print
clock clock iconcutlery cutlery iconflag flag iconfolder folder iconinstagram instagram iconpinterest pinterest iconfacebook facebook iconprint print iconsquares squares iconheart heart iconheart solid heart solid icon
Cheesy Veggie Egg Bites

Cheesy Veggie Egg Bites


5 Stars 4 Stars 3 Stars 2 Stars 1 Star

No reviews

  • Author: Amy MS, RD, LDN
  • Total Time: 35 minutes
  • Yield: 12 Egg Bites 1x
  • Diet: Gluten Free

Description

Start your day with Cheesy Veggie Egg Bites, a protein-packed breakfast loaded with fresh veggies and savory cheese. Perfect for meal prep or busy mornings!


Ingredients

Units Scale
  • 1 cup Cottage Cheese
  • 8 Eggs
  • 1 cup Veggies (suggestions: Diced Bell Pepper, Green Onion, Mushrooms, Spinach)
  • 1/2 cup Grated Cheddar Cheese
  • 1/2 tsp Kosher Salt
  • 1/4 tps Ground Black Pepper

Instructions

  1. Preheat oven to 350° F. Spray a muffin tin with nonstick spray and set on top of a large sheet tray, then set aside.
  2. To a blender, add the cottage cheese, eggs, salt and pepper.
  3. Blend on high until fairly smooth about 1-2 minutes.
  4. Then, pour the mixtures straight from your blender, evenly into your prepared muffin tin.
  5. To each muffin cup, add about 1 tablespoon of each veggie you have prepared.
  6. Then, add 1 tablespoon of cheddar cheese on top.
  7. Place the muffin tin into the oven and bake for 20-25 minutes until the eggs are fully set.
  8. Remove from the oven and allow muffin tin to cool on a wire rack for 5 minutes.
  9. After 5 minutes, remove the egg bites from the muffin tin and allow to cool fully on the wire rack.
  • Prep Time: 10 minutes
  • Cook Time: 25
  • Category: Breakfast
  • Method: Bake
  • Cuisine: American

Nutrition

  • Serving Size: 1 Egg Bite
  • Calories: 72
  • Sugar: 2g
  • Sodium: 210mg
  • Fat: 4g
  • Carbohydrates: 2g
  • Fiber: 0g
  • Protein: 7g
  • Cholesterol: 141mg
Recipe Card powered byTasty Recipes

How to Use Your HSA/FSA Card for Nutrtion Counseling

Using your FSA or HSA for nutrition services is a smart way to invest in your health while saving money. These accounts can help cover things like nutrition counseling, meal planning, and other services that support your wellness goals. In this post, I’ll break down how to use your FSA or HSA for nutrition care and why it’s such a great option. Let’s make prioritizing your health easier and more affordable!

What are HSA/FSA?

Let’s quickly breakdown what exactly HSA and FSA accounts are.

Health Savings Account (HSA): An HSA is a tax-advantaged savings account designed to help you pay for qualified medical expenses. Contributions are tax-deductible, and withdrawals for eligible expenses are tax-free, making it a great tool for managing healthcare costs.

Flexible Spending Account (FSA): An FSA is a pre-tax benefit account that lets you set aside funds for qualified medical expenses. Unlike an HSA, FSAs are often provided through employers and may come with a “use-it-or-lose-it” policy, so it’s important to plan your spending wisely.

Both accounts can be used to pay for a wide range of health-related expenses, including nutrition counseling.

Step-by-Step Guide to Using Your HSA/FSA with Thrive Nutrition RDN

1. Verify Your Eligibility

  • Before getting started, confirm that nutrition counseling qualifies as an eligible expense under your HSA or FSA plan. While counseling provided by a licensed dietitian or nutritionist is typically covered, it’s always wise to check with your plan provider to understand the specific requirements and coverage details.

2. Obtain a Letter of Medical Necessity from a Healthcare Provider

  • A Letter of Medical Necessity (LMN) is a document written by a healthcare provider that explains the medical need for a specific treatment or service. For nutrition counseling, it highlights why the service is essential for your health and how it supports your treatment plan. This document typically includes:

    • Relevant diagnosis or medical condition(s)
    • How nutrition counseling will address your condition
    • The expected duration and frequency of counseling
    • The credentials of the dietitian or nutritionist providing the service

3. Book Your Free Discovery Call

4. Pay with your HSA/FSA Card

  • Paying with your HSA/FSA card is simple through our booking and payment portal, Healthie. Just enter your card details as you would with any credit card, and the payment will be processed directly through your account—streamlined and stress-free!

5. Keep Your Receipts

    • With each payment, you’ll receive a copy of your invoice—be sure to save it! This documentation is important for your records and can be submitted to your HSA/FSA administrator along with your Letter of Medical Necessity, if required for reimbursement or verification.

Why Choose Thrive Nutrition RDN?

At Thrive Nutrition RDN, I’m here to help you find freedom with food while working toward your unique health goals. Forget the strict rules and one-size-fits-all plans—together, we’ll create a personalized approach that fits your life and helps you feel your best. Plus, using your HSA/FSA funds makes it even easier to invest in yourself and take advantage of the benefits you already have!

Ready to Thrive?

Book your free 15-minute discovery call to get started! During the call, we can discuss your goals, answer any questions, and explore how Thrive Nutrition RDN can support you on your journey to better health.

Facebook
Twitter
LinkedIn
Email
Pinterest

Pumpkin Roll Out Cookies

Pumpkin Roll Out Cookies

Print

clock clock iconcutlery cutlery iconflag flag iconfolder folder iconinstagram instagram iconpinterest pinterest iconfacebook facebook iconprint print iconsquares squares iconheart heart iconheart solid heart solid icon

Pumpkin Roll Out Cookies


5 Stars 4 Stars 3 Stars 2 Stars 1 Star

No reviews


  • Author:
    Amy MS, RD, LDN


  • Total Time:
    42 minutes


  • Yield:
    24 Cookies 1x


  • Diet:
    Vegetarian


Description

Soft, spiced, and perfectly festive, these pumpkin roll-out cookies are a family favorite! Easy to cut into fun shapes and topped with a sprinkles for even more fun, they’re perfect for holiday baking or a cozy weekend treat.


Ingredients


Units


Scale

  • 1/2 cup Unsalted Butter, softened
  • 1/2 cup Maple Syrup
  • 1/4 cup Brown Sugar
  • 1/2 cup Pumpkin Puree
  • 1 tsp Vanilla Extract
  • 1 cup White Whole Wheat Flour
  • 1 1/4 cup All Purpose Flour
  • 3/4 tsp Baking Powder
  • 2 1/2 tsp Pumpkin Pie Spice
  • 1/4 tsp Kosher Salt


Instructions

  1. In a medium sized mixing bowl, add the flours, baking powder, pumpkin pie spice and salt. Whisk together and set aside.
  2. In the bowl of a stand mixer, add the wet ingredients: butter, maple syrup, brown sugar, pumpkin puree and vanilla extract. Mix on low, then increase the speed to medium and cream together the ingredients until light and fluffy.
  3. Next, turn the mixer to low and slowly add the dry ingredients. Mix until the dough comes together.
  4. Cover the dough with plastic wrap and refrigerate for at least 30 minutes.
  5. Preheat your oven to 350 F.
  6. Roll the dough out to about 1/4 inch thick. Using your cookie cutters, cut the cookies into your favorite shapes. (Top with sprinkles to jazz them up if you’d like!)
  7. Place the cookies onto a silpat lined sheet tray.
  8. Bake for 12-15 minutes until the cookies are set.
  9. Remove from the oven and allow to cool on a wire rack. Enjoy!

  • Prep Time: 30 minutes
  • Cook Time: 12
  • Category: Dessert
  • Method: Bake
  • Cuisine: American

Nutrition

  • Serving Size: 1 Cookie
  • Calories: 104
  • Sugar: 6g
  • Sodium: 48mg
  • Fat: 4g
  • Carbohydrates: 16g
  • Fiber: 1g
  • Protein: 1g
  • Cholesterol: 10mg

Recipe Card powered byTasty Recipes

Peppermint Hot Chocolate

Peppermint Hot Chocolate

Print
clock clock iconcutlery cutlery iconflag flag iconfolder folder iconinstagram instagram iconpinterest pinterest iconfacebook facebook iconprint print iconsquares squares iconheart heart iconheart solid heart solid icon

Peppermint Hot Chocolate


5 Stars 4 Stars 3 Stars 2 Stars 1 Star

No reviews

  • Author: Amy MS, RD, LDN
  • Total Time: 7 minutes
  • Yield: 2 Servings 1x
  • Diet: Vegan

Description

Peppermint Hot Chocolate is the perfect cozy drink on a winter day. Dairy-free & naturally-sweetened.


Ingredients

Units Scale
  • 2 cups Unsweetened Soy Milk
  • 4 Pitted Dates
  • 2 tbsp Cocoa Powder
  • 2 tbsp Maple Syrup
  • 1/2 tsp Vanilla Extract
  • 1/8 tsp Peppermint Extract
  • Crushed Candy cane or marshmallows, optional for serving

Instructions

  1. Place the soy milk into a microwave safe container. Microwave for 1-2 minutes to heat it up.
  2. Pour the warm milk into a blender, then add the remaining ingredients to the blender.
  3. Blend on high for 1 minute until the mixture is smooth.
  4. Pour into two mugs and top with crushed candy canes, enjoy!
  • Prep Time: 5 minutes
  • Cook Time: 2
  • Category: Drink
  • Method: Blender
  • Cuisine: American

Nutrition

  • Serving Size: 1
  • Calories: 143
  • Sugar: 23g
  • Sodium: 13mg
  • Fat: 2g
  • Carbohydrates: 30g
  • Fiber: 4g
  • Protein: 5g
  • Cholesterol: 0mg
Recipe Card powered byTasty Recipes

Festive Chocolate Bark

Festive Chocolate Bark

Festive Chocolate Bark
Print
clock clock iconcutlery cutlery iconflag flag iconfolder folder iconinstagram instagram iconpinterest pinterest iconfacebook facebook iconprint print iconsquares squares iconheart heart iconheart solid heart solid icon
Festive Chocolate Bark

Festive Chocolate Bark


5 Stars 4 Stars 3 Stars 2 Stars 1 Star

No reviews

  • Author: Amy MS, RD, LDN
  • Total Time: 10 minutes
  • Yield: 25 pieces 1x

Description

This chocolate bark is loaded with crunchy nuts and sweet dried fruit, it’s the perfect mix of sweet, salty, and satisfying. Easy to make, totally customizable, and a hit at any holiday gathering—or just for you with a cozy cup of cocoa.


Ingredients

Units Scale
  • 12 oz Chocolate Chips (choose your favorite, dark, semi-sweet or milk chocolate)
  • 3/4 cup Nuts and/or Seeds (I like cashews, pistachios, slivered almonds, pepitas)
  • 1/4 cup Dried Cranberries or Cherries
  • 1/4 cup Unsweetened Shredded Coconut
  • Pinch Flaky Sea Salt

Instructions

  1. Cover a large sheet tray with a silpat or parchment paper, set aside.
  2. Melt the chocolate in a microwave safe bowl, on 30-second intervals, stirring in between each one. (You can also melt the chocolate in a heat-proof bowl over a saucepan of simmering water.)
  3. Using a rubber spatula, pour the chocolate onto the center of the tray and spread it out evenly until it is about 1/4″ thick. It will likely not reach the edges of your sheet tray.
  4. Sprinkle your toppings over top, the nuts/seeds, dried fruit, coconut and finally sea salt. Give the toppings a little press into the chocolate with the palms of your hands or back of a spatula.
  5. Place the sheet tray into the fridge so that the chocolate can set for 15 minutes.
  6. Once the chocolate has hardened, use your hands to break it into pieces. Enjoy!
  • Prep Time: 10 minutes
  • Category: Dessert, Holiday
  • Method: No Bake
  • Cuisine: American

Nutrition

  • Serving Size: 1 piece
  • Calories: 104
  • Sugar: 9g
  • Sodium: 11mg
  • Fat: 7g
  • Carbohydrates: 11g
  • Fiber: 2g
  • Protein: 2g
  • Cholesterol: 5mg
Recipe Card powered byTasty Recipes

Easy Maple Glazed Carrots

Easy Maple Glazed Carrots

Print
clock clock iconcutlery cutlery iconflag flag iconfolder folder iconinstagram instagram iconpinterest pinterest iconfacebook facebook iconprint print iconsquares squares iconheart heart iconheart solid heart solid icon

Easy Maple Glazed Carrots


5 Stars 4 Stars 3 Stars 2 Stars 1 Star

No reviews

  • Author: Amy MS, RD, LDN
  • Total Time: 10 minutes
  • Yield: 4 Servings 1x

Ingredients

Units Scale
  • 1 lb Carrots, peeled and ends trimmed
  • 1/2 tbsp unsalted Butter
  • 1/2 tbsp Olive Oil
  • 1 tbsp Maple Syrup
  • 1/8 tsp Kosher Salt
  • Ground Black Pepper
  • Parsley, minced for Garnish (Optional)

Instructions

  1. Prep your carrots by slicing them into sticks
  2. Heat a large cast iron pan or sautee pan over medium high heat.
  3. When you pan is warm, add the butter and olive oil.
  4. Next add the carrots, salt and pepper and cook, for 4-5 minutes, stirring occasionally or tossing carrots in the pan so that they brown evenly.
  5. Then add the maple syrup to the pan and cook for an additional minute.
  6. Serve hot or warm. Top with parsley if desired. Enjoy!
  • Prep Time: 5 minutes
  • Cook Time: 5
  • Category: Sides, Holiday
  • Method: Sautee
  • Cuisine: American

Nutrition

  • Serving Size: 1 Serving
  • Calories: 160
  • Sugar: 9g
  • Sodium: 150mg
  • Fat: 5g
  • Carbohydrates: 40g
  • Fiber: 10g
  • Protein: 3g
  • Cholesterol: 4mg
Recipe Card powered byTasty Recipes

Are Seed Oils Toxic? Debunking the Myths with Science

If you’ve been following nutrition trends lately, you’ve probably come across the buzz about seed oils. Many influencers are calling them “toxic” and even lumping them in with the so-called “hateful eight.” But is there any real science behind these claims, or is it just hype? As a registered dietitian, I’m here to break down the evidence and clear up the confusion.

First, What Exactly Are Seed Oils?

Seed oils come from the seeds of various plants, not their fruits. Some common ones include:  

  • Canola Oil (from rapeseed)
  • Sunflower Oil (from sunflower seeds) 
  • Grapeseed Oil (from grape seeds) 
  • Safflower Oil (from safflower seeds) 
  • Corn Oil 
  • Cottonseed Oil 
  • Rice Bran Oil 
  • Soybean Oil  

These oils are mainly made up of unsaturated fats, particularly polyunsaturated fatty acids (PUFAs), which include omega-6 fatty acids. While omega-6s are important for our health, the high amounts in seed oils have some influencers pretty fired up.

Why All the Hype?

The idea that seed oils are toxic has really picked up steam on social media. Influencers often claim there’s a direct link between the rise in seed oils and the increase in chronic illnesses. While there is some truth to the fact that many processed foods contain seed oils, that doesn’t automatically mean they’re the cause of health problems. Other factors—like our sedentary lifestyles and overall diet quality—play a much bigger role in our health.

A classic example of mixing up correlation and causation is the “ice cream and shark attacks” correlation. During the summer, ice cream sales go up, and so do shark attacks—does that mean ice cream is luring sharks? Of course not! It’s just that both are tied to the same thing: people hitting the beach in warmer weather.

Are Seed Oils Really That Bad?
Short answer: not in the way people often claim. In fact, research shows that linoleic acid (the omega-6 fatty acid in seed oils) might actually help reduce inflammation. A big review of 30 studies found that higher linoleic acid intake was linked to a lower risk of heart disease and even death. Plus, another review from the Cochrane group found that upping omega-6 fats could lower heart attack risk without major effects on other heart-related issues. So, turns out, seed oils might not be the villain they’re made out to be.

The Omega-6 Debate
Omega-6 fatty acids are essential for a lot of important functions in our bodies, like keeping our cell membranes healthy. One type of omega-6, linoleic acid, is found in high amounts in seed oils. Critics often claim that too much omega-6 causes inflammation, which could lead to issues like diabetes, heart disease, and even headaches.

But here’s the thing: only about 0.2% of the linoleic acid we consume  actually turns into arachidonic acid, which is linked to inflammation. Plus, arachidonic acid has anti-inflammatory properties too. This important detail often gets glossed over by those calling out seed oils.

The Bottom Line on Seed Oils
The idea that seed oils are toxic is often blown way out of proportion for the sake of clicks and drama. Sure, some people feel better after ditching seed oils, but let’s not forget they’re usually cutting out a lot of processed foods too, which are packed with refined carbs and sugars.

If your diet is heavy on fast food and processed junk, swapping those out for whole foods will definitely boost your health. But there’s no need to stress over using seed oils in moderation or having the occasional snack that contains them.

For a healthier lifestyle, focus more on boosting your omega-3s (think walnuts, salmon, and flaxseed) instead of turning omega-6s into the villain. Getting the facts straight about seed oils and their role in our diet is key. Instead of falling for fear-mongering, let’s focus on the evidence and make informed choices about what we eat!

References:


Hooper, L., Al-Khudairy, L., Abdelhamid, A. S., Rees, K., Brainard, J. S., Brown, T. J., Ajabnoor, S. M., O’Brien, A. T., Winstanley, L. E., Donaldson, D. H., Song, F., & Deane, K. H. (2018). Omega-6 fats for the primary and secondary prevention of cardiovascular disease. Cochrane Database of Systematic Reviews, 2018(11). https://doi.org/10.1002/14651858.CD011094.pub4
Innes, J. K., & Calder, P. C. (2018). Omega-6 fatty acids and inflammation. Prostaglandins, Leukotrienes and Essential Fatty Acids, 132, 41–48. https://doi.org/10.1016/j.plefa.2018.03.004
Katanbaf, M. N., Siegel, P. B., & Gross, W. B. (1987). Prior experience and response of chickens to a streptococcal infection. Poultry Science, 66(12), 2053–2055. https://doi.org/10.3382/ps.0662053
Marklund, M., Wu, J. H. Y., Imamura, F., Del Gobbo, L. C., Fretts, A., de Goede, J., Shi, P., Tintle, N., Wennberg, M., Aslibekyan, S., Chen, T.-A., de Oliveira Otto, M. C., Hirakawa, Y., Eriksen, H. H., Kröger, J., Laguzzi, F., Lankinen, M., Murphy, R. A., Prem, K., … Cohorts for Heart and Aging Research in Genomic Epidemiology (CHARGE) Fatty Acids and Outcomes Research Consortium (FORCE). (2019). Biomarkers of Dietary Omega-6 Fatty Acids and Incident Cardiovascular Disease and Mortality. Circulation, 139(21), 2422–2436. https://doi.org/10.1161/CIRCULATIONAHA.118.038908
Marklund, M., Wu, J. H. Y., Imamura, F., Del Gobbo, L. C., Fretts, A., De Goede, J., Shi, P., Tintle, N., Wennberg, M., Aslibekyan, S., Chen, T.-A., De Oliveira Otto, M. C., Hirakawa, Y., Eriksen, H. H., Kröger, J., Laguzzi, F., Lankinen, M., Murphy, R. A., Prem, K., … For the Cohorts for Heart and Aging Research in Genomic Epidemiology (CHARGE) Fatty Acids and Outcomes Research Consortium (FORCE). (2019). Biomarkers of Dietary Omega-6 Fatty Acids and Incident Cardiovascular Disease and Mortality: An Individual-Level Pooled Analysis of 30 Cohort Studies. Circulation, 139(21), 2422–2436. https://doi.org/10.1161/CIRCULATIONAHA.118.038908
Mojtaba Yousefi 1 2,  Hedayat Hosseini. (n.d.). Evaluation of Hexane Content in Edible Vegetable Oils Consumed in Iran. https://doi.org/10.14302/issn.2641-7669.ject-17-1790
Pereira, M., Liang, J., Edwards-Hicks, J., Meadows, A. M., Hinz, C., Liggi, S., Hepprich, M., Mudry, J. M., Han, K., Griffin, J. L., Fraser, I., Sack, M. N., Hess, C., & Bryant, C. E. (2024). Arachidonic acid inhibition of the NLRP3 inflammasome is a mechanism to explain the anti-inflammatory effects of fasting. Cell Reports, 43(2), 113700. https://doi.org/10.1016/j.celrep.2024.113700
Virtanen, J. K., Wu, J. H. Y., Voutilainen, S., Mursu, J., & Tuomainen, T.-P. (2018). Serum n–6 polyunsaturated fatty acids and risk of death: the Kuopio Ischaemic Heart Disease Risk Factor Study. The American Journal of Clinical Nutrition, 107(3), 427–435. https://doi.org/10.1093/ajcn/nqx063
Facebook
Twitter
LinkedIn
Email
Pinterest

Air Fryer Chickpea Chocolate Chip Cookie Bites

Air Fryer Chickpea Chocolate Chip Cookie Bites

Print

clock clock iconcutlery cutlery iconflag flag iconfolder folder iconinstagram instagram iconpinterest pinterest iconfacebook facebook iconprint print iconsquares squares iconheart heart iconheart solid heart solid icon

Air Fryer Chickpea Chocolate Chip Cookie Bites


5 Stars 4 Stars 3 Stars 2 Stars 1 Star

No reviews


  • Author:
    Amy MS, RD, LDN


  • Total Time:
    10 minutes


  • Yield:
    25 Cookie Bites 1x


  • Diet:
    Gluten Free


Description

Air Fryer Cookie Dough Chickpea Bites are a healthier, delicious twist on traditional cookie dough treats. Made with chickpeas for added protein and fiber, they’re crispy on the outside and soft on the inside, making them a great snack, or fiber-filled dessert treat!


Ingredients


Units


Scale

  • 1 can, 15 oz Chickpeas, drained and rinsed
  • 1/2 cup Peanut Butter
  • 1/3 cup Maple Syrup
  • 2 tsp Vanilla Extract
  • 1 Egg
  • 1 tsp Ground Flaxseed
  • 1/2 tsp Kosher Salt
  • 1/2 tsp Baking Powder
  • 1/2 tsp Baking Soda
  • 1/2 tsp Cinnamon
  • 1/2 cup Oat Flour
  • 1/3 cup Mini Chocolate Chips


Instructions

  1. To a food processor or high-powered blender, add all the ingredients except the chocolate chips.
  2. Process the dough until smooth, about 1-2 minutes.
  3. Take the blade out of the food processor, or alternatively pour the dough into a bowl, then add the chocolate chips and stir into the batter with a spatula.
  4. Preheat your air fryer to 350° F.
  5. Spray the inside of your air fryer basket with nonstick spray.
  6. Scoop 1 tablespoon size portions and place into the air fryer, spacing each cookie bite 2 inches apart.
  7. Air fry on 350° F for 7-10 minutes, depending on your air fryer.
  8. Allow to cool for 10 minutes before digging in, enjoy!

  • Prep Time: 10 minutes
  • Category: Dessert, Snack
  • Method: Air Fry
  • Cuisine: American

Nutrition

  • Serving Size: 1
  • Calories: 86
  • Sugar: 3g
  • Sodium: 159mg
  • Fat: 4g
  • Carbohydrates: 9g
  • Fiber: 1g
  • Protein: 4g
  • Cholesterol: 40mg

Recipe Card powered byTasty Recipes

Healthy Baked Potato Soup

Creamy, comforting and absolutely delicious, this healthy baked potato soup wins at dinner time, every time!

Healthy Baked Potato Soup

Print
clock clock iconcutlery cutlery iconflag flag iconfolder folder iconinstagram instagram iconpinterest pinterest iconfacebook facebook iconprint print iconsquares squares iconheart heart iconheart solid heart solid icon

Healthy Baked Potato Soup


5 Stars 4 Stars 3 Stars 2 Stars 1 Star

No reviews

  • Author: Amy MS, RD, LDN
  • Total Time: 30 minutes
  • Yield: 5 Servings 1x
  • Diet: Vegetarian

Description

This healthy baked potato soup with cauliflower is a creamy, lighter twist on the classic. Cauliflower adds extra fiber and smoothness, while keeping the dish rich and satisfying. This is the perfect comfort soup, especially when topped with chives and cheddar cheese.


Ingredients

Units Scale
  • 2 Large Russet Potatoes, peeled and diced into 1-inch pieces
  • 4 cups Frozen Cauliflower florets
  • 1 1/2 cups Vegetable Stock
  • 1 1/2 cups Milk
  • 1/2 cup Greek Yogurt
  • 2 tsp Kosher Salt
  • 3/4 tsp Ground Black Pepper

Instructions

  1. To a dutch oven or large pot, add the vegetable stock, diced potato, frozen cauliflower and 1 tsp salt. Bring mixture to a boil, then lower the heat and simmer for 10-12 minutes, until the potatoes are tender.
  2. Using an immersion blender, blend the cauliflower, potato mixture until smooth.
  3. Then, to the pot add the milk, Greek Yogurt and remaining salt and pepper. Stir together with a wooden spoon or spatula to combine. Turn the heat to low to cook the soup through for an additional 5 minutes.
  4. Taste for seasoning and add salt and preference to taste.
  5. Top with chives, cheddar cheese or crumbled bacon. Enjoy!
  • Prep Time: 10 minutes
  • Cook Time: 20 minutes
  • Category: Dinner, Soup
  • Method: Stovetop
  • Cuisine: American

Nutrition

  • Serving Size: 1/5
  • Calories: 121
  • Sugar: 6g
  • Sodium: 350mg
  • Fat: 2g
  • Carbohydrates: 19g
  • Fiber: 3g
  • Protein: 7g
  • Cholesterol: 7mg
Recipe Card powered byTasty Recipes

Cauliflower Alfredo with Roast Chicken & Broccoli

Cauliflower Alfredo with Roast Chicken & Broccoli

Print
clock clock iconcutlery cutlery iconflag flag iconfolder folder iconinstagram instagram iconpinterest pinterest iconfacebook facebook iconprint print iconsquares squares iconheart heart iconheart solid heart solid icon

Cauliflower Alfredo with Roast Chicken and Broccoli


5 Stars 4 Stars 3 Stars 2 Stars 1 Star

No reviews

  • Author: Amy MS, RD, LDN
  • Total Time: 45 minutes
  • Yield: 8 Servings 1x

Ingredients

Units Scale

Cauliflower Alfredo:

  • 2 cups Cauliflower Florets (frozen works well here)
  • 1 cup Almond Milk, unsweetened (or milk of your choice)
  • 3 tbsp Olive Oil
  • 3 Garlic Cloves, minced
  • 1 1/2 cup Parmesan Cheese, grated
  • 1 lb Whole Wheat Fettuccine Pasta
  • Salt and pepper to taste

Oven Roast Garlic Chicken & Broccoli:

  • 1 lb Boneless, Skinless Chicken Breasts
  • 1/2 tsp Salt
  • 1/4 tsp Ground Black Pepper
  • 3/4 tsp Garlic Powder
  • 2 tsp Olive Oil
  • 2 Heads Broccoli

Instructions

Cauliflower Alfredo:

  1. Bring a large pot of salted water to a boil. Add the 2 cups of cauliflower and cook for 2 minutes then remove with a slotted spoon to your colander to drain.
  2. Add the fettuccine to the boiling water and cook according to the package directions. Note: Do not drain the pasta, we may need some pasta water for the sauce!
  3. While the pasta cooks, continue the Alfredo sauce.
  4. In a blender or food processor, combine the cooked cauliflower and milk. Puree until smooth.
  5. In a large skillet over medium-low heat, add the olive oil. Then add the garlic and cook for 2 minutes.
  6. Next, gently pour the cauliflower puree into the olive oil and garlic and stir to combine.
  7. Then, turn the heat to low and add the Parmesan cheese and stir into the sauce to melt.
  8. Taste for seasonings and add pepper and salt to your liking.
  9. Then, add the pasta directly into the Alfredo sauce. Using tongs toss the pasta to coat with the sauce.
  10. Top the pasta with your roasted chicken and broccoli, enjoy!

Roast Chicken & Broccoli:

  1. Preheat oven to 400° F. Line a sheet tray with foil or parchment paper.
  2. Prepare the broccoli by cutting the florets off the stem and set aside.
  3. Lay the chicken breasts onto the sheet tray. Top evenly with olive oil, salt, pepper and garlic powder.
  4. Place into the oven and bake for 25 minutes, until the chicken reaches 165° F.
  5. At the 15 minute mark, add the broccoli to the sheet tray to roast.
  6. Remove from the oven and slice the chicken breast to serve over the pasta with the roasted broccoli.
  • Prep Time: 20 minutes
  • Cook Time: 25 minutes
  • Category: Dinner, Entree, Main
  • Method: Stovetop, Oven
  • Cuisine: Italian

Nutrition

  • Serving Size: 1/8
  • Calories: 483
  • Sugar: 3g
  • Sodium: 742mg
  • Fat: 15g
  • Carbohydrates: 52g
  • Fiber: 10g
  • Protein: 35g
  • Cholesterol: 72mg
Recipe Card powered byTasty Recipes

Pumpkin Blondies (Gluten Free)

Pumpkin Blondies (Gluten Free)

Print
clock clock iconcutlery cutlery iconflag flag iconfolder folder iconinstagram instagram iconpinterest pinterest iconfacebook facebook iconprint print iconsquares squares iconheart heart iconheart solid heart solid icon

Pumpkin Blondies (Gluten Free)


5 Stars 4 Stars 3 Stars 2 Stars 1 Star

No reviews

  • Author: Amy MS, RD, LDN
  • Total Time: 35 minutes
  • Yield: 16 servings 1x
  • Diet: Gluten Free

Ingredients

Units Scale
  • 3/4 cup Pumpkin Puree
  • 1 cup Almond, Cashew or Peanut Butter
  • 1/4 cup Maple Syrup
  • 1 Egg
  • 1 tsp Vanilla Extract
  • 1 tsp Pumpkin Pie Spice
  • 1/2 tsp Baking Powder
  • 1/2 tsp Baking Soda
  • 1/4 tsp Kosher Salt
  • 1/3 cup Chocolate Chips + 2 tablespoons

Instructions

  1. Preheat oven to 350° F. Spray an 8×8 baking pan with nonstick spray, set aside.
  2. To a large bowl add the pumpkin, almond butter, maple syrup, egg, vanilla, pumpkin pie spice, baking powder, baking soda and salt. Stir together with a spatula to fully combine.
  3. Next, fold in 1/3 cup chocolate chips.
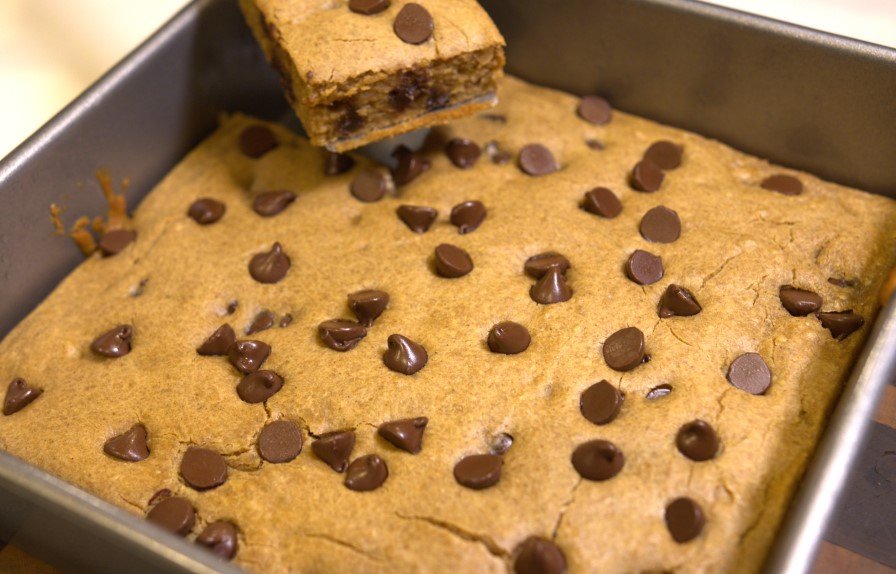
  4. Pour the batter into your prepared pan and smooth the top so the batter is even. Top with the extra 2 tbsp of chocolate chips.
  5. Place the pan into the oven and bake for 25 minutes until the blondies are set.
  6. Allow the blondies to cool on a wire rack for at least 15 minutes before digging in. Enjoy!

Notes

  1. If your nut butter was kept in the fridge, microwave it for 20-30 seconds to soften it and make mixing much smoother!
  • Prep Time: 10 minutes
  • Cook Time: 25
  • Category: Dessert, Snack
  • Method: Bake
  • Cuisine: American

Nutrition

  • Serving Size: 1 Blondie
  • Calories: 153
  • Sugar: 7g
  • Sodium: 112mg
  • Fat: 11g
  • Carbohydrates: 10g
  • Fiber: 3g
  • Protein: 6g
  • Cholesterol: 62mg
Recipe Card powered byTasty Recipes

Taco Salads in a Jar

Taco Salads in a Jar

Print
clock clock iconcutlery cutlery iconflag flag iconfolder folder iconinstagram instagram iconpinterest pinterest iconfacebook facebook iconprint print iconsquares squares iconheart heart iconheart solid heart solid icon

Taco Salads in a Jar


5 Stars 4 Stars 3 Stars 2 Stars 1 Star

No reviews

  • Author: Amy MS, RD, LDN
  • Total Time: 10 minutes
  • Yield: 2 Salads 1x
  • Diet: Vegetarian

Description

Taco Salads in a Jar are an easy and delicious meal prep! With layers of beans, veggies and the simplest dressing these salads will elevate your lunch game!


Ingredients

Units Scale
  • 4 tbsp Salsa
  • 4 tbsp Greek Yogurt
  • 1 Can, 15oz Black Beans, drained and rinsed
  • 1 cup Frozen Corn
  • 1 Orange Bell Pepper, diced
  • 1 pint Cherry Tomatoes, sliced in half lengthwise
  • 12 tbsp Jarred Jalapenos
  • 1 cup Romaine Lettuce
  • Optional: 1/2 cup Crushed Taco Shell, 1/4 cup Shredded Cheddar Cheese

Instructions

  1. Set out two large mason jars.
  2. Pour 2 tbsp salsa into the bottom of each jar. Top with 2 tbsp Greek Yogurt.
  3. Add 1/2 of the rinsed black beans to each jar.
  4. Next add 1/2 cup frozen corn to each jar.
  5. Top the corn with half of the cherry tomatoes and 1-2 tbsp jalapenos.
  6. Finally, top each jar with 1/2 cup Romaine lettuce.
  7. Seal your jars with lids and pop them into the refrigerator until you are ready to enjoy!
  • Prep Time: 10 minutes
  • Category: Lunch, Salad
  • Method: No-Cook
  • Cuisine: Mexican

Nutrition

  • Serving Size: 1 Salad
  • Calories: 317
  • Sugar: 11g
  • Sodium: 664mg
  • Fat: 2.5g
  • Carbohydrates: 60g
  • Fiber: 17g
  • Protein: 19g
  • Cholesterol: 4.4mg
Recipe Card powered byTasty Recipes

Homemade Thin Mint Cookies (Gluten-Free)

Homemade Thin Mint Cookies (Gluten-Free)

Print
clock clock iconcutlery cutlery iconflag flag iconfolder folder iconinstagram instagram iconpinterest pinterest iconfacebook facebook iconprint print iconsquares squares iconheart heart iconheart solid heart solid icon
Thin Mint Cookies

Homemade Thin Mint Cookies (Gluten-Free)


5 Stars 4 Stars 3 Stars 2 Stars 1 Star

No reviews

  • Author: Amy MS, RD, LDN
  • Total Time: 45 minutes
  • Yield: 3840 Cookies 1x
  • Diet: Gluten Free

Description

Homemade Thin Mint Cookies are even better than the Girl Scout’s version! A perfect crisp cookie center with a delicious chocolate peppermint coating, now you can have Thin Mint Cookies anytime of the year!


Ingredients

Units Scale

Cookie Wafer:

  • 1 1/2 cup Almond Flour
  • 1/4 cup Cocoa Powder
  • 1/2 tsp Xanthan Gum
  • Pinch Salt
  • 3 tbsp Unsalted Butter
  • 4 tbsp Maple Syrup
  • 1 tbsp Water
  • 3/4 tsp Peppermint Extract

Chocolate Coating:

  • 1 cup Dark Chocolate Chips
  • 2 tsp Coconut Oil
  • 3/4 tsp Peppermint Extract

Instructions

  1. Preheat oven to 350° F. Cover a sheet tray with a silpat or parchment paper and set aside.
  2. In a medium-sized mixing bowl, add the almond flour, cocoa powder, Xanthan Gum and salt. Whisk to combine.
  3. Slice the butter into small cubes and add to the dry ingredients. Using a fork or pastry cutter, cut the butter into very small pieces into the almond flour mixture (smaller than pea size!). Then add the maple syrup, water and peppermint extract and stir together with a spatula.
  4. Form the dough into a disc, wrap in plastic wrap and place into the refrigerator for 15 minutes. This helps to make rolling the cookies out much easier!
  5. After 15 minutes, remove the dough from the refrigerator and place onto your work surface. Place a piece of parchment paper or plastic wrap over the dough, then roll it out, this makes rolling much easier! Roll the dough out to about 1/8″ thick.
  6. Next, use a 2″ circle cutter, cut out the cookies and place onto your prepared sheet tray.
  7. Bake for 12-17 minutes. (Be sure to check the cookies at 12 minutes, you want them to be crispy but don’t allow them to burn!) Allow cookie wafers to cool completely.
  8. While the cookie wafers cool, make the chocolate coating. To a microwave safe bowl add the dark chocolate chips and coconut oil.
  9. Microwave on 25 second intervals, stirring in between each, until the chocolate is just melted. Then add in the peppermint extract and stir to combine.
  10. Take a chocolate wafer, dip into the melted chocolate coating, turning the wafer to coat the entire cookie. Let any excess chocolate drip off into the bowl and place the cookie onto your prepared sheet tray with a silpat or parchment paper.
  11. Continue with remaining wafers, coating each in chocolate.
  12. Place the coated cookies into the freezer for 10 minutes or refrigerator for at least 15 minutes to allow the chocolate to set.
  13. Store the cookies in an airtight container in the freezer or refrigerator, however you like your thin mints! Enjoy!
  • Prep Time: 30 minutes
  • Cook Time: 15
  • Category: Dessert, Cookie
  • Method: Bake
  • Cuisine: American

Nutrition

  • Serving Size: 4 Cookies
  • Calories: 155
  • Sugar: 6g
  • Sodium: 19mg
  • Fat: 12g
  • Carbohydrates: 11g
  • Fiber: 3g
  • Protein: 4g
  • Cholesterol: 8g
Recipe Card powered byTasty Recipes

7 Foods to Help You Sleep Better Tonight

7 Foods to Help You Sleep Better Tonight

Picture of Amy Lawson MS, RD, LDN

Amy Lawson MS, RD, LDN

woman in bed

Did you know that about one-third of Americans aren’t getting the recommended 7-9 hours of sleep each night? Poor sleep is linked to increased risks of heart disease, obesity, and type 2 diabetes, which makes it so key to prioritize sleep.

While there are many ways to improve your sleep—like exercising and reducing screen time at night—this post is all about nutrition! Let’s dive into the key nutrients that promote better sleep and discover seven foods that can help you get a good night’s rest.

Key Nutrients for Sleep

Certain nutrients and compounds in our food can really help our sleep quality and quantity. Here are some of the sleep-enhancing all-stars to know:

  • Melatonin: A hormone that directly regulates our sleep-wake cycle.

  • Serotonin: This neurotransmitter plays a critical role in establishing our sleep patterns.

  • Tryptophan: This essential amino acid helps produce serotonin and melatonin, hormones that regulate our sleep-wake cycle. Pairing carbohydrates with tryptophan-rich foods can enhance melatonin production.

  • Magnesium: This mineral can help reduce stress and boost melatonin production.

  • Vitamin D: Important for the synthesis of melatonin.

  • Zinc: Supports the conversion of tryptophan into serotonin and melatonin.

7 Sleep Boosting Foods

Kiwi

Kiwi is often overlooked but is a powerful sleep aid! Rich in melatonin, studies show that eating two kiwis an hour before bed for four weeks can significantly improve sleep quality. A study on adults with sleep disorders found improvements in total sleep time and how quickly they fell asleep.

Salmon

Not only is salmon known for its heart and brain health benefits due to omega-3 fatty acid content, but its vitamin D content also plays a vital role in enhancing sleep quality. Men who consumed salmon three times a week reported falling asleep faster and enjoying better sleep quality.

Walnuts

Walnuts pack a trifecta of sleep-promoting nutrients: melatonin, serotonin, and magnesium. Plus, the alpha-linolenic acid (ALA) in walnuts can be converted to DHA, which further boosts serotonin production.


Pumpkin Seeds

Small but mighty, pumpkin seeds are rich in tryptophan, magnesium, and zinc. Just 100 grams can provide a hefty dose of these sleep-enhancing nutrients.


Dark Greens

Leafy greens are not just good for your health; they also support better sleep. The magnesium and calcium in these veggies work together to enhance sleep duration and quality.


Almonds

Almonds are another excellent source of magnesium, which can help calm your mind and body before bed. With 77mg of magnesium and 76mg of calcium per ounce, they’re perfect for an evening snack.

Try making your own trail mix with almonds, walnuts, pumpkin seeds, and a few dark chocolate chips for a tasty treat!

Chickpeas