Meal Prep Frozen Smoothie Packs

Meal Prep Frozen Smoothie Packs

Print
clock clock iconcutlery cutlery iconflag flag iconfolder folder iconinstagram instagram iconpinterest pinterest iconfacebook facebook iconprint print iconsquares squares iconheart heart iconheart solid heart solid icon

Meal Prep Frozen Smoothie Packs


5 Stars 4 Stars 3 Stars 2 Stars 1 Star

No reviews

  • Author: Amy MS, RD, LDN
  • Total Time: 5 minutes

Description

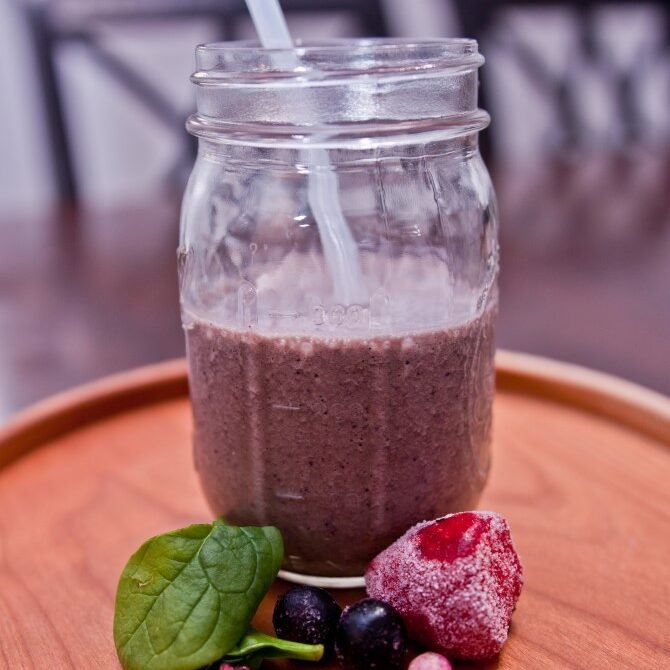
Streamline your mornings with these easy Meal Prep Frozen Smoothie Packs! Perfect for busy schedules, these packs combine fresh fruits, veggies, and other nutritious ingredients to create delicious smoothies in minutes—just blend and go. Ideal for a quick, healthy breakfast or snack!

Ingredients

Units Scale
  • 1 cup Greens (Spinach, Kale, Romaine etc)
  • 1 1/2 cups Fruit (Fresh or Frozen- whatever you like! (Mango, Pineapple, Berries etc)
  • Optional Dry Add-ins: Flaxseed, Chia Seeds, Protein Powder

To Mix Up Smoothies:

  • 1 1/22 cups Milk of Choice

Instructions

  1. To a large freezer bag or freezer safe container, add the greens, fruit and add-ins of your choice.
  2. Seal and store in the freezer until you are ready for a smoothie!
  3. To make the smoothie, add 1 1/2-2 cups of milk and the contents of your prepped smoothie bag.
  4. Blend until smooth. Enjoy!

Equipment

  • Prep Time: 5 Minutes
  • Category: Breakfast, Smoothie
  • Method: Blend
  • Cuisine: American
Recipe Card powered byTasty Recipes

Almond Coconut Granola

Almond Coconut Granola

Print
clock clock iconcutlery cutlery iconflag flag iconfolder folder iconinstagram instagram iconpinterest pinterest iconfacebook facebook iconprint print iconsquares squares iconheart heart iconheart solid heart solid icon

Almond Coconut Granola


5 Stars 4 Stars 3 Stars 2 Stars 1 Star

No reviews

  • Author: Amy MS, RD, LDN
  • Total Time: 35 minutes
  • Yield: 12 Servings 1x
  • Diet: Vegan

Description

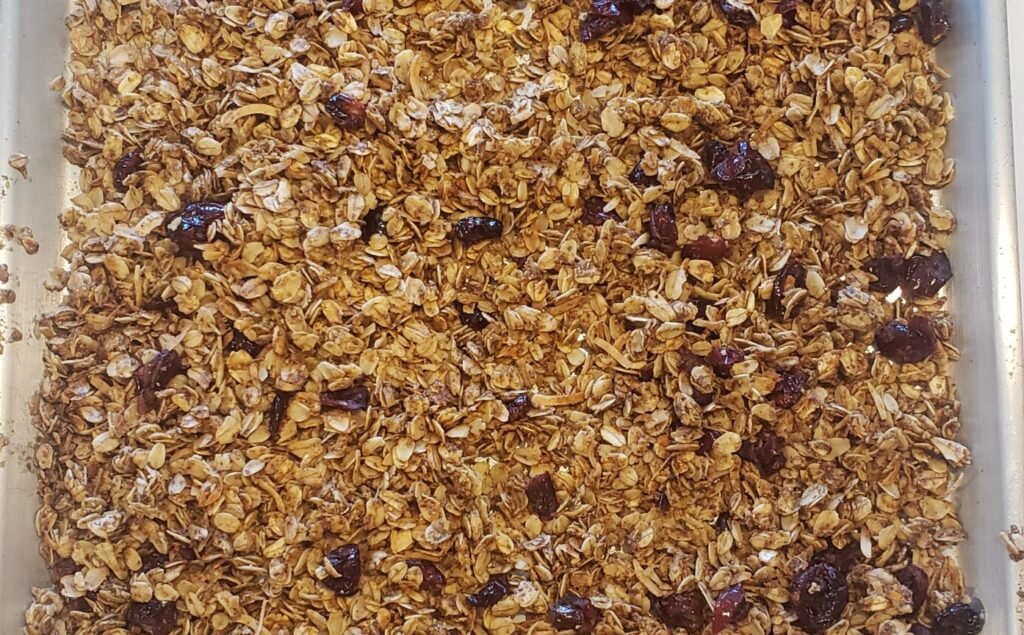
Crunchy and flavorful, Almond Coconut Granola is a wholesome blend of nuts, coconut, and lightly sweetened oats. Perfect for breakfast, meal prep or snacking!


Ingredients

Units Scale
  • 4 cups Old Fashioned Oats
  • 1 cup Unsweetened Shredded Coconut
  • 1 1/2 cups Sliced Almonds
  • 1/2 cup Ground Flaxseed
  • 1 1/2 tsp Cinnamon
  • 1 tsp Cardamom
  • Pinch Salt
  • 1/2 cup Maple Syrup
  • 1/2 cup Coconut Oil
  • 2 tsp Vanilla Extract
  • 1/4 tsp Almond Extract

Instructions

  1. Preheat oven to 325° F. Place a silpat or parchment paper over a large sheet tray, set aside.
  2. To a large mixing bowl add the oats, coconut, almonds, flaxseed, cinnamon, cardamom, and salt. Stir together with a spatula and set aside.
  3. In a microwave safe bowl, melt the coconut oil. Then add the maple syrup, vanilla extract and almond extract. Stir to combine.
  4. Pour the liquid mixture over the oats mixture and stir together thoroughly with a spatula.
  5. Spread the granola mixture evenly onto a large sheet tray and bake for 25 minutes, stirring halfway through at around 12 minutes.
  6. After 25 minutes remove the granola from the oven and using the back of a sturdy spatula, press the mixture down to help it clump together and create clusters. Allow to cool completely.
  7. Mix together and then allow the granola to cool before serving.
  8. Store the granola in an airtight container.
  9. Serve over Greek Yogurt or enjoy plain as a snack!
  • Prep Time: 10 Minutes
  • Cook Time: 25
  • Category: Breakfast
  • Method: Bake
  • Cuisine: American

Nutrition

  • Serving Size: 1/12
  • Calories: 348
  • Sugar: 10g
  • Sodium: 75mg
  • Fat: 26g
  • Carbohydrates: 26g
  • Fiber: 7g
  • Protein: 7g
  • Cholesterol: 0mg
Recipe Card powered byTasty Recipes

Peanut Butter Cup Overnight Oats (Protein-Packed)

Peanut Butter Cup Overnight Oats (Protein-Packed)

Print
clock clock iconcutlery cutlery iconflag flag iconfolder folder iconinstagram instagram iconpinterest pinterest iconfacebook facebook iconprint print iconsquares squares iconheart heart iconheart solid heart solid icon

Peanut Butter Cup Overnight Oats (Protein-Packed)


5 Stars 4 Stars 3 Stars 2 Stars 1 Star

No reviews

  • Author: Amy MS, RD, LDN
  • Total Time: 5 minutes
  • Yield: 1 1x
  • Diet: Vegetarian

Description

Peanut Butter Cup Overnight Oats are a creamy, protein-packed breakfast that tastes almost like dessert! Perfect for meal prep and busy mornings.


Ingredients

Units Scale
  • 1/2 cup Unsweetened Soy Milk
  • 1/4 cup Greek Yogurt
  • 1 Tbsp Maple Syrup
  • 2 Tbsp Peanut Butter
  • 1 Tbsp Cocoa Powder
  • 1/4 tsp Vanilla Extract
  • 1 Tbsp Hemp Hearts
  • 1/2 cup Old Fashioned Oats
  • 1 Tbsp Semi-Sweet Mini Chocolate Chips

Instructions

  1. Into a mason jar add the soy milk, Greek Yogurt, maple syrup and peanut butter. Give the mixture a thorough mix with a whisk or fork.
  2. Then add the cocoa powder, hemp hearts, oats and finally the chocolate chips and stir to fully combine.
  3. Pop a lid onto the jar and place it into the refrigerator overnight.
  4. The next morning, unscrew the top and dig in! Enjoy!
  • Prep Time: 5 Minutes
  • Category: Breakfast
  • Method: No Cook
  • Cuisine: American

Nutrition

  • Serving Size: 1
  • Calories: 472
  • Sugar: 18g
  • Sodium: 212mg
  • Fat: 29g
  • Carbohydrates: 39g
  • Fiber: 7g
  • Protein: 23g
  • Cholesterol: 8mg
Recipe Card powered byTasty Recipes

Cheesy Veggie Egg Bites

Cheesy Veggie Egg Bites

Cheesy Veggie Egg Bites

Print
clock clock iconcutlery cutlery iconflag flag iconfolder folder iconinstagram instagram iconpinterest pinterest iconfacebook facebook iconprint print iconsquares squares iconheart heart iconheart solid heart solid icon
Cheesy Veggie Egg Bites

Cheesy Veggie Egg Bites


5 Stars 4 Stars 3 Stars 2 Stars 1 Star

No reviews

  • Author: Amy MS, RD, LDN
  • Total Time: 35 minutes
  • Yield: 12 Egg Bites 1x
  • Diet: Gluten Free

Description

Start your day with Cheesy Veggie Egg Bites, a protein-packed breakfast loaded with fresh veggies and savory cheese. Perfect for meal prep or busy mornings!


Ingredients

Units Scale
  • 1 cup Cottage Cheese
  • 8 Eggs
  • 1 cup Veggies (suggestions: Diced Bell Pepper, Green Onion, Mushrooms, Spinach)
  • 1/2 cup Grated Cheddar Cheese
  • 1/2 tsp Kosher Salt
  • 1/4 tps Ground Black Pepper

Instructions

  1. Preheat oven to 350° F. Spray a muffin tin with nonstick spray and set on top of a large sheet tray, then set aside.
  2. To a blender, add the cottage cheese, eggs, salt and pepper.
  3. Blend on high until fairly smooth about 1-2 minutes.
  4. Then, pour the mixtures straight from your blender, evenly into your prepared muffin tin.
  5. To each muffin cup, add about 1 tablespoon of each veggie you have prepared.
  6. Then, add 1 tablespoon of cheddar cheese on top.
  7. Place the muffin tin into the oven and bake for 20-25 minutes until the eggs are fully set.
  8. Remove from the oven and allow muffin tin to cool on a wire rack for 5 minutes.
  9. After 5 minutes, remove the egg bites from the muffin tin and allow to cool fully on the wire rack.
  • Prep Time: 10 minutes
  • Cook Time: 25
  • Category: Breakfast
  • Method: Bake
  • Cuisine: American

Nutrition

  • Serving Size: 1 Egg Bite
  • Calories: 72
  • Sugar: 2g
  • Sodium: 210mg
  • Fat: 4g
  • Carbohydrates: 2g
  • Fiber: 0g
  • Protein: 7g
  • Cholesterol: 141mg
Recipe Card powered byTasty Recipes

Pumpkin Roll Out Cookies

Pumpkin Roll Out Cookies

Print
clock clock iconcutlery cutlery iconflag flag iconfolder folder iconinstagram instagram iconpinterest pinterest iconfacebook facebook iconprint print iconsquares squares iconheart heart iconheart solid heart solid icon

Pumpkin Roll Out Cookies


5 Stars 4 Stars 3 Stars 2 Stars 1 Star

No reviews

  • Author: Amy MS, RD, LDN
  • Total Time: 42 minutes
  • Yield: 24 Cookies 1x
  • Diet: Vegetarian

Description

Soft, spiced, and perfectly festive, these pumpkin roll-out cookies are a family favorite! Easy to cut into fun shapes and topped with a sprinkles for even more fun, they’re perfect for holiday baking or a cozy weekend treat.


Ingredients

Units Scale
  • 1/2 cup Unsalted Butter, softened
  • 1/2 cup Maple Syrup
  • 1/4 cup Brown Sugar
  • 1/2 cup Pumpkin Puree
  • 1 tsp Vanilla Extract
  • 1 cup White Whole Wheat Flour
  • 1 1/4 cup All Purpose Flour
  • 3/4 tsp Baking Powder
  • 2 1/2 tsp Pumpkin Pie Spice
  • 1/4 tsp Kosher Salt

Instructions

  1. In a medium sized mixing bowl, add the flours, baking powder, pumpkin pie spice and salt. Whisk together and set aside.
  2. In the bowl of a stand mixer, add the wet ingredients: butter, maple syrup, brown sugar, pumpkin puree and vanilla extract. Mix on low, then increase the speed to medium and cream together the ingredients until light and fluffy.
  3. Next, turn the mixer to low and slowly add the dry ingredients. Mix until the dough comes together.
  4. Cover the dough with plastic wrap and refrigerate for at least 30 minutes.
  5. Preheat your oven to 350 F.
  6. Roll the dough out to about 1/4 inch thick. Using your cookie cutters, cut the cookies into your favorite shapes. (Top with sprinkles to jazz them up if you’d like!)
  7. Place the cookies onto a silpat lined sheet tray.
  8. Bake for 12-15 minutes until the cookies are set.
  9. Remove from the oven and allow to cool on a wire rack. Enjoy!
  • Prep Time: 30 minutes
  • Cook Time: 12
  • Category: Dessert
  • Method: Bake
  • Cuisine: American

Nutrition

  • Serving Size: 1 Cookie
  • Calories: 104
  • Sugar: 6g
  • Sodium: 48mg
  • Fat: 4g
  • Carbohydrates: 16g
  • Fiber: 1g
  • Protein: 1g
  • Cholesterol: 10mg
Recipe Card powered byTasty Recipes

Peppermint Hot Chocolate

Peppermint Hot Chocolate

Print
clock clock iconcutlery cutlery iconflag flag iconfolder folder iconinstagram instagram iconpinterest pinterest iconfacebook facebook iconprint print iconsquares squares iconheart heart iconheart solid heart solid icon

Peppermint Hot Chocolate


5 Stars 4 Stars 3 Stars 2 Stars 1 Star

No reviews

  • Author: Amy MS, RD, LDN
  • Total Time: 7 minutes
  • Yield: 2 Servings 1x
  • Diet: Vegan

Description

Peppermint Hot Chocolate is the perfect cozy drink on a winter day. Dairy-free & naturally-sweetened.


Ingredients

Units Scale
  • 2 cups Unsweetened Soy Milk
  • 4 Pitted Dates
  • 2 tbsp Cocoa Powder
  • 2 tbsp Maple Syrup
  • 1/2 tsp Vanilla Extract
  • 1/8 tsp Peppermint Extract
  • Crushed Candy cane or marshmallows, optional for serving

Instructions

  1. Place the soy milk into a microwave safe container. Microwave for 1-2 minutes to heat it up.
  2. Pour the warm milk into a blender, then add the remaining ingredients to the blender.
  3. Blend on high for 1 minute until the mixture is smooth.
  4. Pour into two mugs and top with crushed candy canes, enjoy!
  • Prep Time: 5 minutes
  • Cook Time: 2
  • Category: Drink
  • Method: Blender
  • Cuisine: American

Nutrition

  • Serving Size: 1
  • Calories: 143
  • Sugar: 23g
  • Sodium: 13mg
  • Fat: 2g
  • Carbohydrates: 30g
  • Fiber: 4g
  • Protein: 5g
  • Cholesterol: 0mg
Recipe Card powered byTasty Recipes

Festive Chocolate Bark

Festive Chocolate Bark

Festive Chocolate Bark
Print
clock clock iconcutlery cutlery iconflag flag iconfolder folder iconinstagram instagram iconpinterest pinterest iconfacebook facebook iconprint print iconsquares squares iconheart heart iconheart solid heart solid icon
Festive Chocolate Bark

Festive Chocolate Bark


5 Stars 4 Stars 3 Stars 2 Stars 1 Star

No reviews

  • Author: Amy MS, RD, LDN
  • Total Time: 10 minutes
  • Yield: 25 pieces 1x

Description

This chocolate bark is loaded with crunchy nuts and sweet dried fruit, it’s the perfect mix of sweet, salty, and satisfying. Easy to make, totally customizable, and a hit at any holiday gathering—or just for you with a cozy cup of cocoa.


Ingredients

Units Scale
  • 12 oz Chocolate Chips (choose your favorite, dark, semi-sweet or milk chocolate)
  • 3/4 cup Nuts and/or Seeds (I like cashews, pistachios, slivered almonds, pepitas)
  • 1/4 cup Dried Cranberries or Cherries
  • 1/4 cup Unsweetened Shredded Coconut
  • Pinch Flaky Sea Salt

Instructions

  1. Cover a large sheet tray with a silpat or parchment paper, set aside.
  2. Melt the chocolate in a microwave safe bowl, on 30-second intervals, stirring in between each one. (You can also melt the chocolate in a heat-proof bowl over a saucepan of simmering water.)
  3. Using a rubber spatula, pour the chocolate onto the center of the tray and spread it out evenly until it is about 1/4″ thick. It will likely not reach the edges of your sheet tray.
  4. Sprinkle your toppings over top, the nuts/seeds, dried fruit, coconut and finally sea salt. Give the toppings a little press into the chocolate with the palms of your hands or back of a spatula.
  5. Place the sheet tray into the fridge so that the chocolate can set for 15 minutes.
  6. Once the chocolate has hardened, use your hands to break it into pieces. Enjoy!
  • Prep Time: 10 minutes
  • Category: Dessert, Holiday
  • Method: No Bake
  • Cuisine: American

Nutrition

  • Serving Size: 1 piece
  • Calories: 104
  • Sugar: 9g
  • Sodium: 11mg
  • Fat: 7g
  • Carbohydrates: 11g
  • Fiber: 2g
  • Protein: 2g
  • Cholesterol: 5mg
Recipe Card powered byTasty Recipes

Easy Maple Glazed Carrots

Easy Maple Glazed Carrots

Print
clock clock iconcutlery cutlery iconflag flag iconfolder folder iconinstagram instagram iconpinterest pinterest iconfacebook facebook iconprint print iconsquares squares iconheart heart iconheart solid heart solid icon

Easy Maple Glazed Carrots


5 Stars 4 Stars 3 Stars 2 Stars 1 Star

No reviews

  • Author: Amy MS, RD, LDN
  • Total Time: 10 minutes
  • Yield: 4 Servings 1x

Ingredients

Units Scale
  • 1 lb Carrots, peeled and ends trimmed
  • 1/2 tbsp unsalted Butter
  • 1/2 tbsp Olive Oil
  • 1 tbsp Maple Syrup
  • 1/8 tsp Kosher Salt
  • Ground Black Pepper
  • Parsley, minced for Garnish (Optional)

Instructions

  1. Prep your carrots by slicing them into sticks
  2. Heat a large cast iron pan or sautee pan over medium high heat.
  3. When you pan is warm, add the butter and olive oil.
  4. Next add the carrots, salt and pepper and cook, for 4-5 minutes, stirring occasionally or tossing carrots in the pan so that they brown evenly.
  5. Then add the maple syrup to the pan and cook for an additional minute.
  6. Serve hot or warm. Top with parsley if desired. Enjoy!
  • Prep Time: 5 minutes
  • Cook Time: 5
  • Category: Sides, Holiday
  • Method: Sautee
  • Cuisine: American

Nutrition

  • Serving Size: 1 Serving
  • Calories: 160
  • Sugar: 9g
  • Sodium: 150mg
  • Fat: 5g
  • Carbohydrates: 40g
  • Fiber: 10g
  • Protein: 3g
  • Cholesterol: 4mg
Recipe Card powered byTasty Recipes

Air Fryer Chickpea Chocolate Chip Cookie Bites

Air Fryer Chickpea Chocolate Chip Cookie Bites

Print
clock clock iconcutlery cutlery iconflag flag iconfolder folder iconinstagram instagram iconpinterest pinterest iconfacebook facebook iconprint print iconsquares squares iconheart heart iconheart solid heart solid icon

Air Fryer Chickpea Chocolate Chip Cookie Bites


5 Stars 4 Stars 3 Stars 2 Stars 1 Star

No reviews

  • Author: Amy MS, RD, LDN
  • Total Time: 10 minutes
  • Yield: 25 Cookie Bites 1x
  • Diet: Gluten Free

Description

Air Fryer Cookie Dough Chickpea Bites are a healthier, delicious twist on traditional cookie dough treats. Made with chickpeas for added protein and fiber, they’re crispy on the outside and soft on the inside, making them a great snack, or fiber-filled dessert treat!


Ingredients

Units Scale
  • 1 can, 15 oz Chickpeas, drained and rinsed
  • 1/2 cup Peanut Butter
  • 1/3 cup Maple Syrup
  • 2 tsp Vanilla Extract
  • 1 Egg
  • 1 tsp Ground Flaxseed
  • 1/2 tsp Kosher Salt
  • 1/2 tsp Baking Powder
  • 1/2 tsp Baking Soda
  • 1/2 tsp Cinnamon
  • 1/2 cup Oat Flour
  • 1/3 cup Mini Chocolate Chips

Instructions

  1. To a food processor or high-powered blender, add all the ingredients except the chocolate chips.
  2. Process the dough until smooth, about 1-2 minutes.
  3. Take the blade out of the food processor, or alternatively pour the dough into a bowl, then add the chocolate chips and stir into the batter with a spatula.
  4. Preheat your air fryer to 350° F.
  5. Spray the inside of your air fryer basket with nonstick spray.
  6. Scoop 1 tablespoon size portions and place into the air fryer, spacing each cookie bite 2 inches apart.
  7. Air fry on 350° F for 7-10 minutes, depending on your air fryer.
  8. Allow to cool for 10 minutes before digging in, enjoy!
  • Prep Time: 10 minutes
  • Category: Dessert, Snack
  • Method: Air Fry
  • Cuisine: American

Nutrition

  • Serving Size: 1
  • Calories: 86
  • Sugar: 3g
  • Sodium: 159mg
  • Fat: 4g
  • Carbohydrates: 9g
  • Fiber: 1g
  • Protein: 4g
  • Cholesterol: 40mg
Recipe Card powered byTasty Recipes

Healthy Baked Potato Soup

Creamy, comforting and absolutely delicious, this healthy baked potato soup wins at dinner time, every time!

Healthy Baked Potato Soup

Print
clock clock iconcutlery cutlery iconflag flag iconfolder folder iconinstagram instagram iconpinterest pinterest iconfacebook facebook iconprint print iconsquares squares iconheart heart iconheart solid heart solid icon

Healthy Baked Potato Soup


5 Stars 4 Stars 3 Stars 2 Stars 1 Star

No reviews

  • Author: Amy MS, RD, LDN
  • Total Time: 30 minutes
  • Yield: 5 Servings 1x
  • Diet: Vegetarian

Description

This healthy baked potato soup with cauliflower is a creamy, lighter twist on the classic. Cauliflower adds extra fiber and smoothness, while keeping the dish rich and satisfying. This is the perfect comfort soup, especially when topped with chives and cheddar cheese.


Ingredients

Units Scale
  • 2 Large Russet Potatoes, peeled and diced into 1-inch pieces
  • 4 cups Frozen Cauliflower florets
  • 1 1/2 cups Vegetable Stock
  • 1 1/2 cups Milk
  • 1/2 cup Greek Yogurt
  • 2 tsp Kosher Salt
  • 3/4 tsp Ground Black Pepper

Instructions

  1. To a dutch oven or large pot, add the vegetable stock, diced potato, frozen cauliflower and 1 tsp salt. Bring mixture to a boil, then lower the heat and simmer for 10-12 minutes, until the potatoes are tender.
  2. Using an immersion blender, blend the cauliflower, potato mixture until smooth.
  3. Then, to the pot add the milk, Greek Yogurt and remaining salt and pepper. Stir together with a wooden spoon or spatula to combine. Turn the heat to low to cook the soup through for an additional 5 minutes.
  4. Taste for seasoning and add salt and preference to taste.
  5. Top with chives, cheddar cheese or crumbled bacon. Enjoy!
  • Prep Time: 10 minutes
  • Cook Time: 20 minutes
  • Category: Dinner, Soup
  • Method: Stovetop
  • Cuisine: American

Nutrition

  • Serving Size: 1/5
  • Calories: 121
  • Sugar: 6g
  • Sodium: 350mg
  • Fat: 2g
  • Carbohydrates: 19g
  • Fiber: 3g
  • Protein: 7g
  • Cholesterol: 7mg
Recipe Card powered byTasty Recipes

Taco Salads in a Jar

Taco Salads in a Jar

Print
clock clock iconcutlery cutlery iconflag flag iconfolder folder iconinstagram instagram iconpinterest pinterest iconfacebook facebook iconprint print iconsquares squares iconheart heart iconheart solid heart solid icon

Taco Salads in a Jar


5 Stars 4 Stars 3 Stars 2 Stars 1 Star

No reviews

  • Author: Amy MS, RD, LDN
  • Total Time: 10 minutes
  • Yield: 2 Salads 1x
  • Diet: Vegetarian

Description

Taco Salads in a Jar are an easy and delicious meal prep! With layers of beans, veggies and the simplest dressing these salads will elevate your lunch game!


Ingredients

Units Scale
  • 4 tbsp Salsa
  • 4 tbsp Greek Yogurt
  • 1 Can, 15oz Black Beans, drained and rinsed
  • 1 cup Frozen Corn
  • 1 Orange Bell Pepper, diced
  • 1 pint Cherry Tomatoes, sliced in half lengthwise
  • 12 tbsp Jarred Jalapenos
  • 1 cup Romaine Lettuce
  • Optional: 1/2 cup Crushed Taco Shell, 1/4 cup Shredded Cheddar Cheese

Instructions

  1. Set out two large mason jars.
  2. Pour 2 tbsp salsa into the bottom of each jar. Top with 2 tbsp Greek Yogurt.
  3. Add 1/2 of the rinsed black beans to each jar.
  4. Next add 1/2 cup frozen corn to each jar.
  5. Top the corn with half of the cherry tomatoes and 1-2 tbsp jalapenos.
  6. Finally, top each jar with 1/2 cup Romaine lettuce.
  7. Seal your jars with lids and pop them into the refrigerator until you are ready to enjoy!
  • Prep Time: 10 minutes
  • Category: Lunch, Salad
  • Method: No-Cook
  • Cuisine: Mexican

Nutrition

  • Serving Size: 1 Salad
  • Calories: 317
  • Sugar: 11g
  • Sodium: 664mg
  • Fat: 2.5g
  • Carbohydrates: 60g
  • Fiber: 17g
  • Protein: 19g
  • Cholesterol: 4.4mg
Recipe Card powered byTasty Recipes

Homemade Thin Mint Cookies (Gluten-Free)

Homemade Thin Mint Cookies (Gluten-Free)

Print
clock clock iconcutlery cutlery iconflag flag iconfolder folder iconinstagram instagram iconpinterest pinterest iconfacebook facebook iconprint print iconsquares squares iconheart heart iconheart solid heart solid icon
Thin Mint Cookies

Homemade Thin Mint Cookies (Gluten-Free)


5 Stars 4 Stars 3 Stars 2 Stars 1 Star

No reviews

  • Author: Amy MS, RD, LDN
  • Total Time: 45 minutes
  • Yield: 3840 Cookies 1x
  • Diet: Gluten Free

Description

Homemade Thin Mint Cookies are even better than the Girl Scout’s version! A perfect crisp cookie center with a delicious chocolate peppermint coating, now you can have Thin Mint Cookies anytime of the year!


Ingredients

Units Scale

Cookie Wafer:

  • 1 1/2 cup Almond Flour
  • 1/4 cup Cocoa Powder
  • 1/2 tsp Xanthan Gum
  • Pinch Salt
  • 3 tbsp Unsalted Butter
  • 4 tbsp Maple Syrup
  • 1 tbsp Water
  • 3/4 tsp Peppermint Extract

Chocolate Coating:

  • 1 cup Dark Chocolate Chips
  • 2 tsp Coconut Oil
  • 3/4 tsp Peppermint Extract

Instructions

  1. Preheat oven to 350° F. Cover a sheet tray with a silpat or parchment paper and set aside.
  2. In a medium-sized mixing bowl, add the almond flour, cocoa powder, Xanthan Gum and salt. Whisk to combine.
  3. Slice the butter into small cubes and add to the dry ingredients. Using a fork or pastry cutter, cut the butter into very small pieces into the almond flour mixture (smaller than pea size!). Then add the maple syrup, water and peppermint extract and stir together with a spatula.
  4. Form the dough into a disc, wrap in plastic wrap and place into the refrigerator for 15 minutes. This helps to make rolling the cookies out much easier!
  5. After 15 minutes, remove the dough from the refrigerator and place onto your work surface. Place a piece of parchment paper or plastic wrap over the dough, then roll it out, this makes rolling much easier! Roll the dough out to about 1/8″ thick.
  6. Next, use a 2″ circle cutter, cut out the cookies and place onto your prepared sheet tray.
  7. Bake for 12-17 minutes. (Be sure to check the cookies at 12 minutes, you want them to be crispy but don’t allow them to burn!) Allow cookie wafers to cool completely.
  8. While the cookie wafers cool, make the chocolate coating. To a microwave safe bowl add the dark chocolate chips and coconut oil.
  9. Microwave on 25 second intervals, stirring in between each, until the chocolate is just melted. Then add in the peppermint extract and stir to combine.
  10. Take a chocolate wafer, dip into the melted chocolate coating, turning the wafer to coat the entire cookie. Let any excess chocolate drip off into the bowl and place the cookie onto your prepared sheet tray with a silpat or parchment paper.
  11. Continue with remaining wafers, coating each in chocolate.
  12. Place the coated cookies into the freezer for 10 minutes or refrigerator for at least 15 minutes to allow the chocolate to set.
  13. Store the cookies in an airtight container in the freezer or refrigerator, however you like your thin mints! Enjoy!
  • Prep Time: 30 minutes
  • Cook Time: 15
  • Category: Dessert, Cookie
  • Method: Bake
  • Cuisine: American

Nutrition

  • Serving Size: 4 Cookies
  • Calories: 155
  • Sugar: 6g
  • Sodium: 19mg
  • Fat: 12g
  • Carbohydrates: 11g
  • Fiber: 3g
  • Protein: 4g
  • Cholesterol: 8g
Recipe Card powered byTasty Recipes

Nutrient-Packed Berry Parfait

Nutrient-Packed Berry Parfait

Print
clock clock iconcutlery cutlery iconflag flag iconfolder folder iconinstagram instagram iconpinterest pinterest iconfacebook facebook iconprint print iconsquares squares iconheart heart iconheart solid heart solid icon

Nutrient-Packed Berry Parfait


5 Stars 4 Stars 3 Stars 2 Stars 1 Star

No reviews

  • Author: Amy MS, RD, LDN
  • Total Time: 5 minutes
  • Yield: 1 Serving 1x
  • Diet: Vegetarian

Description

Berry Parfait is nutrient-packed breakfast, dessert or snack! This anti-inflammatory recipe is easy-to-make with layers of fresh berries, Greek yogurt, and crunchy granola.


Ingredients

Units Scale
  • 3/4 cup Greek Yogurt
  • 1/3 cup Granola
  • 1/2 cup Mixed Berries (Strawberries, Blueberries, Blackberries, Raspberries- choose your favorites!)

Instructions

  1. To a tall glass or mason jar, add 3 spoonfuls of yogurt.
  2. Top with 3 spoonfuls of granola.
  3. Top with a mixture of your favorite berries, creating an even layer on top of the granola.
  4. Repeat with remaining ingredients, finishing with berries on top. Enjoy!
  • Prep Time: 5 minutes
  • Category: Breakfast, Snack, Dessert
  • Method: No Cook
  • Cuisine: American

Nutrition

  • Serving Size: 1
  • Calories: 297
  • Sugar: 20g
  • Sodium: 125mg
  • Fat: 6g
  • Carbohydrates: 40g
  • Fiber: 4g
  • Protein: 23g
  • Cholesterol: 9mg
Recipe Card powered byTasty Recipes

Easy Cashew Curry (An Anti-Inflammatory Dish!)

Easy Cashew Curry (An Anti-Inflammatory Dish!)

Print
clock clock iconcutlery cutlery iconflag flag iconfolder folder iconinstagram instagram iconpinterest pinterest iconfacebook facebook iconprint print iconsquares squares iconheart heart iconheart solid heart solid icon

Easy Cashew Curry (An Anti-Inflammatory Dish!)


5 Stars 4 Stars 3 Stars 2 Stars 1 Star

No reviews

  • Author: Amy MS, RD, LDN
  • Total Time: 25 minutes
  • Yield: 6 Servings 1x
  • Diet: Vegan

Description

Easy Cashew Curry is a creamy, anti-inflammatory dish brimming with cashews and vibrant vegetables, simmered in a blend of soothing spices. This comforting meal is not only delicious but also quick, making it a perfect weeknight meal.


Ingredients

Units Scale
  • 1 tbsp Olive Oil
  • 1/2 Large White Onion, diced
  • 4 Cloves Garlic, Minced
  • 1 tbsp Fresh Ginger, Minced
  • 2 tsp Turmeric
  • 2 tsp Ground Coriander
  • 1 tsp Smoked Paprika
  • 1 tsp Curry Powder
  • 2 tbsp Tomato Paste
  • 2 cups Vegetable Stock
  • 2 cups Coconut Milk
  • 2 cups Raw Cashews

Instructions

  1. Heat a large sautee pan to medium heat. Add the olive oil, then the diced onion. Cook for 7-8 minutes until the onion is translucent and begins to brown slightly.
  2. Turn the heat down to low and add the garlic and ginger to the pan. Cook for 1-2 minutes.
  3. Next, add the spices, turmeric, coriander, smoked paprika and curry powder. Stir into the onion mixture. Then add the tomato paste and stir again.
  4. Next add the vegetable stock, stirring up any browned bits on the bottom of the pan (this is flavor!)
  5. Then add the coconut milk and cashews, stir again to combine.
  6. Bring the mixture to a simmer, cover and cook for 10 minutes.
  7. After 10 minutes check the curry, stir again and crack the lid to allow some steam to escape.
  8. Cook for another 10 minutes.
  9. Then, turn off the heat and add a pinch of salt if desired.
  10. Serve with brown rice, flatbread and sauteed greens for an anti-inflammatory packed meal.

Notes

  1. If you like more heat, top the curry with crushed red pepper flakes, sriracha or your favorite hot sauce.
  • Prep Time: 5 minutes
  • Cook Time: 20 minutes
  • Category: Dinner, Vegan
  • Method: Stovetop
  • Cuisine: Sri Lankan

Nutrition

  • Serving Size: 1 Serving
  • Calories: 414
  • Sugar: 5g
  • Sodium: 27mg
  • Fat: 35g
  • Carbohydrates: 19g
  • Fiber: 3g
  • Protein: 9g
  • Cholesterol: 0mg
Recipe Card powered byTasty Recipes

Rainbow Crunch Salad with Miso Dressing

Rainbow Crunch Salad with Miso Dressing

Print
clock clock iconcutlery cutlery iconflag flag iconfolder folder iconinstagram instagram iconpinterest pinterest iconfacebook facebook iconprint print iconsquares squares iconheart heart iconheart solid heart solid icon

Rainbow Crunch Salad with Miso Dressing


5 Stars 4 Stars 3 Stars 2 Stars 1 Star

No reviews

  • Author: Amy MS, RD, LDN
  • Total Time: 10 minutes
  • Yield: 4 Servings 1x
  • Diet: Vegetarian

Description

Rainbow Crunch Salad, features a vibrant mix of crisp cabbage and crunchy textures tossed in a tangy and savory miso dressing.


Ingredients

Units Scale

Salad:

  • 1 cup Shredded Green Cabbage
  • 1 cup Shredded Purple Cabbage
  • 1 cup Grated Carrots
  • 4 Scallions, sliced
  • 1 Bell Pepper, juilened
  • 1 cup Shelled Edamame (if frozen, be sure to thaw before adding to salad)

Miso Dressing:

  • 2 tsp White Miso Paste
  • 1 Garlic Clove, minced
  • 1/4 cup PB Fit
  • 1/4 cup Soy Sauce
  • 2 tsp Sesame Oil
  • 2 tbsp Rice Wine Vinegar
  • 1 tbsp Honey
  • 1 tbsp Water
  • 1 tsp Chili Paste

Instructions

  1. Add all the salad ingredients to a large mixing bowl. Using two spoons, toss the vegetables together. Set aside.
  2. In a medium-sized mixing bowl, add all the ingredients for the miso dressing. Whisk together until no lumps remain.
  3. Pour the dressing over top of the vegetables. Use the spoons to toss the vegetables and dressing together.
  4. Top with sliced almonds, roasted cashews or pepitas if you’d like extra crunch!
  • Prep Time: 10 minutes
  • Category: Salad
  • Method: No Cook

Nutrition

  • Serving Size: 1 Serving
  • Calories: 154
  • Sugar: 27g
  • Sodium: 1145mg
  • Fat: 20g
  • Carbohydrates: 26g
  • Fiber: 20g
  • Protein: 7g
  • Cholesterol: 0mg
Recipe Card powered byTasty Recipes

Homemade Egg McMuffin (Thrive Muffin)

Homemade Egg McMuffin (Thrive Muffin)

Print
clock clock iconcutlery cutlery iconflag flag iconfolder folder iconinstagram instagram iconpinterest pinterest iconfacebook facebook iconprint print iconsquares squares iconheart heart iconheart solid heart solid icon

Homemade Egg McMuffin (Thrive Muffin)


5 Stars 4 Stars 3 Stars 2 Stars 1 Star

No reviews

  • Author: Amy MS, RD, LDN
  • Total Time: 13 minutes
  • Yield: 1 1x

Description

Skip the drive-thru and make breakfast at home with our delicious Egg McMuffin recipe—nicknamed “Thrive Muffins” by my kids for good reason! These homemade versions are not only tastier and quicker to prepare but also a healthier choice compared to fast food. Enjoy a scrumptious breakfast that’s fresh, nutritious, and made with love.


Ingredients

Units Scale
  • 1 Whole Wheat English Muffin
  • 1 Egg
  • 1 Slice Canadian Bacon
  • 10 grams Sharp Cheddar Cheese
  • 1/2 tbsp Olive Oil

Instructions

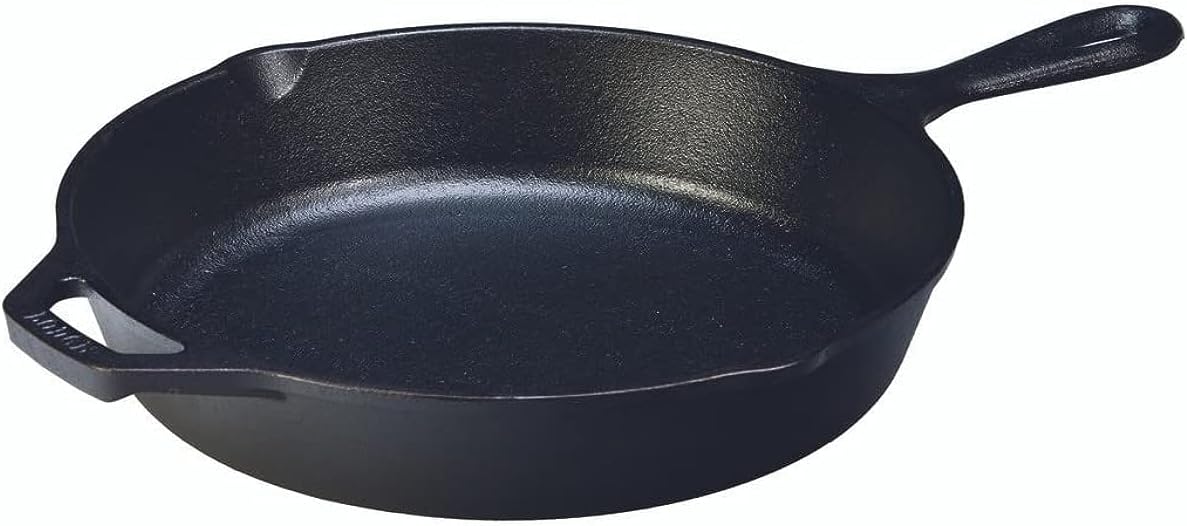
  1. Heat a large cast iron skillet over medium heat.
  2. Once the pan has heated up, add the olive oil.
  3. Spray a biscuit cutter that is the same size as your English Muffin with nonstick spray and place into the pan, top side down so that it sits flat in your pan.
  4. Split the English Muffin in half. Place each half cut side down into the heated pan with olive oil. Then add the Canadian bacon to the pan.
  5. Next, crack the egg into the center of the biscuit cutter. Cover with a small lid to speed up cooking time and get a perfectly cooked egg.
  6. After 2 minutes, flip the Canadian bacon and English Muffin.
  7. Then, using tongs or a pot holder, remove the lid from the egg (caution the lid is hot!). Use the tongs again to lift the biscuit cutter out of the pan, leaving the egg in the pan. Then, flip the egg over with a spatula to cook on the other side
  8. Place the cheese onto the top of the egg to allow the cheese to melt.
  9. After 2 more minutes of cooking, now it is time to plate!
  10. Using a spatula, move the English Muffin to a plate. Place the Canadian bacon on the bottom half of the muffin, then top with the egg and cheese and finally close the sandwich with the top of the muffin.
  • Prep Time: 3 minutes
  • Cook Time: 10
  • Category: Breakfast
  • Method: Stovetop
  • Cuisine: American

Nutrition

  • Serving Size: 1 Sandwich
  • Calories: 331
  • Sugar: 2g
  • Sodium: 563mg
  • Fat: 17g
  • Carbohydrates: 27g
  • Fiber: 3g
  • Protein: 18g
  • Cholesterol: 206mg
Recipe Card powered byTasty Recipes

Yellow Plum Sorbet

Yellow Plum Sorbet

Print
clock clock iconcutlery cutlery iconflag flag iconfolder folder iconinstagram instagram iconpinterest pinterest iconfacebook facebook iconprint print iconsquares squares iconheart heart iconheart solid heart solid icon

Yellow Plum Sorbet


5 Stars 4 Stars 3 Stars 2 Stars 1 Star

No reviews

  • Author: Amy MS, RD, LDN