Healthy Baked Potato Soup

Creamy, comforting and absolutely delicious, this healthy baked potato soup wins at dinner time, every time!

Healthy Baked Potato Soup

Print
clock clock iconcutlery cutlery iconflag flag iconfolder folder iconinstagram instagram iconpinterest pinterest iconfacebook facebook iconprint print iconsquares squares iconheart heart iconheart solid heart solid icon

Healthy Baked Potato Soup


5 Stars 4 Stars 3 Stars 2 Stars 1 Star

No reviews

  • Author: Amy MS, RD, LDN
  • Total Time: 30 minutes
  • Yield: 5 Servings 1x
  • Diet: Vegetarian

Description

This healthy baked potato soup with cauliflower is a creamy, lighter twist on the classic. Cauliflower adds extra fiber and smoothness, while keeping the dish rich and satisfying. This is the perfect comfort soup, especially when topped with chives and cheddar cheese.


Ingredients

Units Scale
  • 2 Large Russet Potatoes, peeled and diced into 1-inch pieces
  • 4 cups Frozen Cauliflower florets
  • 1 1/2 cups Vegetable Stock
  • 1 1/2 cups Milk
  • 1/2 cup Greek Yogurt
  • 2 tsp Kosher Salt
  • 3/4 tsp Ground Black Pepper

Instructions

  1. To a dutch oven or large pot, add the vegetable stock, diced potato, frozen cauliflower and 1 tsp salt. Bring mixture to a boil, then lower the heat and simmer for 10-12 minutes, until the potatoes are tender.
  2. Using an immersion blender, blend the cauliflower, potato mixture until smooth.
  3. Then, to the pot add the milk, Greek Yogurt and remaining salt and pepper. Stir together with a wooden spoon or spatula to combine. Turn the heat to low to cook the soup through for an additional 5 minutes.
  4. Taste for seasoning and add salt and preference to taste.
  5. Top with chives, cheddar cheese or crumbled bacon. Enjoy!
  • Prep Time: 10 minutes
  • Cook Time: 20 minutes
  • Category: Dinner, Soup
  • Method: Stovetop
  • Cuisine: American

Nutrition

  • Serving Size: 1/5
  • Calories: 121
  • Sugar: 6g
  • Sodium: 350mg
  • Fat: 2g
  • Carbohydrates: 19g
  • Fiber: 3g
  • Protein: 7g
  • Cholesterol: 7mg
Recipe Card powered byTasty Recipes

Easy Cashew Curry (An Anti-Inflammatory Dish!)

Easy Cashew Curry (An Anti-Inflammatory Dish!)

Print
clock clock iconcutlery cutlery iconflag flag iconfolder folder iconinstagram instagram iconpinterest pinterest iconfacebook facebook iconprint print iconsquares squares iconheart heart iconheart solid heart solid icon

Easy Cashew Curry (An Anti-Inflammatory Dish!)


5 Stars 4 Stars 3 Stars 2 Stars 1 Star

No reviews

  • Author: Amy MS, RD, LDN
  • Total Time: 25 minutes
  • Yield: 6 Servings 1x
  • Diet: Vegan

Description

Easy Cashew Curry is a creamy, anti-inflammatory dish brimming with cashews and vibrant vegetables, simmered in a blend of soothing spices. This comforting meal is not only delicious but also quick, making it a perfect weeknight meal.


Ingredients

Units Scale
  • 1 tbsp Olive Oil
  • 1/2 Large White Onion, diced
  • 4 Cloves Garlic, Minced
  • 1 tbsp Fresh Ginger, Minced
  • 2 tsp Turmeric
  • 2 tsp Ground Coriander
  • 1 tsp Smoked Paprika
  • 1 tsp Curry Powder
  • 2 tbsp Tomato Paste
  • 2 cups Vegetable Stock
  • 2 cups Coconut Milk
  • 2 cups Raw Cashews

Instructions

  1. Heat a large sautee pan to medium heat. Add the olive oil, then the diced onion. Cook for 7-8 minutes until the onion is translucent and begins to brown slightly.
  2. Turn the heat down to low and add the garlic and ginger to the pan. Cook for 1-2 minutes.
  3. Next, add the spices, turmeric, coriander, smoked paprika and curry powder. Stir into the onion mixture. Then add the tomato paste and stir again.
  4. Next add the vegetable stock, stirring up any browned bits on the bottom of the pan (this is flavor!)
  5. Then add the coconut milk and cashews, stir again to combine.
  6. Bring the mixture to a simmer, cover and cook for 10 minutes.
  7. After 10 minutes check the curry, stir again and crack the lid to allow some steam to escape.
  8. Cook for another 10 minutes.
  9. Then, turn off the heat and add a pinch of salt if desired.
  10. Serve with brown rice, flatbread and sauteed greens for an anti-inflammatory packed meal.

Notes

  1. If you like more heat, top the curry with crushed red pepper flakes, sriracha or your favorite hot sauce.
  • Prep Time: 5 minutes
  • Cook Time: 20 minutes
  • Category: Dinner, Vegan
  • Method: Stovetop
  • Cuisine: Sri Lankan

Nutrition

  • Serving Size: 1 Serving
  • Calories: 414
  • Sugar: 5g
  • Sodium: 27mg
  • Fat: 35g
  • Carbohydrates: 19g
  • Fiber: 3g
  • Protein: 9g
  • Cholesterol: 0mg
Recipe Card powered byTasty Recipes

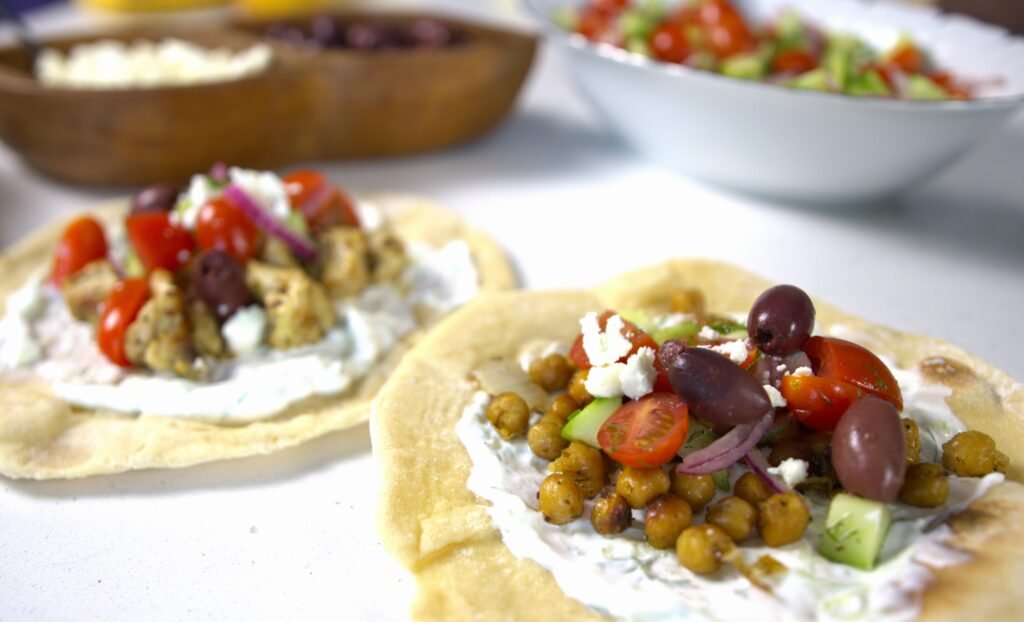
Greek Chicken & Chickpeas

Greek Chicken & Chickpeas

Print
clock clock iconcutlery cutlery iconflag flag iconfolder folder iconinstagram instagram iconpinterest pinterest iconfacebook facebook iconprint print iconsquares squares iconheart heart iconheart solid heart solid icon

Greek Chicken & Chickpeas


5 Stars 4 Stars 3 Stars 2 Stars 1 Star

5 from 1 review

  • Author: Amy MS, RD, LDN

Description

Greek Chicken & Chickpeas is a flavorful and flexitarian dinner that will impress your guests and family!


Ingredients

Scale
  • 2 lbs Chicken Breasts, diced into 1-inch pieces
  • 2, 15oz Cans Chickpeas, drained and rinsed
  • 1 Large Onion, diced
  • 2 Lemons, zested and juiced
  • 4 Garlic Cloves, minced
  • 3/4 cup Olive Oil
  • 3 tsp Oregano
  • 2 tsp Kosher Salt
  • 1 tsp Ground Black Pepper

Instructions

  1. Set out two separate mixing bowls, one will be for the chicken, the other for the chickpeas. (Note: If you do not mind the meat and chickpeas mixed together then feel free to use one large bowl!)
  2. To one bowl, mix up the marinade. Add the olive oil, diced onion, garlic, lemon zest and juice, oregano, salt and pepper. Whisk together to combine.
  3. Pour half of the marinade into the other bowl. You should have half of the marinade in each bowl.
  4. Add the chickpeas to one bowl and cover then add the chicken to the other bowl and cover it. Place both bowls into the refrigerator to marinate for at least 1 hour and up to 6 hours.
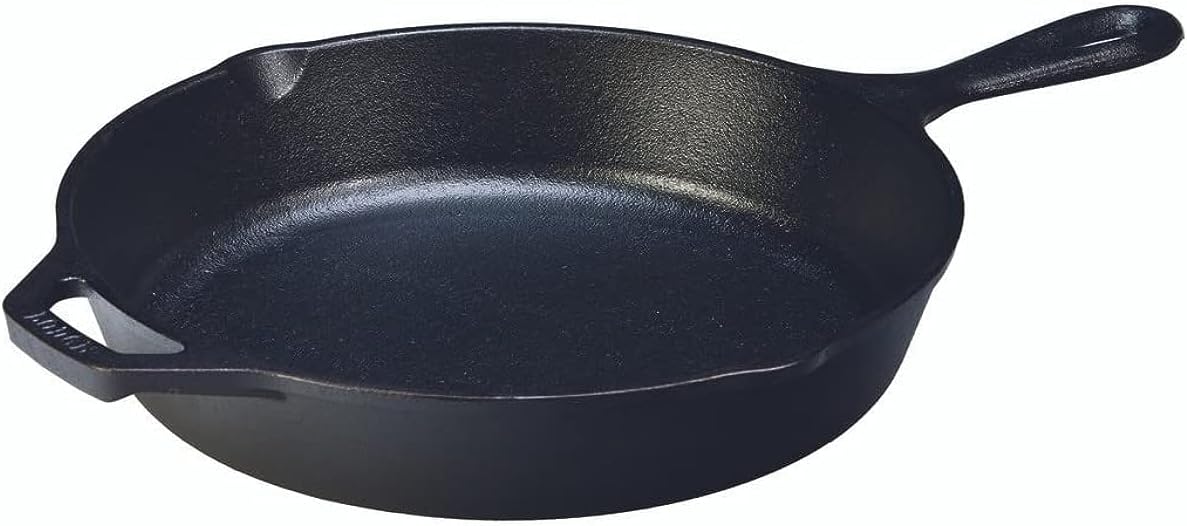
  5. When you are ready to cook. Heat two large cast iron pans over medium high heat. Add 2 tsp olive oil to each pan.
  6. When the pans are heated, add the chickpeas to one pan and the chicken to the other.
  7. Cook the chicken and chickpeas, stirring frequently, for 15-20 minutes until the chicken is cooked through and the chickpeas are crispy. The cast iron pan will help to crisp and slightly char the chicken and chickpeas. This is good flavor! (Note that the chicken should be cooked through to 165 F).
  8. Serve the chicken and chickpeas over whole wheat naan bread, tzatizki sauce, tomato and cucumber salad and top with feta and kalamata olives. Enjoy!

Notes

  • Category: Dinner
  • Method: Stovetop
  • Cuisine: Greek
Recipe Card powered byTasty Recipes

Mediterranean Pesto Pasta with Chicken, Veggies & Chickpeas

Mediterranean Pesto Pasta with Chicken, Veggies & Chickpeas

Print
clock clock iconcutlery cutlery iconflag flag iconfolder folder iconinstagram instagram iconpinterest pinterest iconfacebook facebook iconprint print iconsquares squares iconheart heart iconheart solid heart solid icon

Mediterranean Pesto Pasta with Chicken, Veggies & Chickpeas


5 Stars 4 Stars 3 Stars 2 Stars 1 Star

No reviews

  • Author: Amy MS, RD, LDN
  • Total Time: 25 minutes

Description

Mediterranean Pesto Pasta is fresh, vibrant and satisfying! This dish is infinitely adaptable with your favorite veggies or in-season produce.


Ingredients

Units Scale
  • 1 lb Whole Wheat Penne Pasta
  • 1 lb Chicken Breast, cut into 1 1/2 inch dice
  • 2 Medium Zucchini
  • 2 Bell Peppers (Orange, Red or Yellow)
  • 1 pint Cherry Tomatoes
  • 2 Tbsp Olive Oil
  • 1 15 oz Can Chickpeas, drained and rinsed
  • 4 Tbsp Spinach Pesto

Instructions

  1. Make your pesto and then set aside to cook the rest of the dish.
  2. Cook your pasta according to the box directions.
  3. While the pasta cooks, cook your chicken and veggies
  4. Heat a large skillet (cast iron pan if you have it!) over medium high heat, add 1 tbsp of olive oil
  5. When your pan is hot, add the chicken. Cook for 8-10 minutes until nicely browned and cooked through. Place cooked chicken on a plate and set aside.
  6. While the chicken cooks, prep your veggies. Rinse your veggies and get ready to chop!
  7. Dice the vegetables into 1 1/2 inch pieces
    1. Zucchini: Slice in half length-wise, then dice into half moon shape
    2. Bell Pepper: Cut around the pepper and remove the core, then slice into strips, then dice
    3. Cherry Tomatoes: Slice in half lengthwise
  8. Add another tablespoon of olive oil to the skillet and adjust skillet heat to medium. Add the chickpeas to the skillet.
  9. Next add the zucchini and bell pepper to your pan. Cook for 5-7 minutes, stirring occasionally and turning over the veggies to cook evenly on each side.
  10. Now its time to put the dish together!
  11. In a large bowl, add the 3-4 tablespoons of pesto to the bottom. Next, add the pasta, chicken and veggies, including the cherry tomatoes you chopped earlier. Top with another tablespoon of pesto. Using a large spoon, mix the dish together, taking care to not mash your veg!
  12. Taste the pasta and add additional pesto per your preference.
  13. Serve immediately and enjoy a taste of a Mediterranean Summer!
  • Prep Time: 10 minutes
  • Cook Time: 15 minutes
  • Category: Dinner, Mediterranean
  • Method: Stovetop
  • Cuisine: Italian

Nutrition

  • Serving Size: 1/6
  • Calories: 460
  • Sugar: 7g
  • Sodium: 625mg
  • Fat: 14g
  • Carbohydrates: 77g
  • Fiber: 39g
  • Protein: 40g
  • Cholesterol: 74mg
Recipe Card powered byTasty Recipes

Braided Pesto Garlic Knots

Braided Pesto Garlic Knots

Print
clock clock iconcutlery cutlery iconflag flag iconfolder folder iconinstagram instagram iconpinterest pinterest iconfacebook facebook iconprint print iconsquares squares iconheart heart iconheart solid heart solid icon

Pesto Garlic Knots


5 Stars 4 Stars 3 Stars 2 Stars 1 Star

No reviews

  • Author: Amy MS, RD, LDN
  • Total Time: 45 minutes
  • Yield: 6 1x

Description

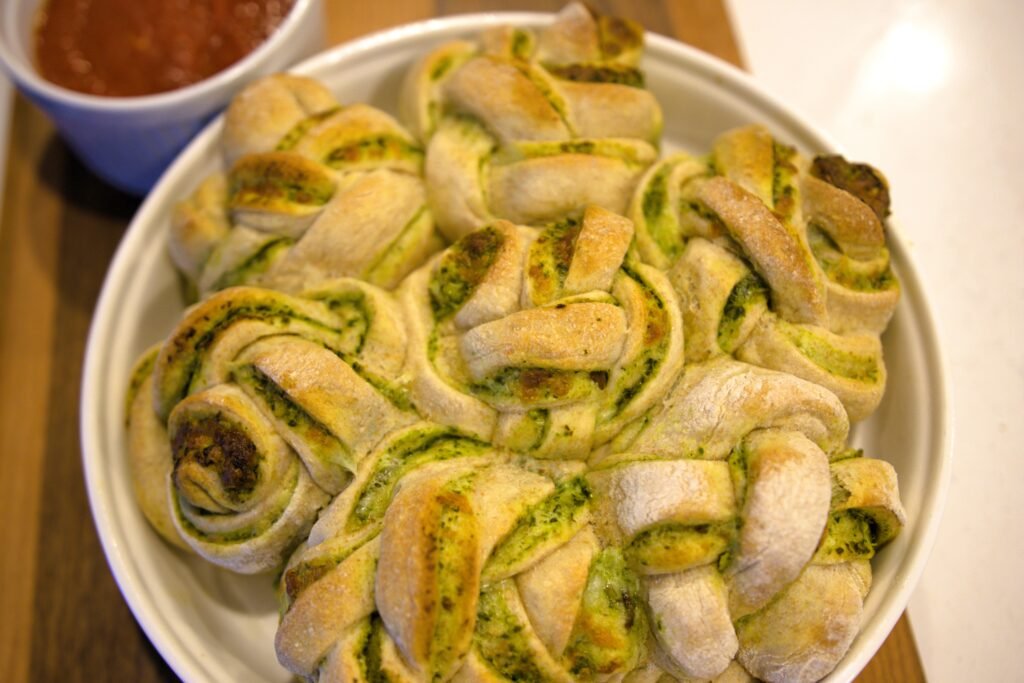
Braided Pesto Garlic Knots are delicious bites packed with spinach pesto, garlic and cheese. Perfect as an appetizer or side dish!


Ingredients

Units Scale

Instructions

  1. Start by making the Whole Wheat Pizza Dough and Spinach Pesto.
  2. Roll the pizza dough into a square, roughly 12×12 inches.
  3. Using a spatula, spread the pesto onto the dough, leaving about a 1/2 inch border around all sides.
  4. Evenly sprinkle the mozzarella over the pesto.
  5. Next, take the top half of the dough and fold down to meet the bottom. You are basically folding the dough in half here. (Check out the video for a play-by-play!)
  6. Then, using a knife or bench scraper, cut the dough horizontally into 6 sections. You should have 6 rectangles at this point.
  7. Now, take one of your rectangles and vertically cut two slits into the dough, keeping the top portion intact. Continue with remaining rectangles.
  8. Next it’s time to braid! Take one of your rectangles and fold the left dough portion over the middle section then repeat with the left side. Continue braiding until you reach the end of the dough. Then, pinch the bottom of the dough to seal. Now take the end you sealed and roll it up towards the other end. You will now have a braided pesto knot! Continue with the rest of the rectangles.
  9. Place the knots into a 9×9 baking dish and brush with a little olive oil.
  10. Place into the oven and bake for 30-35 minutes until golden brown. Note if the tops get a little too brown, cover with foil for the last 5 minutes. Allow to cool slightly and serve with marinara sauce or extra pesto. Enjoy!
  • Prep Time: 15 minutes
  • Cook Time: 30 minutes
  • Category: Appetizer, Dinner
  • Method: Bake
  • Cuisine: Italian

Nutrition

  • Serving Size: 1
  • Calories: 216
  • Sodium: 406mg
  • Fat: 7g
  • Carbohydrates: 33g
  • Fiber: 3g
  • Protein: 8g
  • Cholesterol: 6mg
Recipe Card powered byTasty Recipes

Greek Chickpea Salad in a Jar

Greek Chickpea Salad in a Jar

Print
clock clock iconcutlery cutlery iconflag flag iconfolder folder iconinstagram instagram iconpinterest pinterest iconfacebook facebook iconprint print iconsquares squares iconheart heart iconheart solid heart solid icon

Greek Chickpea Salad in a Jar


5 Stars 4 Stars 3 Stars 2 Stars 1 Star

5 from 1 review

  • Author: Amy MS, RD, LDN
  • Total Time: 8 minutes
  • Yield: 2 Salads 1x
  • Diet: Vegetarian

Description

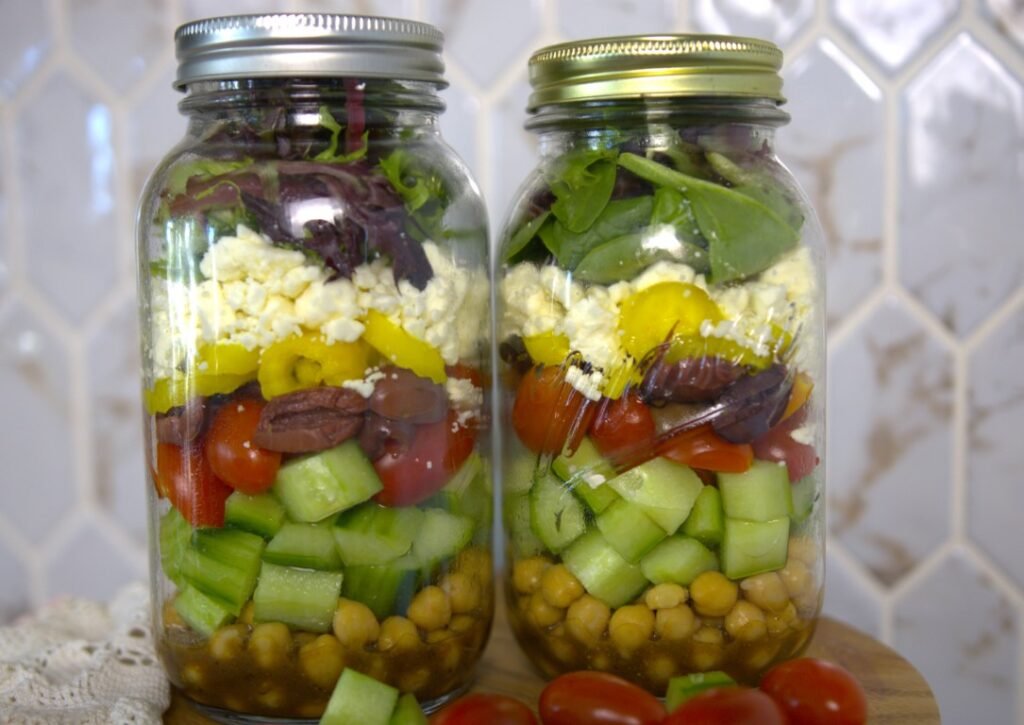
Chickpea Greek Salad is the easiest and tastiest plant-based meal prep!


Ingredients

Units Scale

Chickpea Greek Salad:

  • 1 Can, 15 oz Chickpeas, drained and rinsed
  • 1 Cucumber, Peeled, Seeded and Diced
  • 1/2 cup Cherry Tomatoes, sliced in half lengthwise
  • 1/4 cup Kalamata Olives
  • 1/4 cup Banana Peppers
  • 1/2 cup Feta Cheese
  • 1 cup Mixed Greens

Greek Salad Vinaigrette:

  • 1/3 cup Red Wine or Balsamic Vinegar
  • 1/3 cup Olive Oil
  • 2 tsp Dijon Mustard
  • 2 tsp Honey
  • 1 tsp Oregano
  • 1/2 tsp Kosher Salt
  • 1/4 tsp Ground Black Pepper

Instructions

  1. Add all the Greek Vinaigrette ingredients to a small bowl or mason jar and whisk to combine.
  2. Get out two large mason jars for the salads.
  3. Add 2 tbsp Greek Salad Vinaigrette to the bottom of each of the jars.
  4. Next, add the salad ingredients. 1/2 can of the drained, rinsed chickpeas to each jar.
  5. Then half the diced cucumber, half the cherry tomatoes, half kalamata olives and half banana peppers.
  6. Top with 1/4 cup feta cheese in each jar and finally 1/2 cup of Mixed Greens on top.
  7. Put the mason jar lid on and store in the refrigerator until you are ready to dig in!
  • Prep Time: 8 minutes
  • Category: Salad
  • Method: No Cook
  • Cuisine: Greek

Nutrition

  • Serving Size: 1 Salad
  • Calories: 204
  • Sugar: 3g
  • Sodium: 643mg
  • Fat: 12g
  • Carbohydrates: 17g
  • Fiber: 2g
  • Protein: 8g
  • Cholesterol: 33mg
Recipe Card powered byTasty Recipes

Black Bean & Sweet Potato Enchiladas

Black Bean & Sweet Potato Enchiladas

Print
clock clock iconcutlery cutlery iconflag flag iconfolder folder iconinstagram instagram iconpinterest pinterest iconfacebook facebook iconprint print iconsquares squares iconheart heart iconheart solid heart solid icon
Black Bean & Sweet Potato Enchiladas

Black Bean & Sweet Potato Enchiladas


5 Stars 4 Stars 3 Stars 2 Stars 1 Star

No reviews

  • Author: Amy RD, LDN
  • Total Time: 55 minutes
  • Yield: 12 Enchiladas 1x
  • Diet: Vegetarian

Description

These enchiladas are sure to be your next weeknight favorite dinner! Black Bean & Roasted Sweet Potato Enchiladas are packed with flavor and fiber in each bite.


Ingredients

Units Scale

Roasted Sweet Potatoes:

  • 1 Large Sweet Potato, peeled and small diced to 1/2″ inch
  • 2 tsp Olive Oil
  • 1/4 tsp Ground Cumin
  • 1/4 tsp Chili Powder
  • 1/4 tsp Smoked Paprika

Enchiladas:

  • 2 cans, 15 oz Black Beans, drained and rinsed
  • 1 Red Bell Pepper, diced
  • 2 Scallions, diced
  • 1 cup Cheddar Cheese, Grated
  • 1 tsp Chili Powder
  • 1/2 tsp Ground Cumin
  • 1/2 tsp Smoked Paprika
  • 1/4 tsp Onion Powder
  • 1/4 tsp Garlic Powder
  • 1/4 tsp Kosher Salt
  • 1012 Flour Tortillas, about 8-inches in diameter

Instructions

Roasted Sweet Potatoes:

  1. Preheat your oven to 400° F. Get out a large sheet tray and set aside.
  2. Place your diced sweet potato on the sheet tray, then add spices and mix together with clean hands or a spatula.
  3. Pop the sweet potato sheet tray into the oven and roast for 20-25 minutes until nicely browned, stirring halfway.

Enchiladas:

  1. Prepare a 9×13 baking dish by coating it in nonstick spray. Set aside.
  2. While the sweet potato roasts, mix up the enchilada filling. Into a large bowl add all the filling ingredients, black beans, bell pepper, scallions, grated cheese, chili powder, cumin, paprika, onion powder, garlic powder and salt. Give the mixture a stir with a spoon or spatula.
  3. After the sweet potato has roasted and cooled slightly, add to the black bean mixture and give the filling mixture one more mix with your spoon.
  4. Next roll up the enchiladas. Place one tortilla on your work surface, add 1/2 cup of enchilada filling to one end of the tortilla, then carefully, lift up the end of the tortilla to fold it over the filling and then roll it up and place into your baking dish. Continue with the remaining filling and tortillas.
  5. Turn your oven down to 350 F and bake the enchiladas for 25-30 minutes until they just start to brown and crisp at the edges.
  6. Top with your favorite toppings such as a dollop of Greek Yogurt, salsa, guacamole and a dash of hot sauce. Enjoy!

Notes

  1. Nutrition facts are for 2 enchiladas, without toppings.
  • Prep Time: 25 min
  • Cook Time: 30 min
  • Category: Dinner
  • Method: Bake
  • Cuisine: Mexican

Nutrition

  • Serving Size: 2 Enchiladas
  • Calories: 160
  • Sugar: 8g
  • Sodium: 485mg
  • Fat: 11g
  • Carbohydrates: 21g
  • Fiber: 12g
  • Protein: 7g
  • Cholesterol: 9mg
Recipe Card powered byTasty Recipes

Homemade Pizza

Homemade Pizza

Homemade Pizza
Homemade Pizza
Print
clock clock iconcutlery cutlery iconflag flag iconfolder folder iconinstagram instagram iconpinterest pinterest iconfacebook facebook iconprint print iconsquares squares iconheart heart iconheart solid heart solid icon
Homemade Pizza

Homemade Pizza


5 Stars 4 Stars 3 Stars 2 Stars 1 Star

No reviews

  • Author: Amy RD, LDN
  • Total Time: 4 hours 12 minutes
  • Yield: 8 Slices 1x

Description

Better than takeout, homemade pizza!


Ingredients

Units Scale

Instructions

  1. Preheat oven to 450° F.
  2. Top your par-baked pizza crust with a thin layer of sauce.
  3. Add 1/4 cup of mozzarella cheese, then add your toppings then top with remaining mozzarella cheese
  4. Bake for 10-12 minutes until the cheese is bubbly and just starts to turn golden.
  5. Slice into 8 slices for a round pizza, enjoy!

Notes

Nutrition information is for 1 slice of pizza with turkey pepperoni topping.

  • Prep Time: 4 Hours
  • Cook Time: 12 minutes
  • Category: Pizza, Dinner
  • Method: Bake

Nutrition

  • Serving Size: 1 Slice
  • Calories: 259
  • Sodium: 442mg
  • Fat: 5g
  • Carbohydrates: 40g
  • Fiber: 4g
  • Protein: 4g
  • Cholesterol: 8mg
Recipe Card powered byTasty Recipes

Easy Whole Wheat Pizza Dough

Easy Whole Wheat Pizza Dough

Easy Whole Wheat Pizza Dough
Print
clock clock iconcutlery cutlery iconflag flag iconfolder folder iconinstagram instagram iconpinterest pinterest iconfacebook facebook iconprint print iconsquares squares iconheart heart iconheart solid heart solid icon
Easy Whole Wheat Pizza Dough

Easy Whole Wheat Pizza Dough


5 Stars 4 Stars 3 Stars 2 Stars 1 Star

No reviews

  • Author: Amy RD, LDN
  • Total Time: 14 minutes
  • Yield: 8 Servings 1x
  • Diet: Vegetarian

Description

Simple and delicious whole wheat pizza dough. Perfect for your next homemade pizza night.


Ingredients

Units Scale
  • 2 cups All Purpose Flour
  • 1 cup Whole Wheat Flour
  • 1/2 tsp Dry Active Yeast
  • 1 1/2 tsp Kosher Salt
  • 1 1/4 cups Water (plus a tablespoon or two if needed)

Instructions

  1. In a large mixing bowl combine the flours, yeast and salt. Mix together with a wooden spoon or spatula.
  2. Pour the water into the bowl and mix the dough together. It should be a shaggy dough. Remember it will rise while it sits!
  3. Cover the bowl with plastic wrap or dish towel. Place the bowl in a draft free area and allow to sit for at least 4 hours, up to 8 hours.
  4. After dough has risen for at least 4 hours it is ready to roll out.
  5. Preheat the oven to 450º. Sprinkle a sheet pan with cornmeal.
  6. Flour your countertop to prevent the dough from sticking. Roll out dough into desired shape and size. If rolling into a rectangle, it will yield one 9×13 crust. Transfer crust to sheet pan sprinkled with cornmeal.
  7. Place the crust into the preheated oven and par-bake for 8 minutes. After this it is ready to be topped and made into pizza!
 

Notes

Pizza Assembly – After Crust has Par-Baked
  1. Spoon out pizza sauce and spread evenly.
  2. Top with veggies, cheese, and other desired toppings.
  3. Bake for 10-12 minutes until cheese is melted and just starting to turn brown.
  • Prep Time: 4
  • Cook Time: 10
  • Category: Dinner, Lunch, Vegetarian
  • Method: Bake

Nutrition

  • Serving Size: 1
  • Calories: 170
  • Sugar: 1g
  • Sodium: 212mg
  • Fat: 1g
  • Carbohydrates: 35g
  • Fiber: 3g
  • Protein: 5g
  • Cholesterol: 0mg
Recipe Card powered byTasty Recipes

Pumpkin Chipotle Chili

Pumpkin Chipotle Chili

Pumpkin Chipotle Chili
Print
clock clock iconcutlery cutlery iconflag flag iconfolder folder iconinstagram instagram iconpinterest pinterest iconfacebook facebook iconprint print iconsquares squares iconheart heart iconheart solid heart solid icon
Pumpkin Chipotle Chili

Pumpkin Chipotle Chili


5 Stars 4 Stars 3 Stars 2 Stars 1 Star

No reviews

  • Author: Amy RD, LDN
  • Total Time: 6 hours 10 minutes
  • Yield: 8 servings 1x
  • Diet: Vegetarian

Description

The perfect fall dinner! You won’t even miss the meat with this triple bean, pumpkin, chipotle chili. Pumpkin adds fiber, vitamin A and a delicious creaminess to this fall meal.


Ingredients

Units Scale
  • 1 Onion, diced
  • 1 tbsp Olive Oil
  • 1 Orange Bell Pepper, diced
  • 3 Garlic Cloves, minced
  • 2 cups Chicken Stock or Vegetable Stock
  • 1/4 cup Water
  • 15 oz Pinto Beans, Canned
  • 15 oz Kidney Beans, Canned
  • 15 oz Black Beans, Canned
  • 15 oz Canned Pumpkin Puree
  • 1 Chipotle in Adobo + 1 Tbsp Chipotle Sauce
  • 30 oz Petite Diced Tomatoes
  • 1 tbsp Chili powder
  • 1 tsp Smoked Paprika
  • 1 tsp Kosher Salt
  • 1/2 tsp Black Pepper
  • 2 tsp Cumin
  • 1 pinch Cinnamon

Instructions

  1. Heat a large skillet over medium high heat. Add 1 tbsp olive oil and the minced onions. Sautee onions for 8 minutes until soft. Then, add the diced bell pepper and sautee for another 3-4 minutes.
  2. Next, add the minced garlic and cook for 30 seconds until fragrant. Turn off the pan and remove from heat.
  3. In a large slow cooker, add the sauteed onion, bell pepper and garlic mixture.
  4. Next, add the remaining ingredients. Stir together with a wooden spoon or spatula.
  5. Cover and cook on low for 6-8 hours.


Notes

  1. If you like extra spice, add more chipotle peppers or adobo sauce!
  2. When it is time to serve, top with your favorite chili toppings! We like a dollop of Greek Yogurt, scallions, thinly sliced jalapenos or shredded cheddar cheese.
  • Prep Time: 10
  • Cook Time: 6 Hours
  • Category: Chili, Slow Cooker
  • Method: Slow Cooker
  • Cuisine: Slow Cooker

Nutrition

  • Serving Size: 1
  • Calories: 220
  • Sugar: 7
  • Sodium: 1175
  • Fat: 1
  • Saturated Fat: 0
  • Trans Fat: 0
  • Carbohydrates: 41
  • Fiber: 14
  • Protein: 12
  • Cholesterol: 0
Recipe Card powered byTasty Recipes

Creamy Zucchini Pasta

Creamy Zucchini Pasta

Zucchini Pasta
Print
clock clock iconcutlery cutlery iconflag flag iconfolder folder iconinstagram instagram iconpinterest pinterest iconfacebook facebook iconprint print iconsquares squares iconheart heart iconheart solid heart solid icon
Creamy Zucchini Pasta

Creamy Zucchini Pasta


5 Stars 4 Stars 3 Stars 2 Stars 1 Star

No reviews

  • Author: Amy RD, LDN
  • Total Time: 20 minutes
  • Yield: 7 Servings 1x
  • Diet: Vegetarian

Description

Simple, fast and delicious! Creamy melted zucchini pasta cooks up in no time and delivers a meal that the entire family will enjoy.


Ingredients

Scale
  • 3 Medium Zucchini
  • 1 lb Spaghetti Pasta (Look for Bronze, Die-Cut Pasta)
  • 1/2 cup Olive Oil
  • 3 Garlic Cloves, Whole
  • 1 cup Parmesan Cheese, Grated
  • 1/2 tsp Lemon Zest
  • 1/4 tsp Kosher Salt
  • 1/2 tsp Ground Black Pepper

Instructions

  1. Cook the pasta according to the package directions. Take care to not over cook, we want al dente pasta here! But, DO NOT DRAIN THE PASTA WATER! We will use some of the pasta water for our sauce.
  2. While the pasta cooks, work on the sauce and zucchini.
  3. Heat a large skillet over medium heat. Add the olive oil and allow to heat up for 1 minute, then add the whole garlic cloves and cook for 4-5 minutes to infuse the oil with the garlic.
  4. While the garlic cooks, grate the zucchini. Set a clean dish towel out on a counter or cutting board. Over top the towel, grate the zucchini using a box grater. Gather the towel by the ends and then, over the sink or a bowl, squeeze the liquid out of the shredded zucchini.
  5. Slowly, in batches, add the shredded zucchini to the olive oil skillet. (Take care and go slow because the oil is hot!) Cook the zucchini in the oil for 10-12 minutes, stirring occasionally with a wooden spoon or spatula. The zucchini will start to break down and “melt” into the oil, this is when it is done. Remove the garlic cloves from the zucchini, discard.
  6. Using tongs, remove the pasta from the pot directly into the skillet with the zucchini. Add the Parmesan cheese and lemon zest, and using the tongs, stir together the pasta, cheese, zest and zucchini. The cheese will melt into the mixture, creating the sauce for this dish. If the pasta seems dry, add a few tablespoons of pasta water to loosen up the pasta and create more of a sauce.
  7. Add salt and pepper and adjust seasonings based on your preference. Serve hot and enjoy!
 
  • Prep Time: 5
  • Cook Time: 15
  • Category: Dinner, Lunch, Mediterranean, Sides, Vegetarian
  • Method: Stovetop
  • Cuisine: Italian

Nutrition

  • Serving Size: 1/7
  • Calories: 442
  • Sugar: 4g
  • Sodium: 326mg
  • Fat: 21g
  • Saturated Fat: 4g
  • Unsaturated Fat: 14g
  • Trans Fat: 0g
  • Carbohydrates: 52g
  • Fiber: 3g
  • Protein: 13g
  • Cholesterol: 12mg
Recipe Card powered byTasty Recipes

Fingerling Potato Nachos with Tomatillo Salsa

Fingerling Potato Nachos with Tomatillo Salsa

Nachos Tomatillo Salsa
Print
clock clock iconcutlery cutlery iconflag flag iconfolder folder iconinstagram instagram iconpinterest pinterest iconfacebook facebook iconprint print iconsquares squares iconheart heart iconheart solid heart solid icon
Nachos Tomatillo Salsa

Fingerling Potato Nachos with Tomatillo Salsa


5 Stars 4 Stars 3 Stars 2 Stars 1 Star

No reviews

  • Author: Amy RD, LDN
  • Total Time: 55 minutes
  • Yield: 8 Servings 1x
  • Diet: Vegetarian

Description

Packed with flavor and nutrients, this spin on nachos uses rainbow fingerling potatoes as the base and then is topped with cheddar cheese and fresh and zesty tomatillo salsa.


Ingredients

Units Scale

Tomatillo Salsa

  • 2 Garlic Cloves
  • 1/2 Yellow onion
  • 1 Jalapeno, seeds removed
  • 7 Tomatillos, husks removed
  • 1 tbsp Fresh Lime Juice
  • 1/4 tsp Ground Black Pepper
  • 1/4 tsp Ground Cumin
  • 1/4 tsp Kosher Salt

Fingerling Potato Nachos

  • 3 lbs Fingerling Potatoes
  • 1 tbsp Olive Oil
  • 1 tsp Kosher Salt
  • 1 tsp Ground Cumin
  • 1/2 tsp Chili Powder
  • 1/2 cup Cheddar Cheese, Shredded

Instructions

Tomatillo Salsa

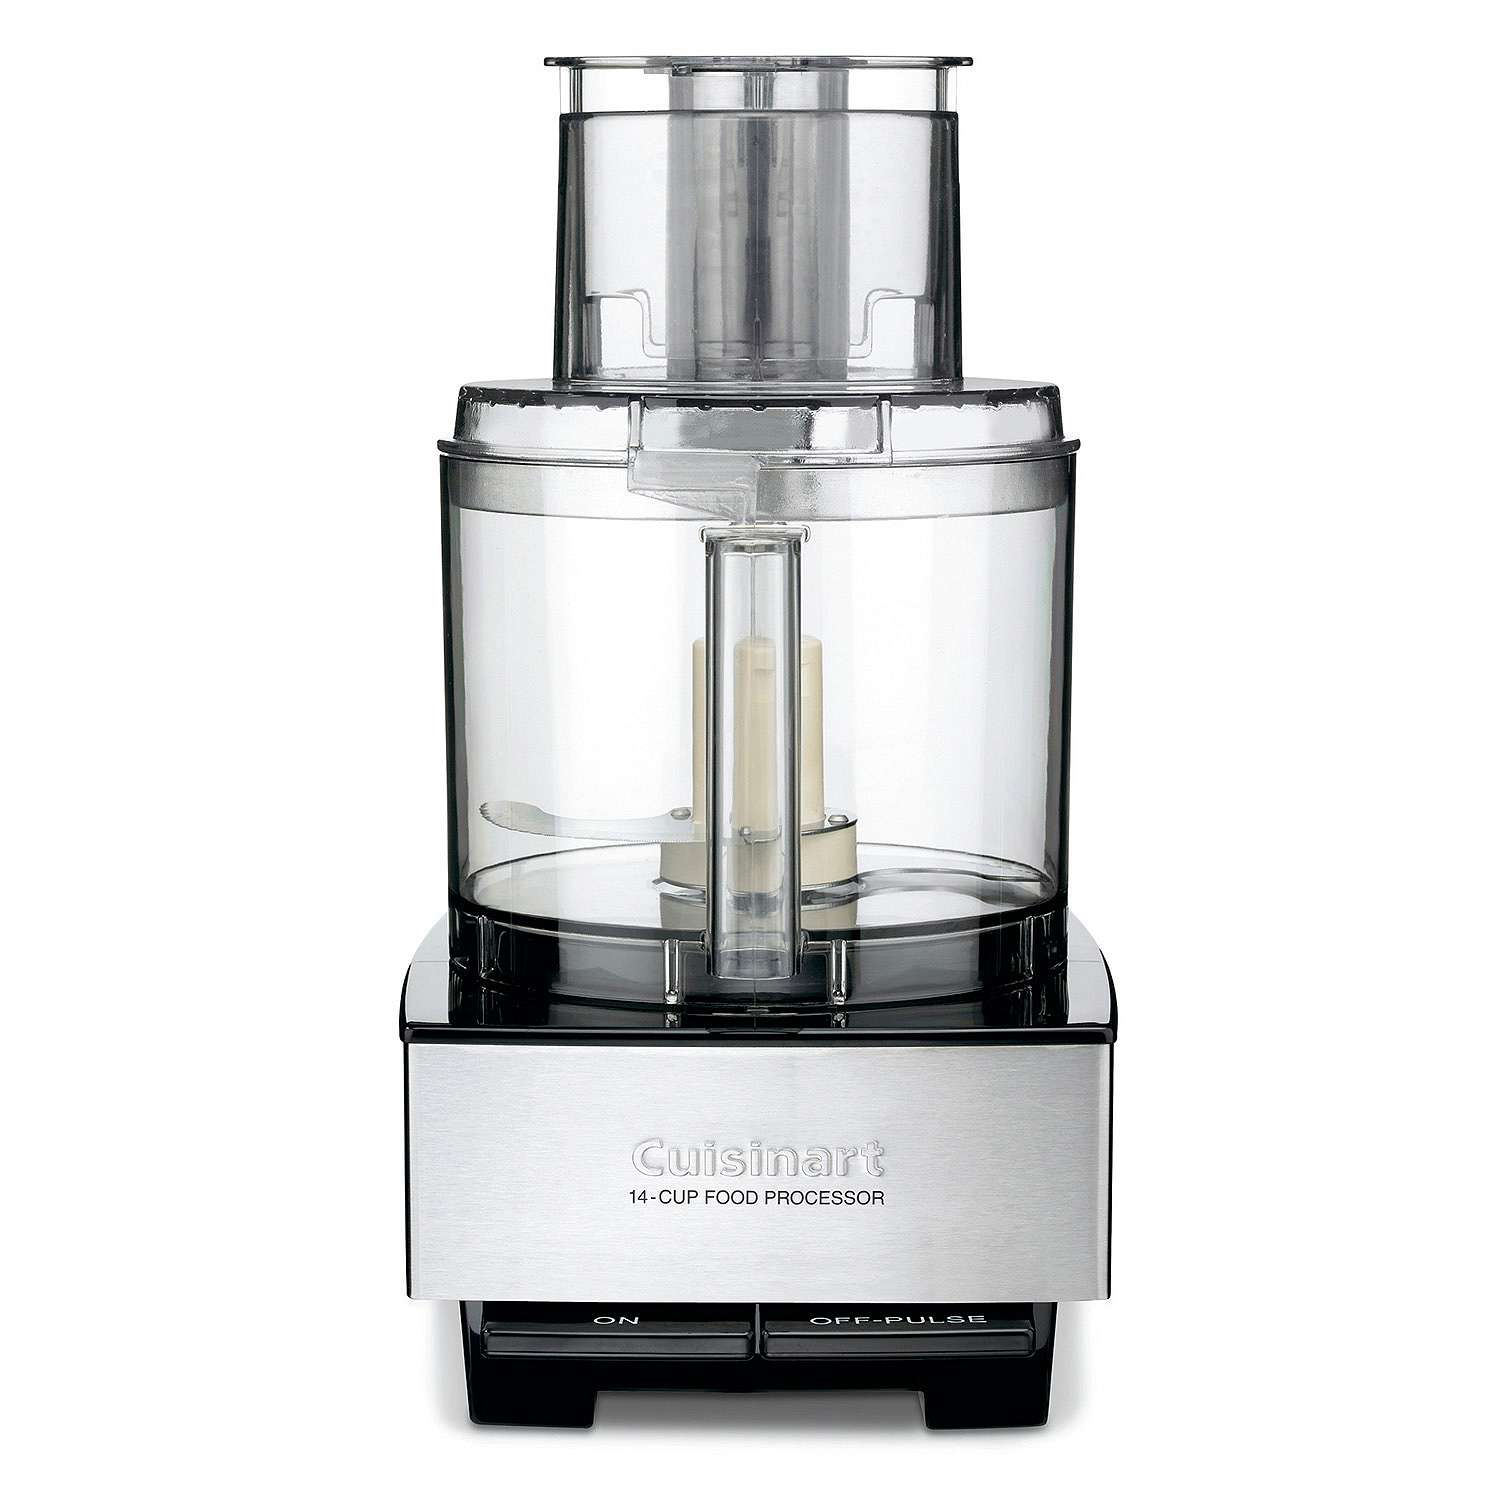
  1. In the bowl of a food processor add the garlic, onion and Jalapeno. Process for 15-20 seconds until the vegetables are broken into fine pieces.
  2. Next, dice the tomatillos, removing the small core, and add to food processor.
  3. Then add the remaining ingredients to food processor. Pulse until salsa is mixed together but not pureed.
  4. Taste and adjust seasonings to your liking!
 
Fingerling Potato Nachos
  1. Preheat oven to 400° F. Get out a large sheet tray and set aside.
  2. Using a mandoline, slice the potatoes into 1/4 inch fry shape. Alternatively, you can slice with a knife by hand.
  3. Place slice potatoes into a large bowl filled with warm water. Stir the potatoes around to help release their starch then drain into a colander. This step helps to create the crispiest potatoes!
  4. Pour the drained potatoes onto your sheet tray. Top with olive oil, salt, cumin and chili powder and mix together with clean hands. Place into the oven and roast for 30 minutes, stirring halfway.
  5. Once the potatoes have fully cooked and crisped, top with 1/4 cup of cheddar cheese. Place back into the oven for 3-4 minutes to melt the cheese.
  6. Top the nachos with tomatillo salsa, enjoy!
 
  • Prep Time: 10
  • Cook Time: 45
  • Category: Appetizer, Black Forest Farmer’s Market, Gluten-Free, Sides, Snack, Vegetarian
  • Method: Roast
  • Cuisine: Mexican

Nutrition

  • Serving Size: 1
  • Calories: 183
  • Sugar: 2g
  • Sodium: 325mg
  • Fat: 3g
  • Saturated Fat: 1g
  • Unsaturated Fat: 2g
  • Carbohydrates: 33g
  • Fiber: 3g
  • Protein: 5g
  • Cholesterol: 3mg
Recipe Card powered byTasty Recipes

Savory Pumpkin & Lentil Quesadillas

Savory Pumpkin & Lentil Quesadillas

Lentil Pumpkin Quesadillas
L
Print
clock clock iconcutlery cutlery iconflag flag iconfolder folder iconinstagram instagram iconpinterest pinterest iconfacebook facebook iconprint print iconsquares squares iconheart heart iconheart solid heart solid icon
Lentil Pumpkin Quesadillas

Savory Pumpkin & Lentil Quesadillas


5 Stars 4 Stars 3 Stars 2 Stars 1 Star

No reviews

  • Author: Sam PharmD
  • Total Time: 15 minutes
  • Yield: 1 1x
  • Diet: Vegetarian

Description

Flavorful, filling & fast! These savory pumpkin and lentil quesadillas are the perfect lunch, dinner or appetizer. Plus they are great for using up that little bit of leftover pumpkin!


Ingredients

Scale
  • 1/2 cup Canned Lentils (drained and rinsed)
  • 1/4 cup Pumpkin Puree
  • 1/4 cup Baby Spinach
  • 1/4 cup Bell Pepper, Diced
  • 1/4 cup Reduced Fat Mexican Shredded Cheese
  • 1/8 tsp Ground Cumin
  • 1/8 tsp Onion Powder
  • 1/8 tsp Garlic Powder
  • 1/8 tsp Paprika
  • Chili Powder
  • 2 Whole Wheat Tortillas
  • 1 tsp Olive Oil

Instructions

  1. Heat a skillet or cast iron pan to medium heat. Add 1 tsp olive oil, then add bell pepper and cook until tender.
  2. Next to the skillet add the lentils, pumpkin, spinach and spices. Cook until spinach slightly wilts.
  3. Heat a separate pan to medium heat. Place one tortilla down into skillet, add half the cheese, top with the lentil pumpkin filling then add remaining cheese to top of filling. Place second tortilla over top to make your quesadilla. Cook for 2-3 minutes then flip and cook another 2-3 minutes until the cheese has melted.
  4. Serve with Greek yogurt, salsa and hot sauce (if you like spicy!)
 
  • Prep Time: 10
  • Cook Time: 5
  • Category: Appetizers, Lunch, Dinner, Vegetarian
  • Method: Skillet
  • Cuisine: Mexican

Nutrition

  • Serving Size: 1
  • Calories: 376
  • Sugar: 7g
  • Sodium: 456mg
  • Fat: 12g
  • Saturated Fat: 3g
  • Carbohydrates: 50g
  • Fiber: 12g
  • Protein: 19g
  • Cholesterol: 17mg
Recipe Card powered byTasty Recipes

Butternut Squash Mac and Cheese

Butternut Squash Mac and Cheese

Print
clock clock iconcutlery cutlery iconflag flag iconfolder folder iconinstagram instagram iconpinterest pinterest iconfacebook facebook iconprint print iconsquares squares iconheart heart iconheart solid heart solid icon

Butternut Squash Mac and Cheese


5 Stars 4 Stars 3 Stars 2 Stars 1 Star

5 from 1 review

  • Author: Amy RD, LDN
  • Total Time: 50 minutes

Description

Creamy, cheesy, and absolutely delicious! Butternut Squash Mac and Cheese is packed with flavor, fiber and nutrients. It is the perfect dish for your holiday meals.


Ingredients

Units Scale
  • 1 Butternut Squash
  • 3 Garlic Cloves
  • 2 tsp Kosher Salt
  • 1 1/2 tsp Ground Black Pepper
  • 1 tbsp Olive Oil
  • 1 cup Vegetable Stock
  • 4 oz Gruyere Cheese, Shredded
  • 8 oz Sharp Cheddar Cheese, Shredded
  • 16 oz Cavatappi Pasta

Breadcrumb Topping:

  • 1/2 cup Whole Wheat Panko Breadcrumbs
  • 1 tbsp Chopped Herbs (Such as Thyme, Sage)
  • 1 tbsp Olive Oil

Instructions

  1. Preheat oven to 400° F. Line a large sheet tray with foil, set aside.
  2. Using a sharp knife, slice the butternut squash in half lengthwise. Be careful as the squash’s skin is quite tough! Using a spoon, scoop out the seeds and bit of flesh from the squash.
  3. Spread 1 tablespoon olive oil over the squash halves. Place garlic cloves into each squash half. Add 1 tsp kosher salt and 1/2 tsp ground black pepper. Place sheet tray into the preheated oven and roast for 40-60 minutes, depending on the size of your butternut squash. You will know the squash is done when you can press it with a fork and it is soft.
  4. While the squash is roasting, cook your pasta. Fill a large pot with water and bring to a boil. Add 2 tsp salt to your water. Add your pasta and cook 1 minute under the recommended time. You want your pasta to be “al dente” and have a little bite to it. Drain the pasta and set the pot aside to use again.
  5. Let the squash cool for at least 10 minutes. After 10 minutes scoop the flesh of the butternut squash out and place into the bowl of a food processor. Be sure to scoop all the flesh and the garlic!
  6. Add 1 cup of stock to the food processor. Process the mixture until it is smooth and creamy.
  7. Place the pot you used for the pasta onto the stove and heat to low. Using a spatula spoon the butternut squash mixture into the pot. Add both the shredded gruyere and cheddar cheeses. Stir the cheeses into the butternut squash mixture until they are melted. At this point check your mixture for seasoning. Add additional salt and pepper to taste.
  8. Add the cooked pasta to your squash and cheese mixture. Mix thoroughly.
  9. Place pasta mixture into a 9×13 dish that has been coated with cooking spray.
  10. Sprinkle 1/2 cup panko breadcrumbs over top of mac and cheese. Then top with herbs and drizzle 1 tbsp olive oil over top.
  11. Bake for 25-30 minutes or until bubbly and golden brown on top. Allow to cool for 5 minutes, enjoy!
 
  • Prep Time: 20
  • Cook Time: 30
  • Category: Comfort Food
  • Method: Bake
  • Cuisine: American

Nutrition

  • Serving Size: 1/8
  • Calories: 395
  • Sugar: 3
  • Sodium: 851
  • Fat: 15
  • Saturated Fat: 8
  • Unsaturated Fat: 7
  • Trans Fat: 0
  • Carbohydrates: 48
  • Fiber: 3
  • Protein: 19
  • Cholesterol: 46
Recipe Card powered byTasty Recipes

Roasted Tomato and Red Pepper Soup

Roasted Tomato and Red Pepper Soup

Print
clock clock iconcutlery cutlery iconflag flag iconfolder folder iconinstagram instagram iconpinterest pinterest iconfacebook facebook iconprint print iconsquares squares iconheart heart iconheart solid heart solid icon

Roasted Tomato and Red Pepper Soup


5 Stars 4 Stars 3 Stars 2 Stars 1 Star

No reviews

  • Author: Amy RD, LDN
  • Total Time: 1 hour 20 minutes
  • Yield: 6 Servings 1x
  • Diet: Vegetarian

Description

Healthy, flavorful and comforting, this is the BEST tomato soup recipe out there!


Ingredients

Scale
  • 10 Roma Tomatoes, halved and seeded
  • 2 Red Bell Peppers, quartered and seeded
  • 1 Onion
  • 8 Cloves Garlic
  • 2 Carrots, peeled and sliced into 2 inch pieces
  • 4 tbsp Olive Oil, divided
  • 2 tbsp Balsamic Vinegar
  • 6 oz Tomato Paste
  • 1/4 cup Basil Leaves, julienned
  • 6 cups Vegetable Stock
  • 2 tsp Kosher Salt
  • 1 tsp Black Pepper

Instructions

  1. Preheat oven to 400° F degrees. Prep vegetables as listed above.
  2. On a sheet tray toss together tomatoes, red pepper, onion, garlic, 2 tablespoons olive oil, balsamic and salt and pepper. Arrange tomatoes and peppers skin side up. Roast for 45-50 minutes until lightly charred.
  3. In a large pot, warm the remaining 2 tablespoons olive oil, stir in the tomato paste and mix well. Add the roasted vegetables including juices and stir to combine with tomato paste. Stir in the stock, cover and bring to a boil. Reduce heat to low and simmer for 20 minutes.
  4. Transfer soup to a blender in batches so that soup fills blender only halfway. Place kitchen towel over blender lid and puree soup to desired consistency. Blend remaining soup and return to soup pot.
  5. Heat the pureed soup to warm through. Ladle soup into bowls, top with basil and enjoy.
 
  • Prep Time: 20
  • Cook Time: 60
  • Category: Dinner, Soup, Mediterranean
  • Method: Roast
  • Cuisine: American

Nutrition

  • Serving Size: 1
  • Calories: 143
  • Sugar: 17g
  • Sodium: 718mg
  • Fat: 3g
  • Carbohydrates: 28g
  • Fiber: 8g
  • Protein: 5g
  • Cholesterol: 0mg
Recipe Card powered byTasty Recipes

Cozy Fall Harvest Soup

Cozy Fall Harvest Soup with Roast Squash, Apples & Jalapeño

Cozy Fall Harvest Soup
Print
clock clock iconcutlery cutlery iconflag flag iconfolder folder iconinstagram instagram iconpinterest pinterest iconfacebook facebook iconprint print iconsquares squares iconheart heart iconheart solid heart solid icon
Cozy Fall Harvest Soup

Cozy Fall Harvest Soup with Roast Squash, Apples & Jalapeño


5 Stars 4 Stars 3 Stars 2 Stars 1 Star

No reviews

  • Author: Amy RD, LDN
  • Total Time: 1 hour 20 minutes
  • Yield: 8 Servings 1x
  • Diet: Vegetarian

Description

Sweet and savory fall flavors with a kick of heat. Cozy up this fall with a soothing bowl of Harvest Soup. Roasted squash and apples along with a jalapeno for surprising heat make this the perfect fall soup!


Ingredients

Scale
  • 2 Large Apples
  • 2 Yellow Onions
  • 6 Cloves of Garlic
  • 3 lbs Squash (Buttercup, Carnival, whatever you like!)
  • 2 tbsp Olive Oil
  • 2 tsp Kosher Salt
  • 1 tsp Ground Black Pepper
  • 4 cups Vegetable Stock
  • 1 Jalapeno
  • 1 tsp Apple Cider Vinegar

Instructions

  1. Preheat oven to 400°F. Get out two sheet trays and set aside.
  2. Prep the veggies. Peel and chop onion, garlic cloves, apple and squash into large chunks
  3. Place vegetables evenly on both sheets and drizzle each with 1 tbsp olive oil.
  4. Season with salt and pepper and toss gently with your hands. Add the whole jalapeno to one of the sheets. Roast for 50 minutes to 1 hour until the squash is fork tender. Remove from the oven and allow to cool.
  5. Once the vegetables are cool enough to handle, remove the skins from the apples, jalapenos, and squash and de-seed the jalapenos.
  6. In a large soup pot, add roasted vegetables and vegetable stock. Let simmer for 20 minutes.
  7. Turn off the heat, and puree the soup a blender in batches until smooth – be sure not to overfill your blender!
  8. Place pureed soup back into pot over stove, stir in the apple cider vinegar and warm through. Serve with toasted sourdough bread, croutons or gluten-free bread.
 
  • Prep Time: 10
  • Cook Time: 70
  • Category: Black Forest Farmer’s Market, Dinner, Gluten-Free, Mediterranean, Vegan, Vegetarian
  • Method: Roast
  • Cuisine: Soup

Nutrition

  • Serving Size: 1
  • Calories: 153
  • Sugar: 14g
  • Sodium: 498mg
  • Fat: 5g
  • Saturated Fat: 1g
  • Carbohydrates: 28g
  • Fiber: 7g
  • Protein: 2g
  • Cholesterol: 0mg
Recipe Card powered byTasty Recipes

Pink Beet Pizza Dough, Barbie-Inspired!

Pink Beet Pizza Dough, Barbie-Inspired!

Pink Beet Pizza Dough
Print
clock clock iconcutlery cutlery iconflag flag iconfolder folder iconinstagram instagram iconpinterest pinterest iconfacebook facebook iconprint print iconsquares squares iconheart heart iconheart solid heart solid icon
Pink Beet Pizza Dough

Pink Beet Pizza Dough, Barbie-Inspired!