Nutrient-Packed Berry Parfait

Nutrient-Packed Berry Parfait

Print
clock clock iconcutlery cutlery iconflag flag iconfolder folder iconinstagram instagram iconpinterest pinterest iconfacebook facebook iconprint print iconsquares squares iconheart heart iconheart solid heart solid icon

Nutrient-Packed Berry Parfait


5 Stars 4 Stars 3 Stars 2 Stars 1 Star

No reviews

  • Author: Amy MS, RD, LDN
  • Total Time: 5 minutes
  • Yield: 1 Serving 1x
  • Diet: Vegetarian

Description

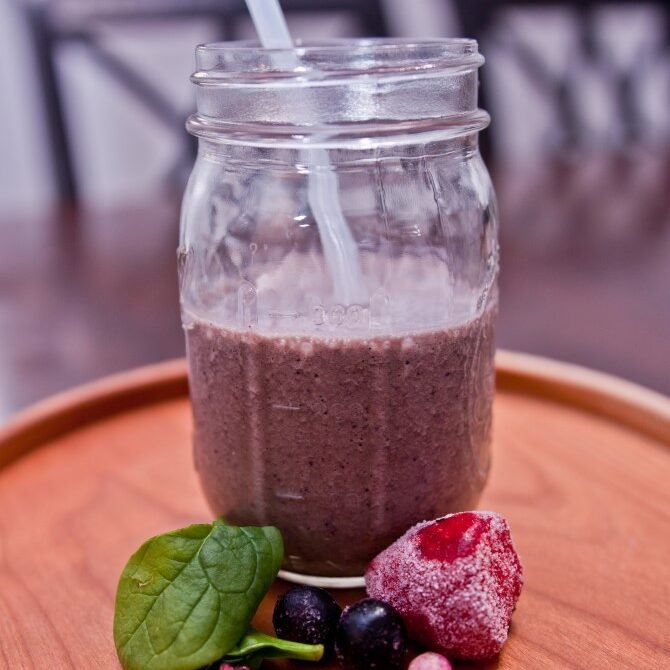
Berry Parfait is nutrient-packed breakfast, dessert or snack! This anti-inflammatory recipe is easy-to-make with layers of fresh berries, Greek yogurt, and crunchy granola.


Ingredients

Units Scale
  • 3/4 cup Greek Yogurt
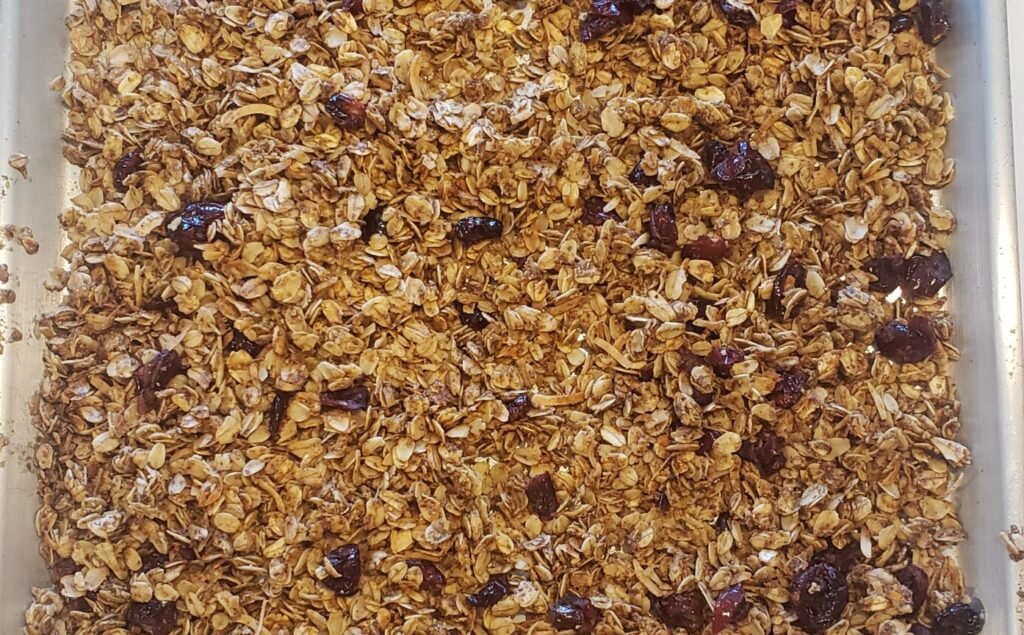
  • 1/3 cup Granola
  • 1/2 cup Mixed Berries (Strawberries, Blueberries, Blackberries, Raspberries- choose your favorites!)

Instructions

  1. To a tall glass or mason jar, add 3 spoonfuls of yogurt.
  2. Top with 3 spoonfuls of granola.
  3. Top with a mixture of your favorite berries, creating an even layer on top of the granola.
  4. Repeat with remaining ingredients, finishing with berries on top. Enjoy!
  • Prep Time: 5 minutes
  • Category: Breakfast, Snack, Dessert
  • Method: No Cook
  • Cuisine: American

Nutrition

  • Serving Size: 1
  • Calories: 297
  • Sugar: 20g
  • Sodium: 125mg
  • Fat: 6g
  • Carbohydrates: 40g
  • Fiber: 4g
  • Protein: 23g
  • Cholesterol: 9mg
Recipe Card powered byTasty Recipes

Homemade Egg McMuffin (Thrive Muffin)

Homemade Egg McMuffin (Thrive Muffin)

Print
clock clock iconcutlery cutlery iconflag flag iconfolder folder iconinstagram instagram iconpinterest pinterest iconfacebook facebook iconprint print iconsquares squares iconheart heart iconheart solid heart solid icon

Homemade Egg McMuffin (Thrive Muffin)


5 Stars 4 Stars 3 Stars 2 Stars 1 Star

No reviews

  • Author: Amy MS, RD, LDN
  • Total Time: 13 minutes
  • Yield: 1 1x

Description

Skip the drive-thru and make breakfast at home with our delicious Egg McMuffin recipe—nicknamed “Thrive Muffins” by my kids for good reason! These homemade versions are not only tastier and quicker to prepare but also a healthier choice compared to fast food. Enjoy a scrumptious breakfast that’s fresh, nutritious, and made with love.


Ingredients

Units Scale
  • 1 Whole Wheat English Muffin
  • 1 Egg
  • 1 Slice Canadian Bacon
  • 10 grams Sharp Cheddar Cheese
  • 1/2 tbsp Olive Oil

Instructions

  1. Heat a large cast iron skillet over medium heat.
  2. Once the pan has heated up, add the olive oil.
  3. Spray a biscuit cutter that is the same size as your English Muffin with nonstick spray and place into the pan, top side down so that it sits flat in your pan.
  4. Split the English Muffin in half. Place each half cut side down into the heated pan with olive oil. Then add the Canadian bacon to the pan.
  5. Next, crack the egg into the center of the biscuit cutter. Cover with a small lid to speed up cooking time and get a perfectly cooked egg.
  6. After 2 minutes, flip the Canadian bacon and English Muffin.
  7. Then, using tongs or a pot holder, remove the lid from the egg (caution the lid is hot!). Use the tongs again to lift the biscuit cutter out of the pan, leaving the egg in the pan. Then, flip the egg over with a spatula to cook on the other side
  8. Place the cheese onto the top of the egg to allow the cheese to melt.
  9. After 2 more minutes of cooking, now it is time to plate!
  10. Using a spatula, move the English Muffin to a plate. Place the Canadian bacon on the bottom half of the muffin, then top with the egg and cheese and finally close the sandwich with the top of the muffin.
  • Prep Time: 3 minutes
  • Cook Time: 10
  • Category: Breakfast
  • Method: Stovetop
  • Cuisine: American

Nutrition

  • Serving Size: 1 Sandwich
  • Calories: 331
  • Sugar: 2g
  • Sodium: 563mg
  • Fat: 17g
  • Carbohydrates: 27g
  • Fiber: 3g
  • Protein: 18g
  • Cholesterol: 206mg
Recipe Card powered byTasty Recipes

Yellow Plum Sorbet

Yellow Plum Sorbet

Print
clock clock iconcutlery cutlery iconflag flag iconfolder folder iconinstagram instagram iconpinterest pinterest iconfacebook facebook iconprint print iconsquares squares iconheart heart iconheart solid heart solid icon

Yellow Plum Sorbet


5 Stars 4 Stars 3 Stars 2 Stars 1 Star

No reviews

  • Author: Amy MS, RD, LDN
  • Total Time: 0 hours
  • Yield: 6 Servings 1x
  • Diet: Vegetarian

Description

Bright and refreshing, this plum sorbet combines ripe sorriso plums with a touch of lemon juice and a hint of honey for a delicious, summer treat. This recipe was developed for the Black Forest Farmer’s Market.


Ingredients

Units Scale
  • 1 1/22 lbs Ripe Sorriso Plums
  • 2 tsp Lemon Juice
  • 1/2 cup Maple Syrup
  • 1/2 cup Water

Instructions

  1. Halve, pit and cut plums into 1 1/2-inch dice. Place diced plums into a large sauce pan.
  2. To the sauce pan add maple syrup and lemon juice.
  3. Cover and bring to a simmer. Then, simmer uncovered for 8 minutes. Remove from heat and allow mixture to cool to room temperature.
  4. In a food processor or blender, blend the mixture until smooth. Then place the mixture into a container and chill for at least 2 hours.
  5. When the sorbet mixture is completely chilled, freeze the mixture using an ice cream maker, according to your machine’s directions.
  6. Once frozen, scoop into bowls and enjoy! Or place the frozen sorbet into a freezer-safe container and keep in the freezer until ready to enjoy.
  • Prep Time: 15 minutes
  • Cook Time: 10 minutes + 3 Hour Freeze Time
  • Category: Dessert
  • Method: Ice Cream Machine
  • Cuisine: Italian
Recipe Card powered byTasty Recipes

Cherry Oatmeal Bars

Cherry Oatmeal Bars

Cherry Oatmeal Bars
Print
clock clock iconcutlery cutlery iconflag flag iconfolder folder iconinstagram instagram iconpinterest pinterest iconfacebook facebook iconprint print iconsquares squares iconheart heart iconheart solid heart solid icon
Cherry Oatmeal Bars

Cherry Oatmeal Bars


5 Stars 4 Stars 3 Stars 2 Stars 1 Star

No reviews

  • Author: Amy MS, RD, LDN
  • Total Time: 35 minutes
  • Yield: 32 1x
  • Diet: Vegan

Description

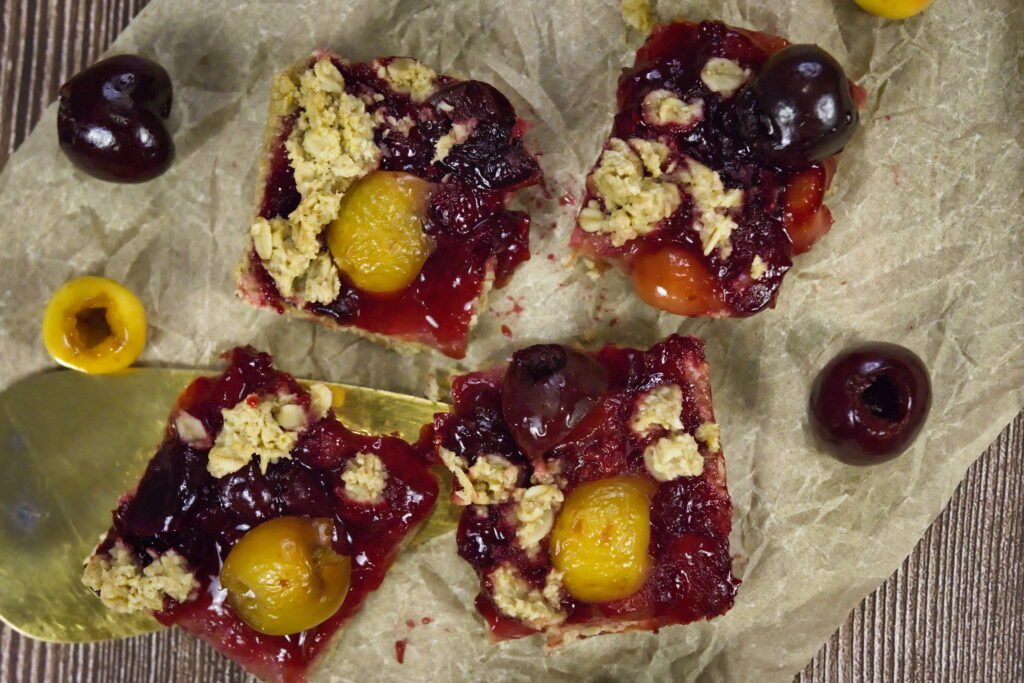
Fresh cherry and oatmeal bars. The perfect dessert or grab & go snack that is packed full of antioxidants and fiber! This recipe was developed for the Park Union Farmer’s Market.


Ingredients

Units Scale

Oatmeal Crumb:

  • 1 3/4 cup Oat Flour
  • 1 1/4 cup Old Fashioned Oats
  • 1 1/2 tsp Cinnamon
  • 1/4 tsp Salt
  • 1/4 tsp Baking Powder
  • 1/2 cup Coconut Oil
  • 1/2 cup Applesauce
  • 1/3 cup Maple Syrup
  • 1 tsp Vanilla Extract
  • 1 tsp Lemon Zest

Cherry Filling:

  • 3 cups Pitted Cherries
  • 2 tbsp Maple Syrup
  • 1 tbsp Lemon Juice
  • 2 tsp Cornstarch

Instructions

  1. Preheat oven to 350° F. Grease a 9×13 dark pan with nonstick spray. Set aside.
  2. In a small sauce pan, add the cherry filling ingredients, pitted cherries, maple syrup, lemon juice and cornstarch. Turn the heat to medium and bring the mixture to a low boil.
  3. In a large mixing bowl, add the oat flour, oats, cinnamon, baking powder and salt. Whisk together to combine.
  4. Next add the liquid ingredients, coconut oil, applesauce, maple syrup, vanilla extract and lemon zest.
  5. Using a spatula, stir the crumb mixture together.
  6. Set 3/4 cup of the mixture aside for the topping.
  7. Pour the remaining mixture into your prepared pan and spread evenly, pressing down with a spatula to ensure crumb crust cooks evenly.
  8. Par bake the crumb crust! Pop into the oven and bake for 10 minutes. This helps to get a slightly crispy bottom to your bars.
  9. After 10 minutes, remove the pan from the oven and spread the cherry filling evenly over top of the crumb crust. Top with the remaining filling by dropping small teaspoon size bits over top the cherry filling.
  10. Place the pan back into the oven and bake for an additional 20-25 minutes.
  11. Remove from the oven and allow to cool fully before slicing. Enjoy!
  • Prep Time: 15
  • Cook Time: 20
  • Category: Dessert, Snack
  • Method: Bake
  • Cuisine: American

Nutrition

  • Serving Size: 1 Bar
Recipe Card powered byTasty Recipes

Zucchini & Yellow Squash Rosettes

Zucchini & Yellow Squash Rosettes

Zucchini Rosette
Print
clock clock iconcutlery cutlery iconflag flag iconfolder folder iconinstagram instagram iconpinterest pinterest iconfacebook facebook iconprint print iconsquares squares iconheart heart iconheart solid heart solid icon
Zucchini Rosette

Zucchini & Yellow Squash Rosettes


5 Stars 4 Stars 3 Stars 2 Stars 1 Star

No reviews

  • Total Time: 15 minutes
  • Yield: 4050 Rosettes 1x
  • Diet: Vegetarian

Description

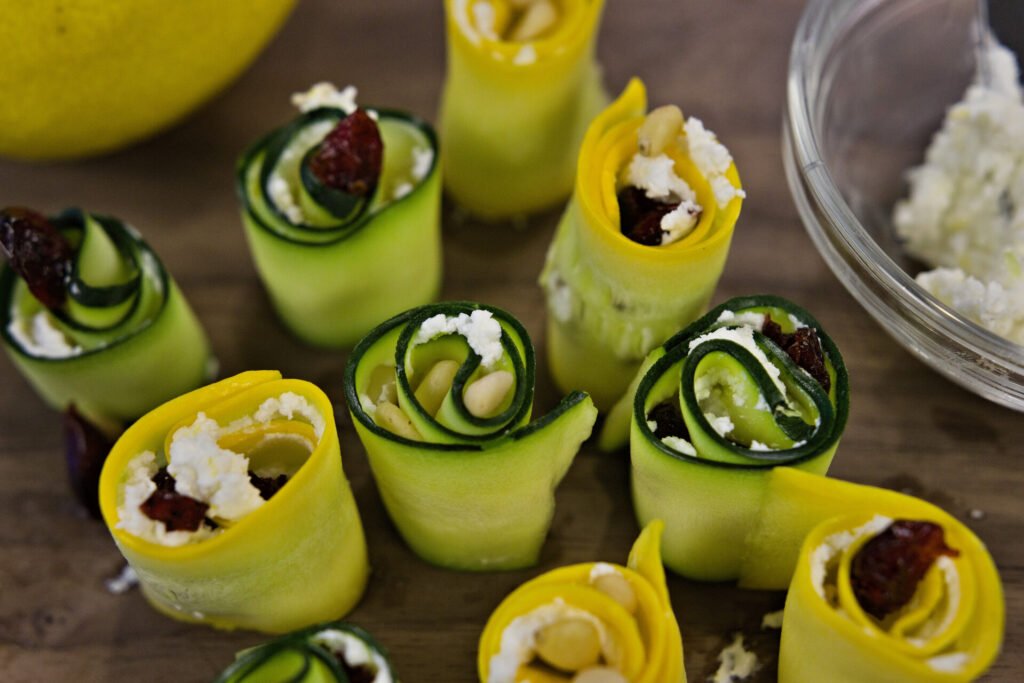
Zucchini and Yellow Squash Rosettes are a recipe that’s as beautiful as they are delicious. Packed with tangy goat cheese, sweet cranberries and crunchy pine nuts. This appetizer is perfect for impressing guests or adding elegance to any meal. This recipe was created for the Park Union Farmer’s Market.


Ingredients

Units Scale
  • 1 Medium Zucchini
  • 1 Medium Yellow Squash
  • 2 oz Goat Cheese
  • 1/2 tsp Lemon Zest
  • 1/2 tbsp Lemon Juice
  • 1/4 cup Dried Cranberries
  • 1/4 cup Pine Nuts

Instructions

  1. Trim the ends of the zucchini and squash. Then, using a vegetable peeler, peel long ribbons of both the zucchini and squash.
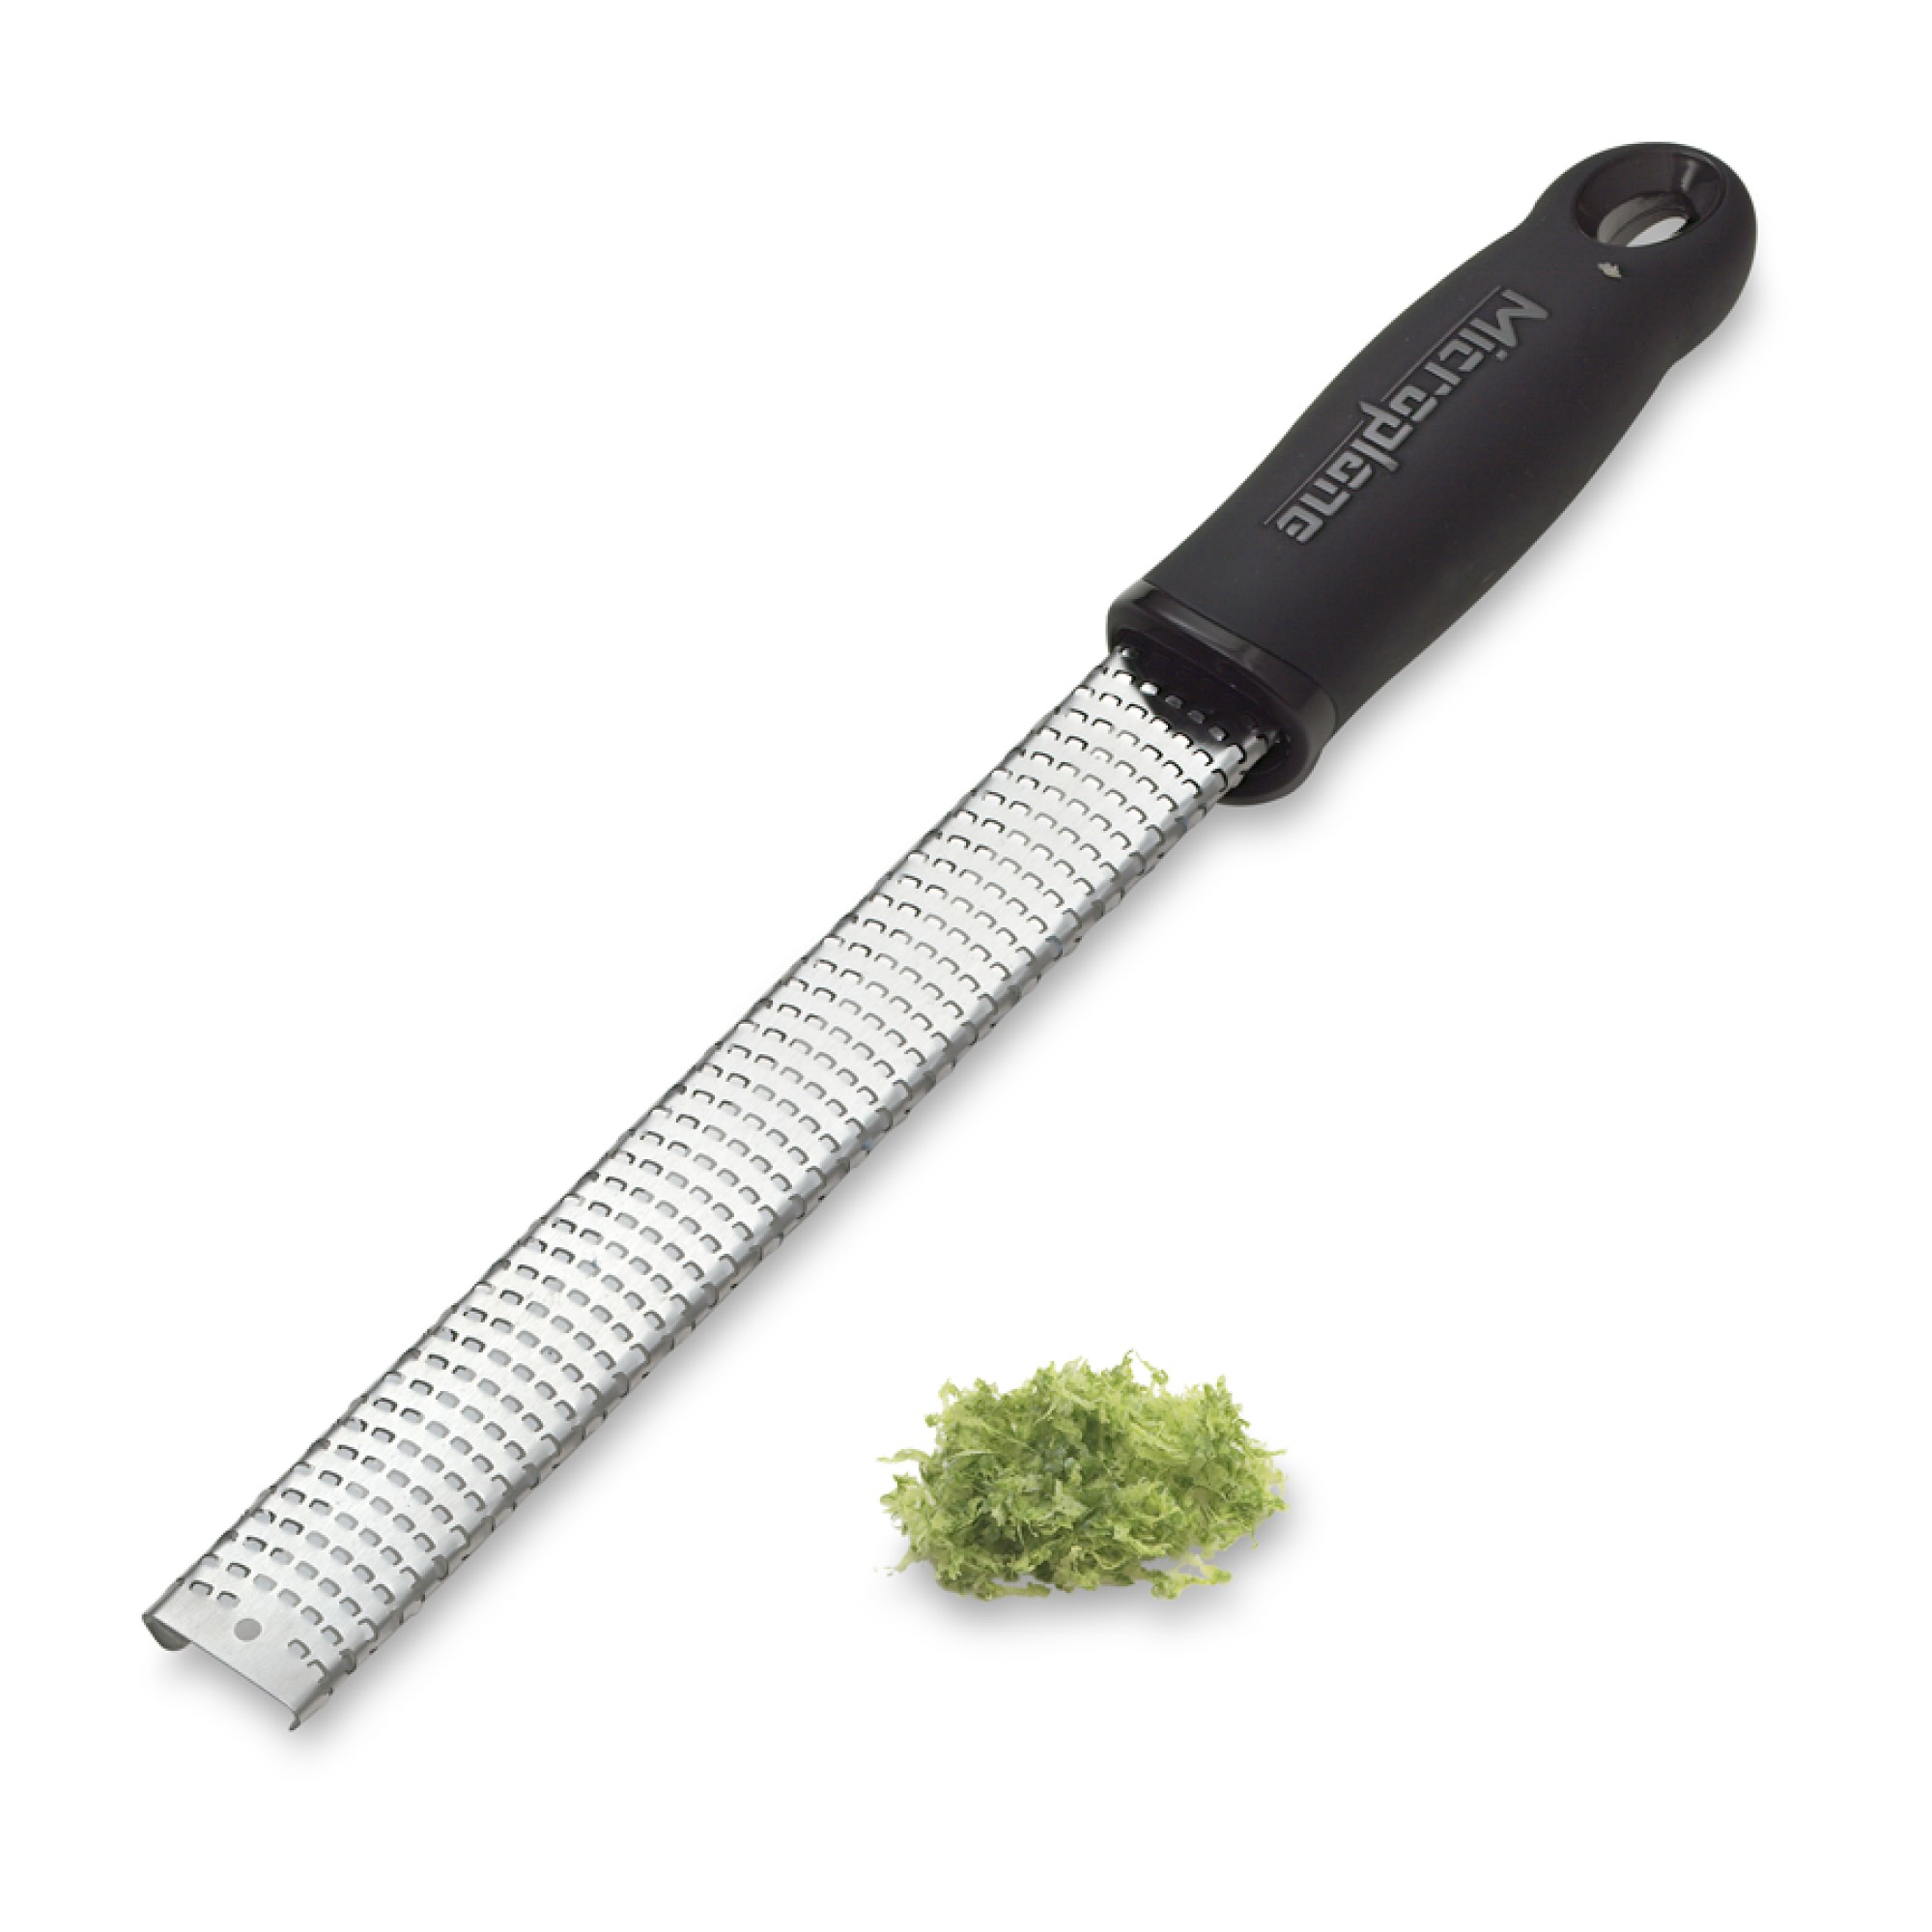
  2. Mix the goal cheese filling. Using a microplane zester, zest and juice the lemon. In a small mixing bowl combine the goat cheese, lemon zest and lemon juice, Mix together with a fork to fully incorporate.
  3. Toast the pine nuts. Place the pine nuts into a dry skillet, in a single layer. Turn the heat to medium-low and toast for 2-3 minutes, continually stirring or tossing the skillet to
  4. Place the zucchini and squash ribbons onto a cutting board or work surface. Using a butter knife or small spatula, spread 1/2 to 1 tsp of goat cheese mixture onto each ribbon. Top the goat cheese with a few cranberries and pine nuts. Roll up. Continue until all the ribbons have been filled. Enjoy!
  • Prep Time: 15 minutes
  • Category: Appetizer
  • Method: No Cook
  • Cuisine: Mediterranean

Nutrition

  • Serving Size: 3
  • Calories: 32
  • Sugar: 2g
  • Sodium: 12mg
  • Fat: 2g
  • Carbohydrates: 2g
  • Fiber: 0g
  • Protein: 2g
  • Cholesterol: 2mg
Recipe Card powered byTasty Recipes

Dark Chocolate Cherry Cashew Bars

Dark Chocolate Cherry Cashew Bars

Print
clock clock iconcutlery cutlery iconflag flag iconfolder folder iconinstagram instagram iconpinterest pinterest iconfacebook facebook iconprint print iconsquares squares iconheart heart iconheart solid heart solid icon

Dark Chocolate Cherry Cashew Bars


5 Stars 4 Stars 3 Stars 2 Stars 1 Star

No reviews

  • Author: Amy MS, RD, LDN
  • Total Time: 20 minutes
  • Yield: 16 Bars 1x
  • Diet: Vegetarian

Ingredients

Units Scale
  • 1 cup Raw Cashews
  • 1/2 cup Raw Almonds
  • 1/2 cup Unsalted Peanuts
  • 1/2 cup Dried Cherries
  • 2 tbsp Ground Flaxseed
  • 1/8 tsp Sea Salt
  • 3 tbsp Honey
  • 2 tbsp Maple Syrup
  • 1/2 cup Semi Sweet or Dark Chocolate Chips
  • 1 tsp Coconut Oil

Instructions

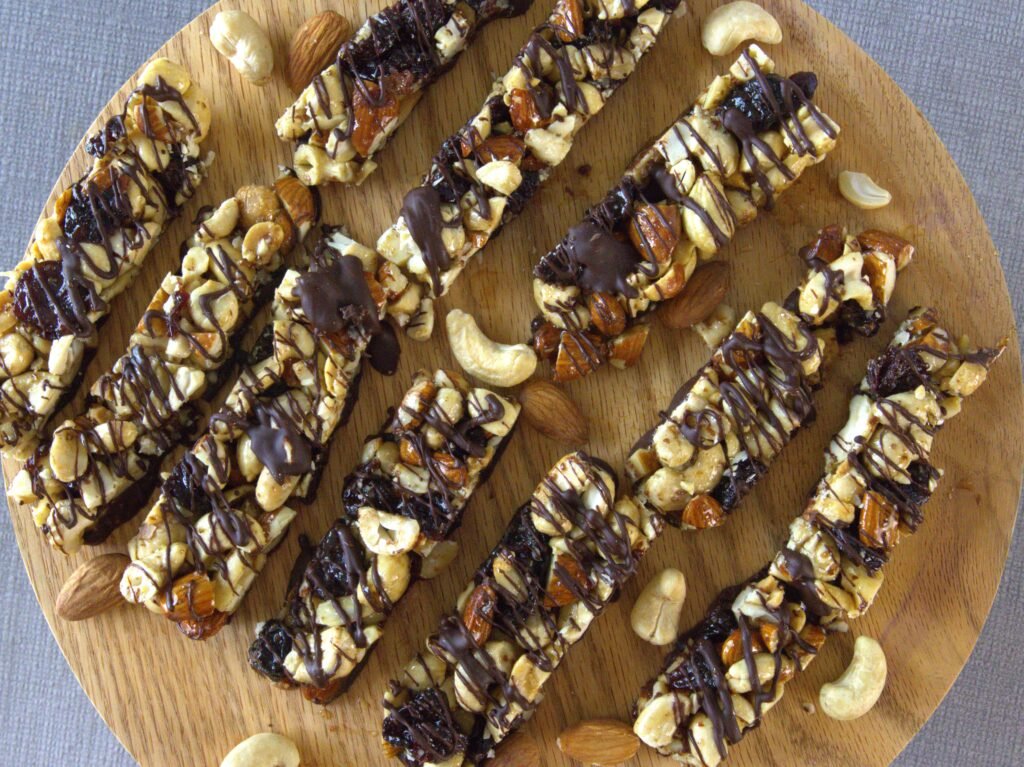
  1. Preheat oven to 325° F. Line an 8×8 inch baking pan with parchment paper and set aside.
  2. In a large mixing bowl, add the nuts, cherries and flaxseed and stir together with a spatula.
  3. Set a small sauce pan over medium-low heat and add the honey and maple syrup. Cook until the liquid just starts to simmer. Remove from heat.
  4. Pour the liquid mixture over the nuts and stir with a spatula to combine. Then pour the mixture into your prepared pan. Working quickly, press the mixture evenly into the pan. (It helps to place another piece of parchment paper over top to press evenly and avoid getting your hands sticky!)
  5. Place into the oven and bake for 15 minutes.
  6. Remove from the oven and allow to cool for 15 minutes on a wire rack. Then place into the refridgerator to fully cool for 15 minutes.
  7. Just before the 15 minutes are up, make the chocolate for the bottom and deocrative topping.
  8. In a medium sized microwave safe bowl, add the dark chocolate chips and coconut oil. Microwave on 25 second intervals, stirring in between each, until the chocolate is just melted.
  9. Remove the bars from the refrigerator and place parchment onto a cutting board. Using a sharp knife, slice the bars into 16 equal portions.
  10. Set a silpat out on a large sheet tray.
  11. Using an spatula or spoon, spread a thin layer of chocolate onto the bottom of each bar. Place onto the silpat. Continue with remaining bars.
  12. Using the remaining chocolate, drizzle chocolate over top of the bars for a decorative finish.
  13. Place the bars back into the refrigerator for the chocolate to fully harden. Bars will keep in an airtight container for 5-7 days. Enjoy!
  • Prep Time: 5
  • Cook Time: 15
  • Category: Snack
  • Method: Bake

Nutrition

  • Serving Size: 1 Bar
  • Calories: 143
  • Sugar: 11g
  • Sodium: 22mg
  • Fat: 8g
  • Saturated Fat: 2g
  • Unsaturated Fat: 6g
  • Carbohydrates: 15g
  • Fiber: 1g
  • Protein: 4g
  • Cholesterol: 0mg
Recipe Card powered byTasty Recipes

Homemade Chocolate Chip Clif Bars

Homemade Chocolate Chip Clif Bars

Print
clock clock iconcutlery cutlery iconflag flag iconfolder folder iconinstagram instagram iconpinterest pinterest iconfacebook facebook iconprint print iconsquares squares iconheart heart iconheart solid heart solid icon

Homemade Chocolate Chip Clif Bars


5 Stars 4 Stars 3 Stars 2 Stars 1 Star

No reviews

  • Author: Amy MS, RD, LDN
  • Total Time: 10 minutes
  • Yield: 12 Bars 1x
  • Diet: Vegetarian

Description

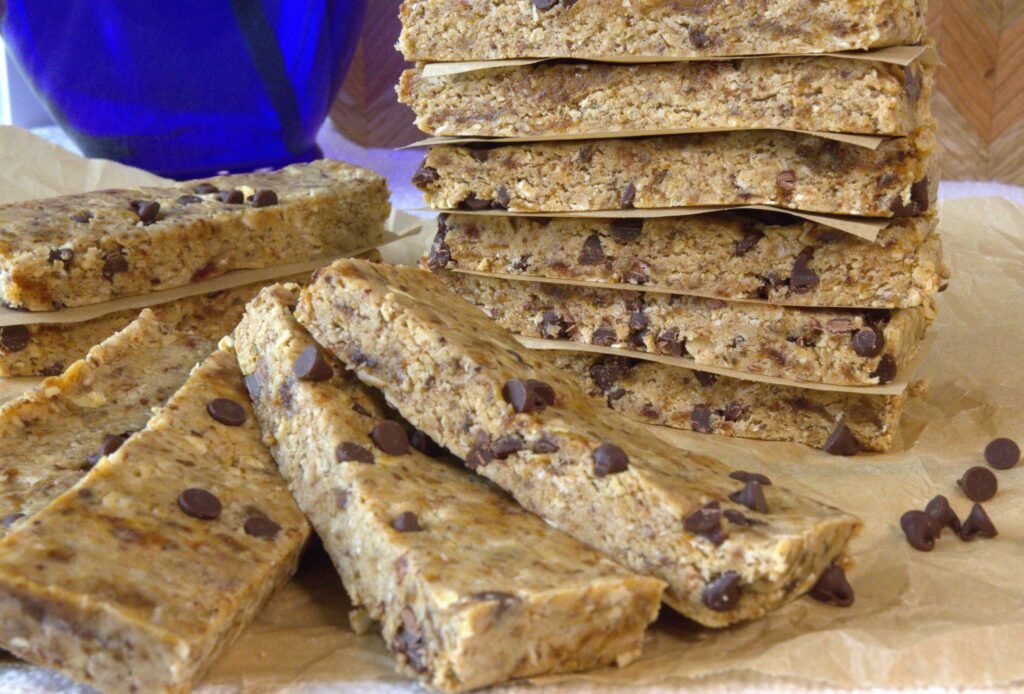
Make your own homemade, no-bake Chocolate Chip Clif Bars!


Ingredients

Units Scale
  • 1 cup Pitted Dates
  • 1 cup Old Fashioned Oats
  • 1 cup Crisp Rice Cereal
  • 2 Scoops Vanilla Protein Powder
  • 2 tbsp Ground Flaxseed
  • 1/2 tsp Ground Cinnamon
  • 1/8 tsp Salt
  • 1/2 cup Cashew Butter
  • 1/4 cup Honey
  • 1 tsp Vanilla Extract
  • 1/4 cup Mini Chocolate Chips

Instructions

  1. Set out an 8×8 baking pan and line with parchment paper, set aside.
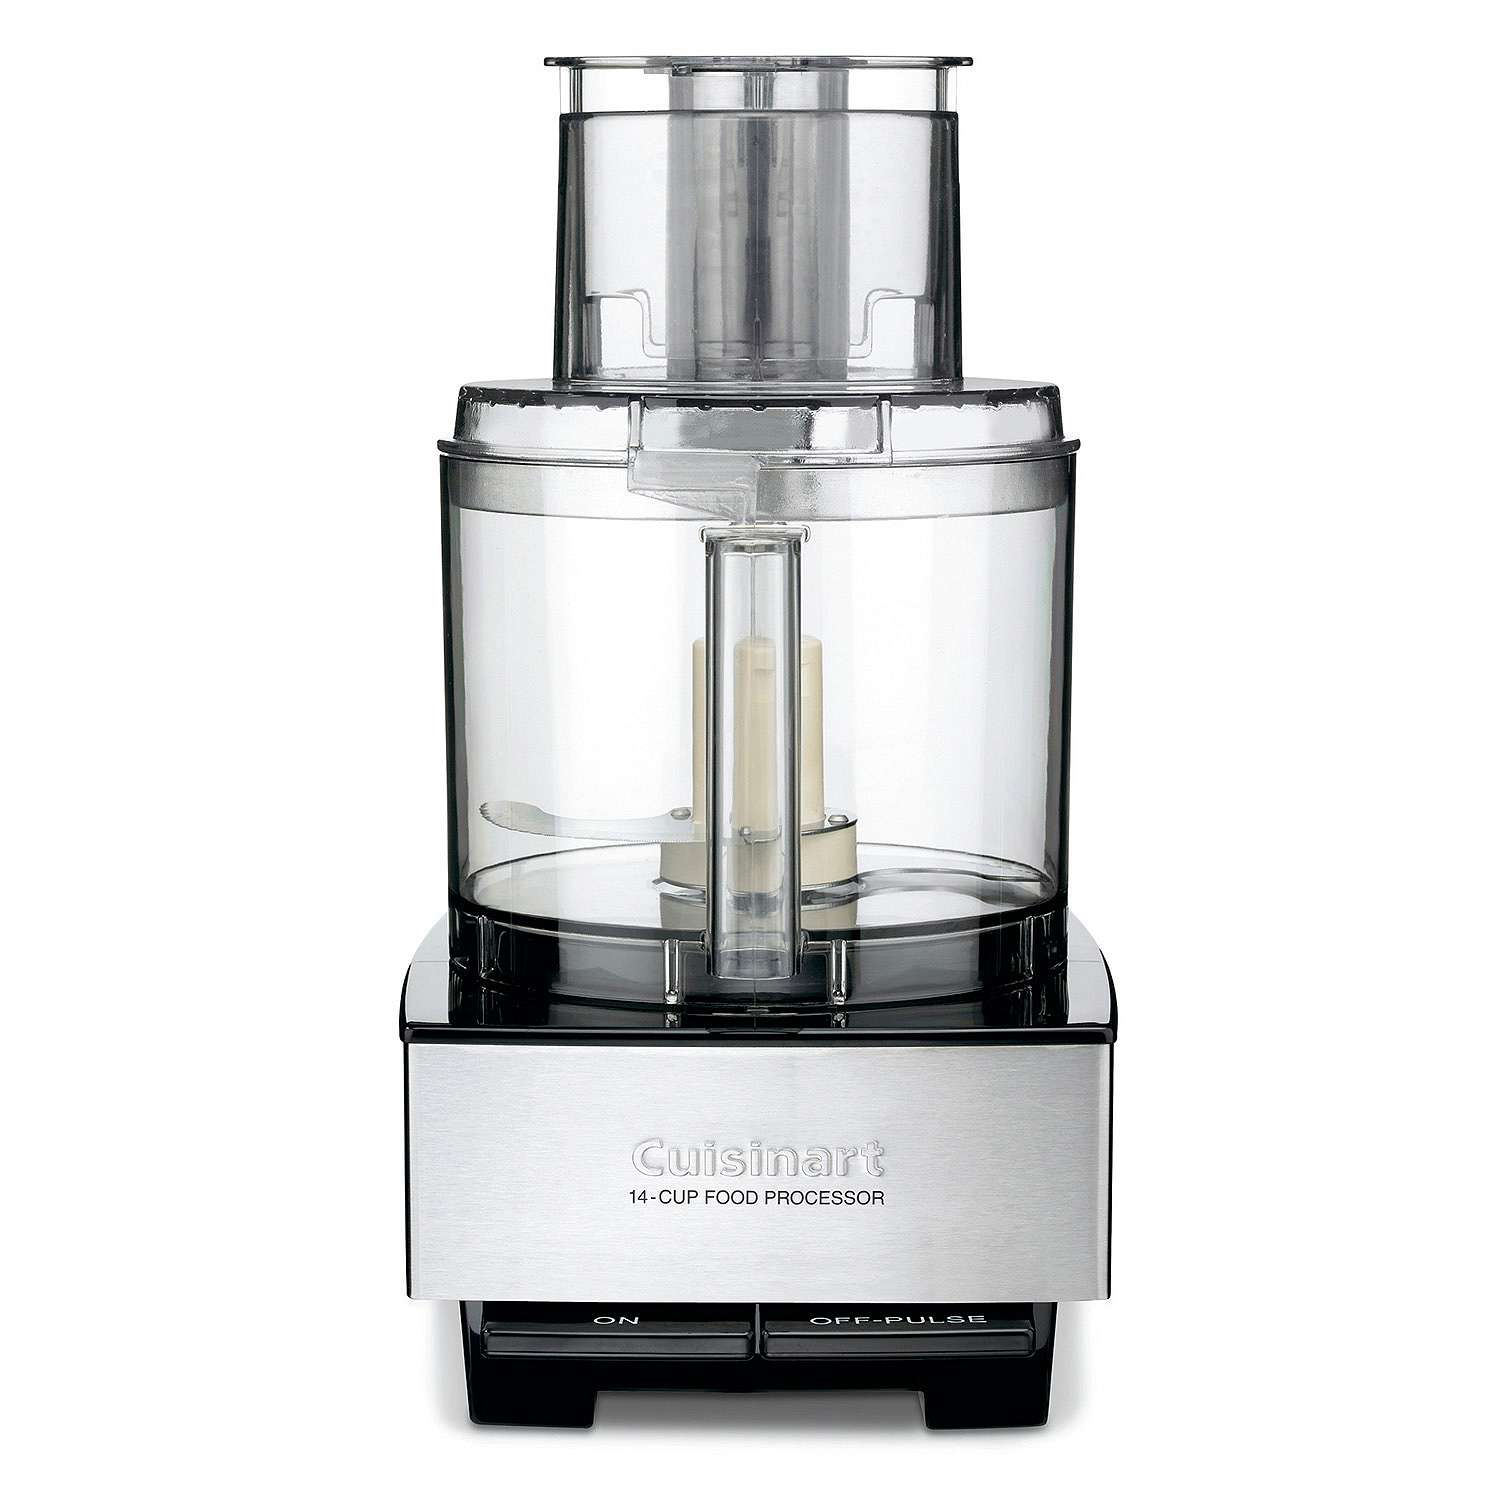
  2. In the bowl of a food processor, add the dates and process until they are broken down into very small pieces.
  3. Next, add the remaining ingredients (except chocolate chips) the oats, rice cereal, protein powder, flaxseed, cinnamon, salt, cashew butter, honey, vanilla. Process again for 20 seconds.
  4. Remove the blade from the food processor. Add in the mini chocolate chips and stir with a spatula.
  5. Pour the mixture into your prepared pan and press evenly with your hands or the back of a measuring cup.
  6. Place the pan into the refrigerator to set for at least 30 minutes.
  7. After 30 minutes, remove the pan from the refrigerator. Lift out the parchment paper and place onto a cutting board.
  8. Cut the bars into 12 equal sections. Store in an airtight container in the refrigerator. Enjoy!
  • Prep Time: 10
  • Category: Snack
  • Method: No Cook

Nutrition

  • Serving Size: 1 bar
  • Calories: 198
  • Sugar: 15g
  • Sodium: 84mg
  • Fat: 9g
  • Fiber: 2g
  • Protein: 6g
  • Cholesterol: 8mg
Recipe Card powered byTasty Recipes

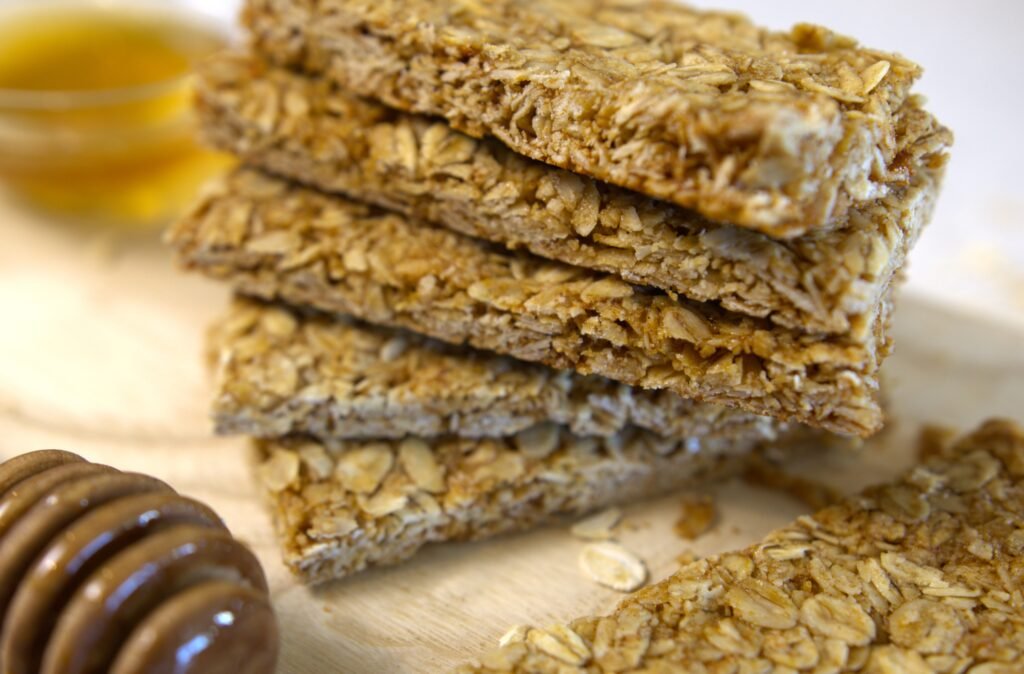
Crunchy Oats and Honey Granola Bars

Crunchy Oats & Honey Granola Bars

Print
clock clock iconcutlery cutlery iconflag flag iconfolder folder iconinstagram instagram iconpinterest pinterest iconfacebook facebook iconprint print iconsquares squares iconheart heart iconheart solid heart solid icon

Crunchy Oats & Honey Granola Bars


5 Stars 4 Stars 3 Stars 2 Stars 1 Star

5 from 1 review

  • Author: Amy MS, RD, LDN
  • Total Time: 23 minutes
  • Yield: 8 Bars 1x
  • Diet: Vegetarian

Description

These bars are a homemade version of Nature Valley Oats ‘n Honey Bars made with wholesome oats, honey and simple pantry ingredients.


Ingredients

Units Scale
  • 1 1/2 cups Old Fashioned Oats
  • 1/3 cup Oat Flour
  • 1/2 tsp Ground Cinnamon
  • 1/4 tsp Baking Soda
  • 1/8 tsp Salt
  • 3 tbsp Coconut Oil
  • 3 tbsp Honey
  • 2 tbsp Brown Sugar
  • 1 tsp Vanilla Extract

Instructions

  1. Preheat oven to 350 F. Line an 8×8 inch baking dish with parchment paper. Set aside
  2. In a small sauce pan, add the coconut oil, honey and brown sugar. Heat on medium low until the coconut oil has melted and the brown sugar dissolves into the mixture. Remove from heat.
  3. In a large mixing bowl, add the oats, oat flour, cinnamon, baking soda and salt.
  4. Next, pour the liquid ingredients into the bowl with the oats and stir with a spatula to combine.
  5. Pour the mixture into your prepared pan and spread evenly with a spatula.
  6. Bake for 15-18 minutes until the bars are slightly browned.
  7. Remove from the oven and cool on a wire rack.
  • Prep Time: 8
  • Cook Time: 15
  • Category: Snack, Bar
  • Method: Bake
  • Cuisine: American

Nutrition

  • Serving Size: 1 Bar
  • Calories: 155
  • Sugar: 7g
  • Sodium: 76mg
  • Fat: 6g
  • Carbohydrates: 23g
  • Fiber: 2g
  • Protein: 3g
  • Cholesterol: 0mg
Recipe Card powered byTasty Recipes

Roasted Turnips & Garlic Scape Chimichurri on Baked Potato Chips

Roasted Turnips & Garlic Scape Chimichurri on Baked Potato Chips

Print
clock clock iconcutlery cutlery iconflag flag iconfolder folder iconinstagram instagram iconpinterest pinterest iconfacebook facebook iconprint print iconsquares squares iconheart heart iconheart solid heart solid icon

Roasted Turnips & Garlic Scape Chimichurri on Baked Potato Chips


5 Stars 4 Stars 3 Stars 2 Stars 1 Star

No reviews

  • Author: Amy MS, RD, LDN
  • Total Time: 1 hour 30 minutes
  • Diet: Vegetarian

Description

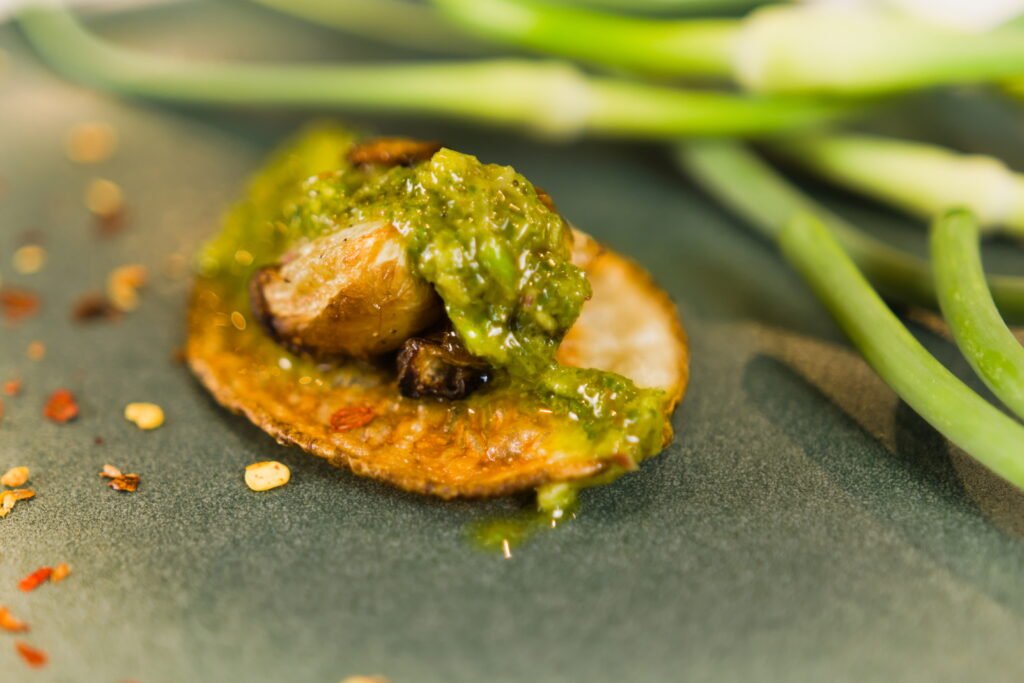
Market fresh produce turn these simple ingredients into a show-stopper appetizer, Roasted Turnips with Kale & Garlic Scape Chimichuri on top oven Baked Potato Chips! This recipe was created for the Black Forest Farmer’s Market.


Ingredients

Units Scale

Roasted Turnips

  • 1 lb Turnips (4 cups) Trimmed, scrubbed and diced into 1/2-inch pieces
  • 2 tbsp Olive Oil
  • 1/2 tsp Kosher Salt
  • 1/4 tsp Paprika
  • 1/4 tsp Onion Powder
  • 1/4 tsp Garlic Powder
  • 1/4 tsp Ground Black Pepper

Kale & Garlic Scape Chimichuri

  • 1 cup Baby Kale
  • 5 Garlic Scapes
  • 1/2 cup Olive Oil
  • 1 tbsp Red Wine Vinegar
  • 1 tbsp Lime Juice
  • 1/2 tsp Kosher Salt
  • 1/2 tsp Ground Black Pepper
  • 1/4 tsp Red Pepper Flakes (Optional)

Oven Baked Potato Chips

  • 1 lb Russet Potatoes (2-3 potatoes), Scrubbed
  • 3 tbsp Olive Oil
  • 1 tsp Kosher Salt

Instructions

Roasted Turnips:

  1. Preheat oven to 400° F. Get out a sheet tray. Set aside.
  2. In a large bowl, toss together the turnips, olive oil, spices, salt and pepper.
  3. Spread the mixture out onto your sheet tray in an even layer.
  4. Roast for 25-30 minutes, stirring halfway through roasting until the turnips are nicely golden brown and slightly crispy.

Kale and Garlic Scape Chimichuri:

  1. Into the bowl of a food processor, add all the ingredients, kale, garlic scapes, olive oil, red wine vinegar, lime juice, salt, pepper and red pepper flakes.
  2. Process on 15 second intervals until the chimichuri reaches your desired consistency. (Traditionally chimichuri is not blended until smooth but left slightly chunky.)
  3. Taste and adjust seasonings as needed.

Oven Baked Potato Chips:

  1. Preheat oven to 375°F Convect or 400°F regular. Get out a large sheet tray and set aside.
  2. Using a mandoline or a sharp knife, slice the potatoes into 1/8″ slices. Place the slices into a large bowl of warm water. This helps to remove some of the starch from the potatoes.
  3. Drain the potato slices and pat them dry with a clean dish towel or paper towel.
  4. In a large bowl toss the potato slices with the olive oil and salt.
  5. Place the potato slices onto your sheet tray in one single layer. This make take a few rounds, do not overlap or the chips will not cook evenly.
  6. Bake for 10 minutes, then using a spatula, flip the chips over and bake for another 10 minutes on the other side. Take care in the last few minutes to watch so that the chips do not burn!
  7. Remove from the oven and allow to cool on a wire rack.

Assembly:

  1. Place one chip onto a plate, top with a tablespoon of roasted turnips, then top with a drizzle of chimichuri. Continue with remaining ingredients. Enjoy!
  • Prep Time: 30
  • Cook Time: 60
  • Category: Appetizer
  • Method: Roast
  • Cuisine: Mediterranean
Recipe Card powered byTasty Recipes

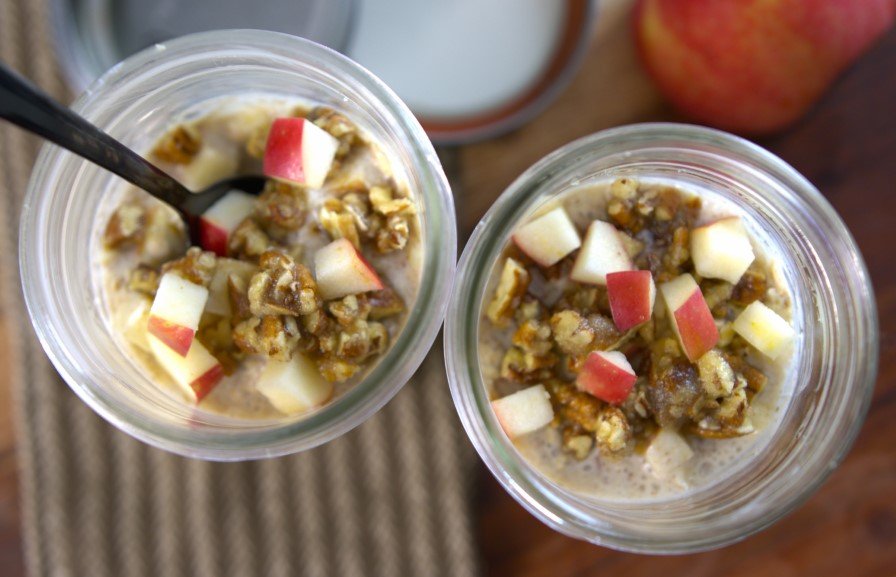
Apple Pie Overnight Oats

Apple Pie Overnight Oats

Print
clock clock iconcutlery cutlery iconflag flag iconfolder folder iconinstagram instagram iconpinterest pinterest iconfacebook facebook iconprint print iconsquares squares iconheart heart iconheart solid heart solid icon
Apple Pie Overnight Oats

Apple Pie Overnight Oats


5 Stars 4 Stars 3 Stars 2 Stars 1 Star

No reviews

  • Author: Amy MS, RD, LDN
  • Total Time: 5 minutes
  • Yield: 1 1x
  • Diet: Vegetarian

Description

Apple Pie Overnight Oats have all the warm and comforting flavors of apple pie in wholesome overnight oats. The best meal prep breakfast!


Ingredients

Units Scale
  • 1/2 cup Soy Milk (Unsweetened)
  • 1/4 cup Greek Yogurt
  • 1/2 cup Old Fashioned Oats
  • 1 Tbsp Maple Syrup
  • 1/2 tsp Cinnamon
  • 1/2 cup Diced Apple

Topping:

  • 1 tsp Almond or Oat Flour
  • 1 tsp Maple Syrup
  • 1 tbsp Pecans, chopped

Instructions

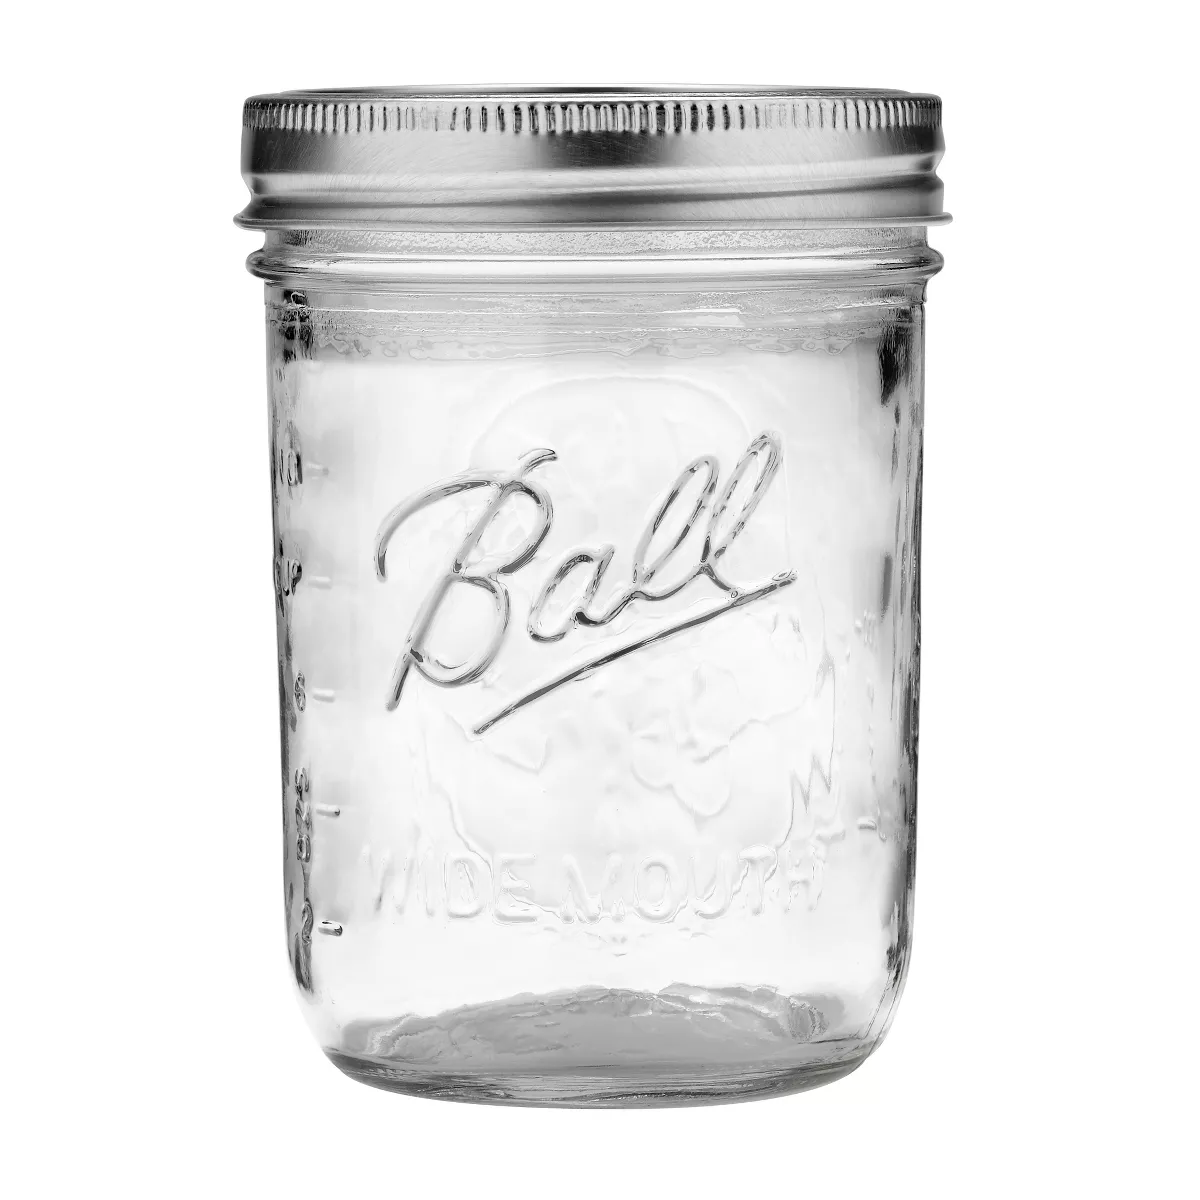
  1. Add all the ingredients (except the toppings) to a mason jar or container with a lid. Stir together to fully mix.
  2. Pop a lid on the mason jar or container and place into the refrigerator overnight.
  3. The next morning, mix up the topping and add to the top of your oats. Enjoy!
  • Prep Time: 5 minutes
  • Category: Breakfast
  • Cuisine: American

Nutrition

  • Serving Size: 1
  • Calories: 401
  • Sugar: 31g
  • Sodium: 84mg
  • Fat: 10g
  • Carbohydrates: 65g
  • Fiber: 7g
  • Protein: 16g
  • Cholesterol: 3mg
Recipe Card powered byTasty Recipes

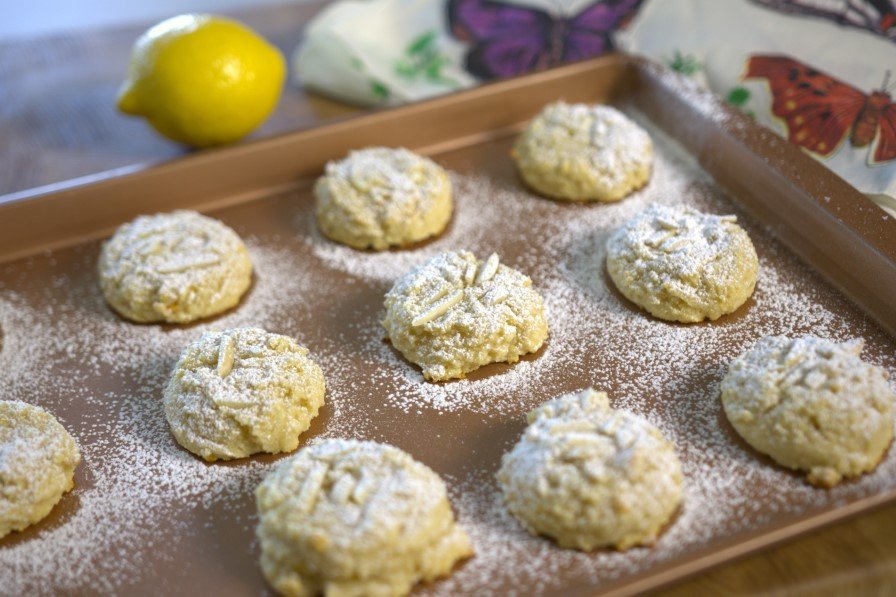
Almond Lemon Cookies

Almond Lemon Cookies

Print
clock clock iconcutlery cutlery iconflag flag iconfolder folder iconinstagram instagram iconpinterest pinterest iconfacebook facebook iconprint print iconsquares squares iconheart heart iconheart solid heart solid icon
Almond Lemon Cookies Gluten Free

Almond Lemon Cookies


5 Stars 4 Stars 3 Stars 2 Stars 1 Star

No reviews

  • Author: Amy RD, LDN
  • Total Time: 22 minutes
  • Yield: 1112 cookies 1x
  • Diet: Gluten Free

Description

Lemon almond cookies are moist, light and gluten-free goodness!


Ingredients

Units Scale
  • 1 1/2 cups Almond Flour
  • 1/3 cup Honey
  • 1/8 tsp Baking Soda
  • 1 Medium Sized Lemon, Zested and Juiced
  • 1 Large Egg White
  • 2 tbsp Powdered Sugar
  • 2 tbsp Slivered Almonds (optional)

Instructions

  1. Preheat oven to 350° F. Get out a baking sheet and set aside.
  2. Place the egg white into a small bowl and beat with a fork until slightly frothy. Set aside.
  3. In a medium-sized mixing bowl add the almond flour, lemon zest, lemon juice, honey, baking soda, and egg white. Stir together with a spatula. The mixture should resemble wet sand.
  4. Using a 1 1/2 inch scoop, scoop the dough and place onto the baking sheet. Continue until all dough has been used.
  5. Sprinkle each raw cookie with a few slivered almonds and gently press the cookies with your hands to flatten them every so slightly.
  6. Place the tray into the oven and bake the cookies for 12 minutes until just golden on the edges. You do not want to over cook!
  7. After 12 minutes, allow the cookies to cool on a wire rack for at least 10 minutes.
  8. Sprinkle with powdered sugar and enjoy!
  • Prep Time: 10 minutes
  • Cook Time: 12 minutes
  • Category: Dessert
  • Method: Bake

Nutrition

  • Serving Size: 1
  • Calories: 124
  • Sugar: 10g
  • Sodium: 20mg
  • Fat: 8g
  • Carbohydrates: 13g
  • Fiber: 2g
  • Protein: 4g
  • Cholesterol: 0mg
Recipe Card powered byTasty Recipes

Nut-Free Protein Granola Bars

Nut-Free Protein Granola Bars

Print
clock clock iconcutlery cutlery iconflag flag iconfolder folder iconinstagram instagram iconpinterest pinterest iconfacebook facebook iconprint print iconsquares squares iconheart heart iconheart solid heart solid icon

Nut-Free Protein Granola Bars


5 Stars 4 Stars 3 Stars 2 Stars 1 Star

No reviews

  • Author: Amy RD, LDN
  • Total Time: 15 minutes
  • Yield: 8 Servings 1x
  • Diet: Vegetarian

Description

These protein granola bars are a great snack or pre-workout boost. Plus they are nut-free!


Ingredients

Units Scale
  • 1 1/2 cups Old Fashioned Oats
  • 1/4 cup Oat Flour
  • 1/3 cup Protein Powder
  • 2 tbsp Flaxseed + 2 tbsp water
  • 1/4 tsp Salt
  • 1/2 tsp Ground Cinnamon
  • 3 tbsp Mini Chocolate Chips
  • 1/4 cup Coconut Oil
  • 1/4 cup Honey
  • 1 tsp Vanilla Extract

Instructions

  1. Preheat oven to 350 F. Line a 10×4″ pan (bread/loaf pan) with parchment paper and set aside.
  2. In a small bowl, mix together the flaxseed and water. Allow the flaxseed to soak up the water while you mix the remaining ingredients.
  3. To a large mixing bowl add the oats, oat flour, protein powder, and salt. Mix together with a wooden spoon or spatula.
  4. To a microwave safe bowl, add the coconut oil and heat on 20 second internals until melted. Then add the honey and vanilla extract and stir to mix. Then add the flaxseed water mixture and stir together.
  5. Next, pour the coconut oil mixture into the oat mixture and stir together. Add the mini chocolate chips and stir again. The mixture should resemble wet sand.
  6. Using a spatula, scoop the mixture into your prepared pan, spreading it evenly throughout the pan. Then, using your hands, the spatula or the bottom of a measuring cup press the dough firmly and evenly into the pan.
  7. Place into the oven and bake for 10-12 minutes until slightly browned on top.
  8. Allow the pan to cool on a wire rack for at least 10 minutes. Remove the parchment paper from the pan and allow the granola bars to cool on the wire rack for another 15 minutes until fully cooled.
  9. Using a knife, cut the bars into 8 servings. Enjoy!
  10. Optional Topping:
    1. In a microwave safe bowl add 1 tbsp chocolate chips and 1/2 tsp coconut oil. Microwave on 20 second intervals until melted.
    2. Using a spoon, drizzle the melted chocolate across the tops of the bars. Allow to cool for the chocolate to set.
  • Prep Time: 5 minutes
  • Cook Time: 10 minutes
  • Category: Snack, Dessert
  • Method: Bake
  • Cuisine: American

Nutrition

  • Serving Size: 1 Bar
  • Calories: 207
  • Sugar: 13g
  • Sodium: 83mg
  • Fat: 10g
  • Saturated Fat: 7g
  • Unsaturated Fat: 2g
  • Carbohydrates: 26g
  • Fiber: 2g
  • Protein: 6g
  • Cholesterol: 3mg
Recipe Card powered byTasty Recipes

Carrot Cake Quick Bread

Carrot Cake Quick Bread

Print
clock clock iconcutlery cutlery iconflag flag iconfolder folder iconinstagram instagram iconpinterest pinterest iconfacebook facebook iconprint print iconsquares squares iconheart heart iconheart solid heart solid icon
Carrot Cake Quick Bread

Carrot Cake Quick Bread


5 Stars 4 Stars 3 Stars 2 Stars 1 Star

No reviews

  • Author: Amy RD, LDN
  • Total Time: 1 hour
  • Diet: Vegetarian

Description

Carrot Cake Quick Bread is the perfect spring dessert!


Ingredients

Units Scale

Carrot Cake Bread:

  • 3/4 cup All Purpose Flour
  • 1/2 cup Oat Flour
  • 1/2 cup Whole Wheat Flour
  • 1 tsp Baking Powder
  • 1/2 tsp Baking Soda
  • 1/2 tsp Salt
  • 1 1/2 tsp Ground Cinnamon
  • 1/2 tsp Nutmeg
  • 1/2 tsp Cardamom (Optional)
  • 2 Tbsp Ground Flaxseed
  • 1/2 cup Olive Oil
  • 1/2 cup Honey
  • 1/2 cup Unsweetened Applesauce
  • 1 cup Grated Carrot
  • 2 Eggs
  • 1 tsp Vanilla Extract
  • 1/3 cup Walnuts, chopped

Icing Glaze:

  • 1/4 cup Powdered Sugar
  • 2 tsp Milk

Instructions

  1. Set out all ingredients and equipment needed for happy baking!
  2. Preheat oven to 325° F. Spray a bread pan with nonstick cooking spray and set aside.
  3. In a large mixing bowl, add all the dry ingredients and whisk together (Oat Flour, AP Flour, Wheat Flour, Baking Powder, Baking Soda, Salt, Cinnamon, Nutmeg, Cardamom, Flaxseed).
  4. In a medium mixing bowl add the wet ingredients and whisk to combine (Olive Oil, Honey, Applesauce, Carrot, Eggs, Vanilla Extract).
  5. Next, pour the wet ingredients into the dry ingredients and mix together with a spatula. Take care to not over mix!
  6. Add in the chopped walnuts to the batter.
  7. Pour the batter into prepared bread pan and bake for 40-50 minutes, until just browned around the edges and a toothpick comes out clean from the center. *Note! Keep an eye on your quick bread. If it starts to brown too much before the 50 minutes, cover your bread pan with foil and place back into the oven to finish cooking.*
  8. Remove from the oven and allow to cool on a wire rack for 5 minutes. Then, run a butter knife along the edges of the pan and carefully remove the bread from the pan.
  9. While the bread cools, prepare the glaze icing
  10. In a small bowl whisk together the powdered sugar and 2 tsp milk.
  11. Using a spoon, drizzle the icing over top of the bread.
  12. Slice into 1 inch sections and enjoy!

Notes

  1. Keep an eye on your quick bread. If it starts to brown too much before the 50 minutes, cover your bread pan with foil and place back into the oven to finish cooking.
  • Prep Time: 10 min
  • Cook Time: 50 min
  • Category: Dessert
  • Method: Bake
  • Cuisine: American

Nutrition

  • Serving Size: 1 Slice
  • Calories: 233
  • Sugar: 13g
  • Sodium: 180mg
  • Fat: 11g
  • Carbohydrates: 29g
  • Fiber: 2g
  • Protein: 3g
  • Cholesterol: 27mg
Recipe Card powered byTasty Recipes