How to Use Your HSA/FSA Card for Nutrtion Counseling

Using your FSA or HSA for nutrition services is a smart way to invest in your health while saving money. These accounts can help cover things like nutrition counseling, meal planning, and other services that support your wellness goals. In this post, I’ll break down how to use your FSA or HSA for nutrition care and why it’s such a great option. Let’s make prioritizing your health easier and more affordable!

What are HSA/FSA?

Let’s quickly breakdown what exactly HSA and FSA accounts are.

Health Savings Account (HSA): An HSA is a tax-advantaged savings account designed to help you pay for qualified medical expenses. Contributions are tax-deductible, and withdrawals for eligible expenses are tax-free, making it a great tool for managing healthcare costs.

Flexible Spending Account (FSA): An FSA is a pre-tax benefit account that lets you set aside funds for qualified medical expenses. Unlike an HSA, FSAs are often provided through employers and may come with a “use-it-or-lose-it” policy, so it’s important to plan your spending wisely.

Both accounts can be used to pay for a wide range of health-related expenses, including nutrition counseling.

Step-by-Step Guide to Using Your HSA/FSA with Thrive Nutrition RDN

1. Verify Your Eligibility

  • Before getting started, confirm that nutrition counseling qualifies as an eligible expense under your HSA or FSA plan. While counseling provided by a licensed dietitian or nutritionist is typically covered, it’s always wise to check with your plan provider to understand the specific requirements and coverage details.

2. Obtain a Letter of Medical Necessity from a Healthcare Provider

  • A Letter of Medical Necessity (LMN) is a document written by a healthcare provider that explains the medical need for a specific treatment or service. For nutrition counseling, it highlights why the service is essential for your health and how it supports your treatment plan. This document typically includes:

    • Relevant diagnosis or medical condition(s)
    • How nutrition counseling will address your condition
    • The expected duration and frequency of counseling
    • The credentials of the dietitian or nutritionist providing the service

3. Book Your Free Discovery Call

4. Pay with your HSA/FSA Card

  • Paying with your HSA/FSA card is simple through our booking and payment portal, Healthie. Just enter your card details as you would with any credit card, and the payment will be processed directly through your account—streamlined and stress-free!

5. Keep Your Receipts

    • With each payment, you’ll receive a copy of your invoice—be sure to save it! This documentation is important for your records and can be submitted to your HSA/FSA administrator along with your Letter of Medical Necessity, if required for reimbursement or verification.

Why Choose Thrive Nutrition RDN?

At Thrive Nutrition RDN, I’m here to help you find freedom with food while working toward your unique health goals. Forget the strict rules and one-size-fits-all plans—together, we’ll create a personalized approach that fits your life and helps you feel your best. Plus, using your HSA/FSA funds makes it even easier to invest in yourself and take advantage of the benefits you already have!

Ready to Thrive?

Book your free 15-minute discovery call to get started! During the call, we can discuss your goals, answer any questions, and explore how Thrive Nutrition RDN can support you on your journey to better health.

Facebook
Twitter
LinkedIn
Email
Pinterest

Pumpkin Roll Out Cookies

Pumpkin Roll Out Cookies

Print

clock clock iconcutlery cutlery iconflag flag iconfolder folder iconinstagram instagram iconpinterest pinterest iconfacebook facebook iconprint print iconsquares squares iconheart heart iconheart solid heart solid icon

Pumpkin Roll Out Cookies


5 Stars 4 Stars 3 Stars 2 Stars 1 Star

No reviews


  • Author:
    Amy MS, RD, LDN


  • Total Time:
    42 minutes


  • Yield:
    24 Cookies 1x


  • Diet:
    Vegetarian


Description

Soft, spiced, and perfectly festive, these pumpkin roll-out cookies are a family favorite! Easy to cut into fun shapes and topped with a sprinkles for even more fun, they’re perfect for holiday baking or a cozy weekend treat.


Ingredients


Units


Scale

  • 1/2 cup Unsalted Butter, softened
  • 1/2 cup Maple Syrup
  • 1/4 cup Brown Sugar
  • 1/2 cup Pumpkin Puree
  • 1 tsp Vanilla Extract
  • 1 cup White Whole Wheat Flour
  • 1 1/4 cup All Purpose Flour
  • 3/4 tsp Baking Powder
  • 2 1/2 tsp Pumpkin Pie Spice
  • 1/4 tsp Kosher Salt


Instructions

  1. In a medium sized mixing bowl, add the flours, baking powder, pumpkin pie spice and salt. Whisk together and set aside.
  2. In the bowl of a stand mixer, add the wet ingredients: butter, maple syrup, brown sugar, pumpkin puree and vanilla extract. Mix on low, then increase the speed to medium and cream together the ingredients until light and fluffy.
  3. Next, turn the mixer to low and slowly add the dry ingredients. Mix until the dough comes together.
  4. Cover the dough with plastic wrap and refrigerate for at least 30 minutes.
  5. Preheat your oven to 350 F.
  6. Roll the dough out to about 1/4 inch thick. Using your cookie cutters, cut the cookies into your favorite shapes. (Top with sprinkles to jazz them up if you’d like!)
  7. Place the cookies onto a silpat lined sheet tray.
  8. Bake for 12-15 minutes until the cookies are set.
  9. Remove from the oven and allow to cool on a wire rack. Enjoy!

  • Prep Time: 30 minutes
  • Cook Time: 12
  • Category: Dessert
  • Method: Bake
  • Cuisine: American

Nutrition

  • Serving Size: 1 Cookie
  • Calories: 104
  • Sugar: 6g
  • Sodium: 48mg
  • Fat: 4g
  • Carbohydrates: 16g
  • Fiber: 1g
  • Protein: 1g
  • Cholesterol: 10mg

Recipe Card powered byTasty Recipes

Peppermint Hot Chocolate

Peppermint Hot Chocolate

Print
clock clock iconcutlery cutlery iconflag flag iconfolder folder iconinstagram instagram iconpinterest pinterest iconfacebook facebook iconprint print iconsquares squares iconheart heart iconheart solid heart solid icon

Peppermint Hot Chocolate


5 Stars 4 Stars 3 Stars 2 Stars 1 Star

No reviews

  • Author: Amy MS, RD, LDN
  • Total Time: 7 minutes
  • Yield: 2 Servings 1x
  • Diet: Vegan

Description

Peppermint Hot Chocolate is the perfect cozy drink on a winter day. Dairy-free & naturally-sweetened.


Ingredients

Units Scale
  • 2 cups Unsweetened Soy Milk
  • 4 Pitted Dates
  • 2 tbsp Cocoa Powder
  • 2 tbsp Maple Syrup
  • 1/2 tsp Vanilla Extract
  • 1/8 tsp Peppermint Extract
  • Crushed Candy cane or marshmallows, optional for serving

Instructions

  1. Place the soy milk into a microwave safe container. Microwave for 1-2 minutes to heat it up.
  2. Pour the warm milk into a blender, then add the remaining ingredients to the blender.
  3. Blend on high for 1 minute until the mixture is smooth.
  4. Pour into two mugs and top with crushed candy canes, enjoy!
  • Prep Time: 5 minutes
  • Cook Time: 2
  • Category: Drink
  • Method: Blender
  • Cuisine: American

Nutrition

  • Serving Size: 1
  • Calories: 143
  • Sugar: 23g
  • Sodium: 13mg
  • Fat: 2g
  • Carbohydrates: 30g
  • Fiber: 4g
  • Protein: 5g
  • Cholesterol: 0mg
Recipe Card powered byTasty Recipes

Festive Chocolate Bark

Festive Chocolate Bark

Festive Chocolate Bark
Print
clock clock iconcutlery cutlery iconflag flag iconfolder folder iconinstagram instagram iconpinterest pinterest iconfacebook facebook iconprint print iconsquares squares iconheart heart iconheart solid heart solid icon
Festive Chocolate Bark

Festive Chocolate Bark


5 Stars 4 Stars 3 Stars 2 Stars 1 Star

No reviews

  • Author: Amy MS, RD, LDN
  • Total Time: 10 minutes
  • Yield: 25 pieces 1x

Description

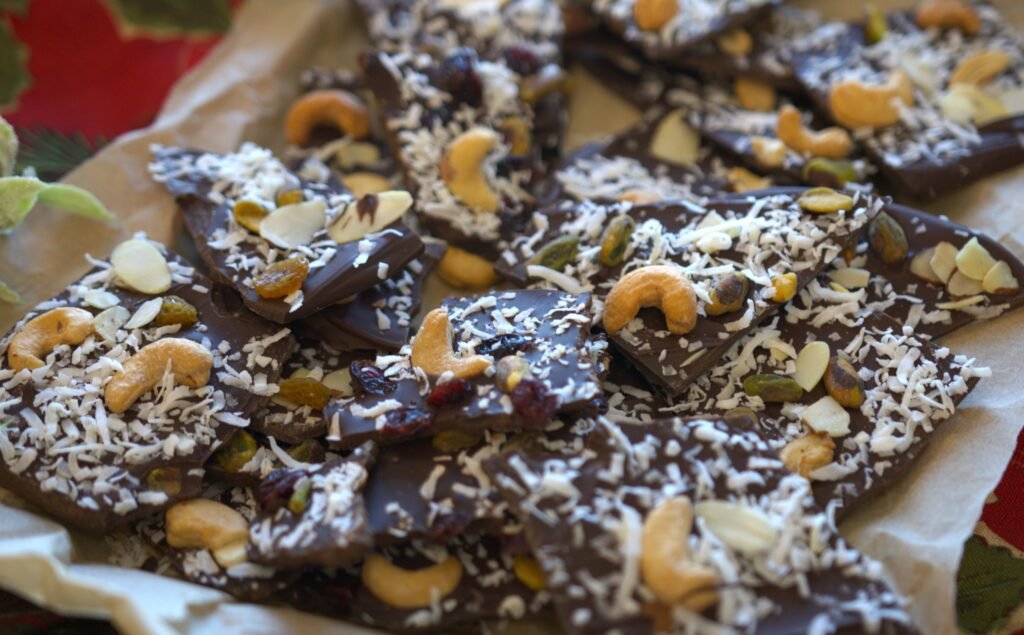
This chocolate bark is loaded with crunchy nuts and sweet dried fruit, it’s the perfect mix of sweet, salty, and satisfying. Easy to make, totally customizable, and a hit at any holiday gathering—or just for you with a cozy cup of cocoa.


Ingredients

Units Scale
  • 12 oz Chocolate Chips (choose your favorite, dark, semi-sweet or milk chocolate)
  • 3/4 cup Nuts and/or Seeds (I like cashews, pistachios, slivered almonds, pepitas)
  • 1/4 cup Dried Cranberries or Cherries
  • 1/4 cup Unsweetened Shredded Coconut
  • Pinch Flaky Sea Salt

Instructions

  1. Cover a large sheet tray with a silpat or parchment paper, set aside.
  2. Melt the chocolate in a microwave safe bowl, on 30-second intervals, stirring in between each one. (You can also melt the chocolate in a heat-proof bowl over a saucepan of simmering water.)
  3. Using a rubber spatula, pour the chocolate onto the center of the tray and spread it out evenly until it is about 1/4″ thick. It will likely not reach the edges of your sheet tray.
  4. Sprinkle your toppings over top, the nuts/seeds, dried fruit, coconut and finally sea salt. Give the toppings a little press into the chocolate with the palms of your hands or back of a spatula.
  5. Place the sheet tray into the fridge so that the chocolate can set for 15 minutes.
  6. Once the chocolate has hardened, use your hands to break it into pieces. Enjoy!
  • Prep Time: 10 minutes
  • Category: Dessert, Holiday
  • Method: No Bake
  • Cuisine: American

Nutrition

  • Serving Size: 1 piece
  • Calories: 104
  • Sugar: 9g
  • Sodium: 11mg
  • Fat: 7g
  • Carbohydrates: 11g
  • Fiber: 2g
  • Protein: 2g
  • Cholesterol: 5mg
Recipe Card powered byTasty Recipes

Easy Maple Glazed Carrots

Easy Maple Glazed Carrots

Print
clock clock iconcutlery cutlery iconflag flag iconfolder folder iconinstagram instagram iconpinterest pinterest iconfacebook facebook iconprint print iconsquares squares iconheart heart iconheart solid heart solid icon

Easy Maple Glazed Carrots


5 Stars 4 Stars 3 Stars 2 Stars 1 Star

No reviews

  • Author: Amy MS, RD, LDN
  • Total Time: 10 minutes
  • Yield: 4 Servings 1x

Ingredients

Units Scale
  • 1 lb Carrots, peeled and ends trimmed
  • 1/2 tbsp unsalted Butter
  • 1/2 tbsp Olive Oil
  • 1 tbsp Maple Syrup
  • 1/8 tsp Kosher Salt
  • Ground Black Pepper
  • Parsley, minced for Garnish (Optional)

Instructions

  1. Prep your carrots by slicing them into sticks
  2. Heat a large cast iron pan or sautee pan over medium high heat.
  3. When you pan is warm, add the butter and olive oil.
  4. Next add the carrots, salt and pepper and cook, for 4-5 minutes, stirring occasionally or tossing carrots in the pan so that they brown evenly.
  5. Then add the maple syrup to the pan and cook for an additional minute.
  6. Serve hot or warm. Top with parsley if desired. Enjoy!
  • Prep Time: 5 minutes
  • Cook Time: 5
  • Category: Sides, Holiday
  • Method: Sautee
  • Cuisine: American

Nutrition

  • Serving Size: 1 Serving
  • Calories: 160
  • Sugar: 9g
  • Sodium: 150mg
  • Fat: 5g
  • Carbohydrates: 40g
  • Fiber: 10g
  • Protein: 3g
  • Cholesterol: 4mg
Recipe Card powered byTasty Recipes

Are Seed Oils Toxic? Debunking the Myths with Science

If you’ve been following nutrition trends lately, you’ve probably come across the buzz about seed oils. Many influencers are calling them “toxic” and even lumping them in with the so-called “hateful eight.” But is there any real science behind these claims, or is it just hype? As a registered dietitian, I’m here to break down the evidence and clear up the confusion.

First, What Exactly Are Seed Oils?

Seed oils come from the seeds of various plants, not their fruits. Some common ones include:  

  • Canola Oil (from rapeseed)
  • Sunflower Oil (from sunflower seeds) 
  • Grapeseed Oil (from grape seeds) 
  • Safflower Oil (from safflower seeds) 
  • Corn Oil 
  • Cottonseed Oil 
  • Rice Bran Oil 
  • Soybean Oil  

These oils are mainly made up of unsaturated fats, particularly polyunsaturated fatty acids (PUFAs), which include omega-6 fatty acids. While omega-6s are important for our health, the high amounts in seed oils have some influencers pretty fired up.

Why All the Hype?

The idea that seed oils are toxic has really picked up steam on social media. Influencers often claim there’s a direct link between the rise in seed oils and the increase in chronic illnesses. While there is some truth to the fact that many processed foods contain seed oils, that doesn’t automatically mean they’re the cause of health problems. Other factors—like our sedentary lifestyles and overall diet quality—play a much bigger role in our health.

A classic example of mixing up correlation and causation is the “ice cream and shark attacks” correlation. During the summer, ice cream sales go up, and so do shark attacks—does that mean ice cream is luring sharks? Of course not! It’s just that both are tied to the same thing: people hitting the beach in warmer weather.

Are Seed Oils Really That Bad?
Short answer: not in the way people often claim. In fact, research shows that linoleic acid (the omega-6 fatty acid in seed oils) might actually help reduce inflammation. A big review of 30 studies found that higher linoleic acid intake was linked to a lower risk of heart disease and even death. Plus, another review from the Cochrane group found that upping omega-6 fats could lower heart attack risk without major effects on other heart-related issues. So, turns out, seed oils might not be the villain they’re made out to be.

The Omega-6 Debate
Omega-6 fatty acids are essential for a lot of important functions in our bodies, like keeping our cell membranes healthy. One type of omega-6, linoleic acid, is found in high amounts in seed oils. Critics often claim that too much omega-6 causes inflammation, which could lead to issues like diabetes, heart disease, and even headaches.

But here’s the thing: only about 0.2% of the linoleic acid we consume  actually turns into arachidonic acid, which is linked to inflammation. Plus, arachidonic acid has anti-inflammatory properties too. This important detail often gets glossed over by those calling out seed oils.

The Bottom Line on Seed Oils
The idea that seed oils are toxic is often blown way out of proportion for the sake of clicks and drama. Sure, some people feel better after ditching seed oils, but let’s not forget they’re usually cutting out a lot of processed foods too, which are packed with refined carbs and sugars.

If your diet is heavy on fast food and processed junk, swapping those out for whole foods will definitely boost your health. But there’s no need to stress over using seed oils in moderation or having the occasional snack that contains them.

For a healthier lifestyle, focus more on boosting your omega-3s (think walnuts, salmon, and flaxseed) instead of turning omega-6s into the villain. Getting the facts straight about seed oils and their role in our diet is key. Instead of falling for fear-mongering, let’s focus on the evidence and make informed choices about what we eat!

References:


Hooper, L., Al-Khudairy, L., Abdelhamid, A. S., Rees, K., Brainard, J. S., Brown, T. J., Ajabnoor, S. M., O’Brien, A. T., Winstanley, L. E., Donaldson, D. H., Song, F., & Deane, K. H. (2018). Omega-6 fats for the primary and secondary prevention of cardiovascular disease. Cochrane Database of Systematic Reviews, 2018(11). https://doi.org/10.1002/14651858.CD011094.pub4
Innes, J. K., & Calder, P. C. (2018). Omega-6 fatty acids and inflammation. Prostaglandins, Leukotrienes and Essential Fatty Acids, 132, 41–48. https://doi.org/10.1016/j.plefa.2018.03.004
Katanbaf, M. N., Siegel, P. B., & Gross, W. B. (1987). Prior experience and response of chickens to a streptococcal infection. Poultry Science, 66(12), 2053–2055. https://doi.org/10.3382/ps.0662053
Marklund, M., Wu, J. H. Y., Imamura, F., Del Gobbo, L. C., Fretts, A., de Goede, J., Shi, P., Tintle, N., Wennberg, M., Aslibekyan, S., Chen, T.-A., de Oliveira Otto, M. C., Hirakawa, Y., Eriksen, H. H., Kröger, J., Laguzzi, F., Lankinen, M., Murphy, R. A., Prem, K., … Cohorts for Heart and Aging Research in Genomic Epidemiology (CHARGE) Fatty Acids and Outcomes Research Consortium (FORCE). (2019). Biomarkers of Dietary Omega-6 Fatty Acids and Incident Cardiovascular Disease and Mortality. Circulation, 139(21), 2422–2436. https://doi.org/10.1161/CIRCULATIONAHA.118.038908
Marklund, M., Wu, J. H. Y., Imamura, F., Del Gobbo, L. C., Fretts, A., De Goede, J., Shi, P., Tintle, N., Wennberg, M., Aslibekyan, S., Chen, T.-A., De Oliveira Otto, M. C., Hirakawa, Y., Eriksen, H. H., Kröger, J., Laguzzi, F., Lankinen, M., Murphy, R. A., Prem, K., … For the Cohorts for Heart and Aging Research in Genomic Epidemiology (CHARGE) Fatty Acids and Outcomes Research Consortium (FORCE). (2019). Biomarkers of Dietary Omega-6 Fatty Acids and Incident Cardiovascular Disease and Mortality: An Individual-Level Pooled Analysis of 30 Cohort Studies. Circulation, 139(21), 2422–2436. https://doi.org/10.1161/CIRCULATIONAHA.118.038908
Mojtaba Yousefi 1 2,  Hedayat Hosseini. (n.d.). Evaluation of Hexane Content in Edible Vegetable Oils Consumed in Iran. https://doi.org/10.14302/issn.2641-7669.ject-17-1790
Pereira, M., Liang, J., Edwards-Hicks, J., Meadows, A. M., Hinz, C., Liggi, S., Hepprich, M., Mudry, J. M., Han, K., Griffin, J. L., Fraser, I., Sack, M. N., Hess, C., & Bryant, C. E. (2024). Arachidonic acid inhibition of the NLRP3 inflammasome is a mechanism to explain the anti-inflammatory effects of fasting. Cell Reports, 43(2), 113700. https://doi.org/10.1016/j.celrep.2024.113700
Virtanen, J. K., Wu, J. H. Y., Voutilainen, S., Mursu, J., & Tuomainen, T.-P. (2018). Serum n–6 polyunsaturated fatty acids and risk of death: the Kuopio Ischaemic Heart Disease Risk Factor Study. The American Journal of Clinical Nutrition, 107(3), 427–435. https://doi.org/10.1093/ajcn/nqx063
Facebook
Twitter
LinkedIn
Email
Pinterest

If you’ve been following nutrition trends lately, you’ve probably come across the buzz about seed oils. Many influencers are calling them “toxic” and even lumping them in with the so-called “hateful eight.” But is there any real science behind these claims, or is it just hype? As a registered dietitian, I’m here to break down the evidence and clear up the confusion.

First, What Exactly Are Seed Oils?

Seed oils come from the seeds of various plants, not their fruits. Some common ones include:  

  • Canola Oil (from rapeseed)
  • Sunflower Oil (from sunflower seeds) 
  • Grapeseed Oil (from grape seeds) 
  • Safflower Oil (from safflower seeds) 
  • Corn Oil 
  • Cottonseed Oil 
  • Rice Bran Oil 
  • Soybean Oil  

These oils are mainly made up of unsaturated fats, particularly polyunsaturated fatty acids (PUFAs), which include omega-6 fatty acids. While omega-6s are important for our health, the high amounts in seed oils have some influencers pretty fired up.

Why All the Hype?

The idea that seed oils are toxic has really picked up steam on social media. Influencers often claim there’s a direct link between the rise in seed oils and the increase in chronic illnesses. While there is some truth to the fact that many processed foods contain seed oils, that doesn’t automatically mean they’re the cause of health problems. Other factors—like our sedentary lifestyles and overall diet quality—play a much bigger role in our health.

A classic example of mixing up correlation and causation is the “ice cream and shark attacks” correlation. During the summer, ice cream sales go up, and so do shark attacks—does that mean ice cream is luring sharks? Of course not! It’s just that both are tied to the same thing: people hitting the beach in warmer weather.

Are Seed Oils Really That Bad?
Short answer: not in the way people often claim. In fact, research shows that linoleic acid (the omega-6 fatty acid in seed oils) might actually help reduce inflammation. A big review of 30 studies found that higher linoleic acid intake was linked to a lower risk of heart disease and even death. Plus, another review from the Cochrane group found that upping omega-6 fats could lower heart attack risk without major effects on other heart-related issues. So, turns out, seed oils might not be the villain they’re made out to be.

The Omega-6 Debate
Omega-6 fatty acids are essential for a lot of important functions in our bodies, like keeping our cell membranes healthy. One type of omega-6, linoleic acid, is found in high amounts in seed oils. Critics often claim that too much omega-6 causes inflammation, which could lead to issues like diabetes, heart disease, and even headaches.

But here’s the thing: only about 0.2% of the linoleic acid we consume  actually turns into arachidonic acid, which is linked to inflammation. Plus, arachidonic acid has anti-inflammatory properties too. This important detail often gets glossed over by those calling out seed oils.

The Bottom Line on Seed Oils
The idea that seed oils are toxic is often blown way out of proportion for the sake of clicks and drama. Sure, some people feel better after ditching seed oils, but let’s not forget they’re usually cutting out a lot of processed foods too, which are packed with refined carbs and sugars.

If your diet is heavy on fast food and processed junk, swapping those out for whole foods will definitely boost your health. But there’s no need to stress over using seed oils in moderation or having the occasional snack that contains them.

For a healthier lifestyle, focus more on boosting your omega-3s (think walnuts, salmon, and flaxseed) instead of turning omega-6s into the villain. Getting the facts straight about seed oils and their role in our diet is key. Instead of falling for fear-mongering, let’s focus on the evidence and make informed choices about what we eat!

References:


Hooper, L., Al-Khudairy, L., Abdelhamid, A. S., Rees, K., Brainard, J. S., Brown, T. J., Ajabnoor, S. M., O’Brien, A. T., Winstanley, L. E., Donaldson, D. H., Song, F., & Deane, K. H. (2018). Omega-6 fats for the primary and secondary prevention of cardiovascular disease. Cochrane Database of Systematic Reviews, 2018(11). https://doi.org/10.1002/14651858.CD011094.pub4
Innes, J. K., & Calder, P. C. (2018). Omega-6 fatty acids and inflammation. Prostaglandins, Leukotrienes and Essential Fatty Acids, 132, 41–48. https://doi.org/10.1016/j.plefa.2018.03.004
Katanbaf, M. N., Siegel, P. B., & Gross, W. B. (1987). Prior experience and response of chickens to a streptococcal infection. Poultry Science, 66(12), 2053–2055. https://doi.org/10.3382/ps.0662053
Marklund, M., Wu, J. H. Y., Imamura, F., Del Gobbo, L. C., Fretts, A., de Goede, J., Shi, P., Tintle, N., Wennberg, M., Aslibekyan, S., Chen, T.-A., de Oliveira Otto, M. C., Hirakawa, Y., Eriksen, H. H., Kröger, J., Laguzzi, F., Lankinen, M., Murphy, R. A., Prem, K., … Cohorts for Heart and Aging Research in Genomic Epidemiology (CHARGE) Fatty Acids and Outcomes Research Consortium (FORCE). (2019). Biomarkers of Dietary Omega-6 Fatty Acids and Incident Cardiovascular Disease and Mortality. Circulation, 139(21), 2422–2436. https://doi.org/10.1161/CIRCULATIONAHA.118.038908
Marklund, M., Wu, J. H. Y., Imamura, F., Del Gobbo, L. C., Fretts, A., De Goede, J., Shi, P., Tintle, N., Wennberg, M., Aslibekyan, S., Chen, T.-A., De Oliveira Otto, M. C., Hirakawa, Y., Eriksen, H. H., Kröger, J., Laguzzi, F., Lankinen, M., Murphy, R. A., Prem, K., … For the Cohorts for Heart and Aging Research in Genomic Epidemiology (CHARGE) Fatty Acids and Outcomes Research Consortium (FORCE). (2019). Biomarkers of Dietary Omega-6 Fatty Acids and Incident Cardiovascular Disease and Mortality: An Individual-Level Pooled Analysis of 30 Cohort Studies. Circulation, 139(21), 2422–2436. https://doi.org/10.1161/CIRCULATIONAHA.118.038908
Mojtaba Yousefi 1 2,  Hedayat Hosseini. (n.d.). Evaluation of Hexane Content in Edible Vegetable Oils Consumed in Iran. https://doi.org/10.14302/issn.2641-7669.ject-17-1790
Pereira, M., Liang, J., Edwards-Hicks, J., Meadows, A. M., Hinz, C., Liggi, S., Hepprich, M., Mudry, J. M., Han, K., Griffin, J. L., Fraser, I., Sack, M. N., Hess, C., & Bryant, C. E. (2024). Arachidonic acid inhibition of the NLRP3 inflammasome is a mechanism to explain the anti-inflammatory effects of fasting. Cell Reports, 43(2), 113700. https://doi.org/10.1016/j.celrep.2024.113700
Virtanen, J. K., Wu, J. H. Y., Voutilainen, S., Mursu, J., & Tuomainen, T.-P. (2018). Serum n–6 polyunsaturated fatty acids and risk of death: the Kuopio Ischaemic Heart Disease Risk Factor Study. The American Journal of Clinical Nutrition, 107(3), 427–435. https://doi.org/10.1093/ajcn/nqx063
Facebook
Twitter
LinkedIn
Email
Pinterest

Air Fryer Chickpea Chocolate Chip Cookie Bites

Air Fryer Chickpea Chocolate Chip Cookie Bites

Print

clock clock iconcutlery cutlery iconflag flag iconfolder folder iconinstagram instagram iconpinterest pinterest iconfacebook facebook iconprint print iconsquares squares iconheart heart iconheart solid heart solid icon

Air Fryer Chickpea Chocolate Chip Cookie Bites


5 Stars 4 Stars 3 Stars 2 Stars 1 Star

No reviews


  • Author:
    Amy MS, RD, LDN


  • Total Time:
    10 minutes


  • Yield:
    25 Cookie Bites 1x


  • Diet:
    Gluten Free


Description

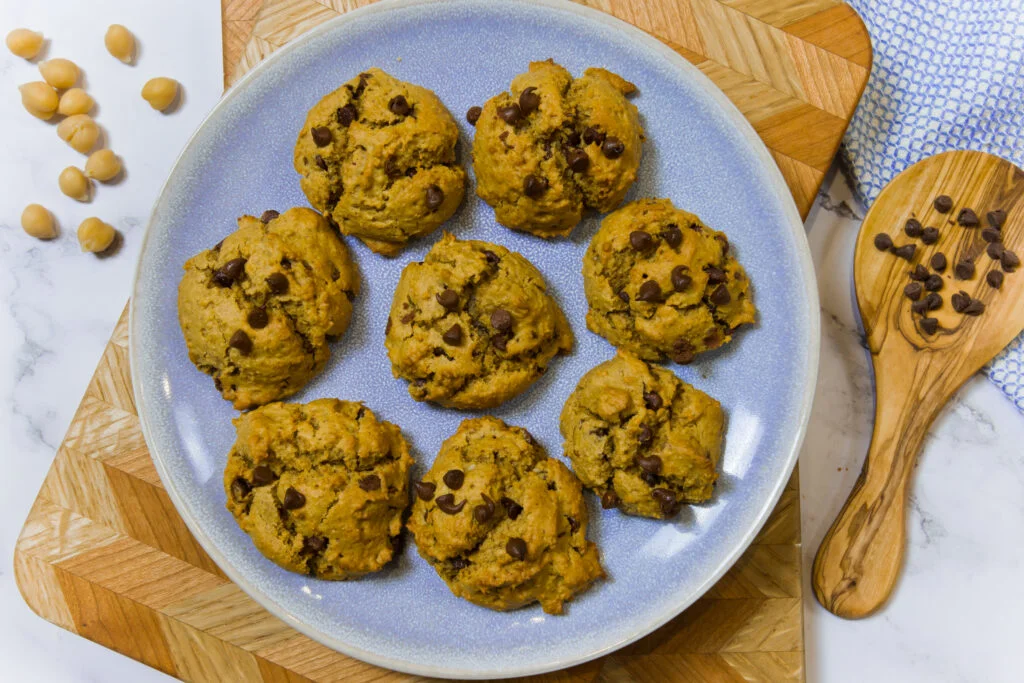
Air Fryer Cookie Dough Chickpea Bites are a healthier, delicious twist on traditional cookie dough treats. Made with chickpeas for added protein and fiber, they’re crispy on the outside and soft on the inside, making them a great snack, or fiber-filled dessert treat!


Ingredients


Units


Scale

  • 1 can, 15 oz Chickpeas, drained and rinsed
  • 1/2 cup Peanut Butter
  • 1/3 cup Maple Syrup
  • 2 tsp Vanilla Extract
  • 1 Egg
  • 1 tsp Ground Flaxseed
  • 1/2 tsp Kosher Salt
  • 1/2 tsp Baking Powder
  • 1/2 tsp Baking Soda
  • 1/2 tsp Cinnamon
  • 1/2 cup Oat Flour
  • 1/3 cup Mini Chocolate Chips


Instructions

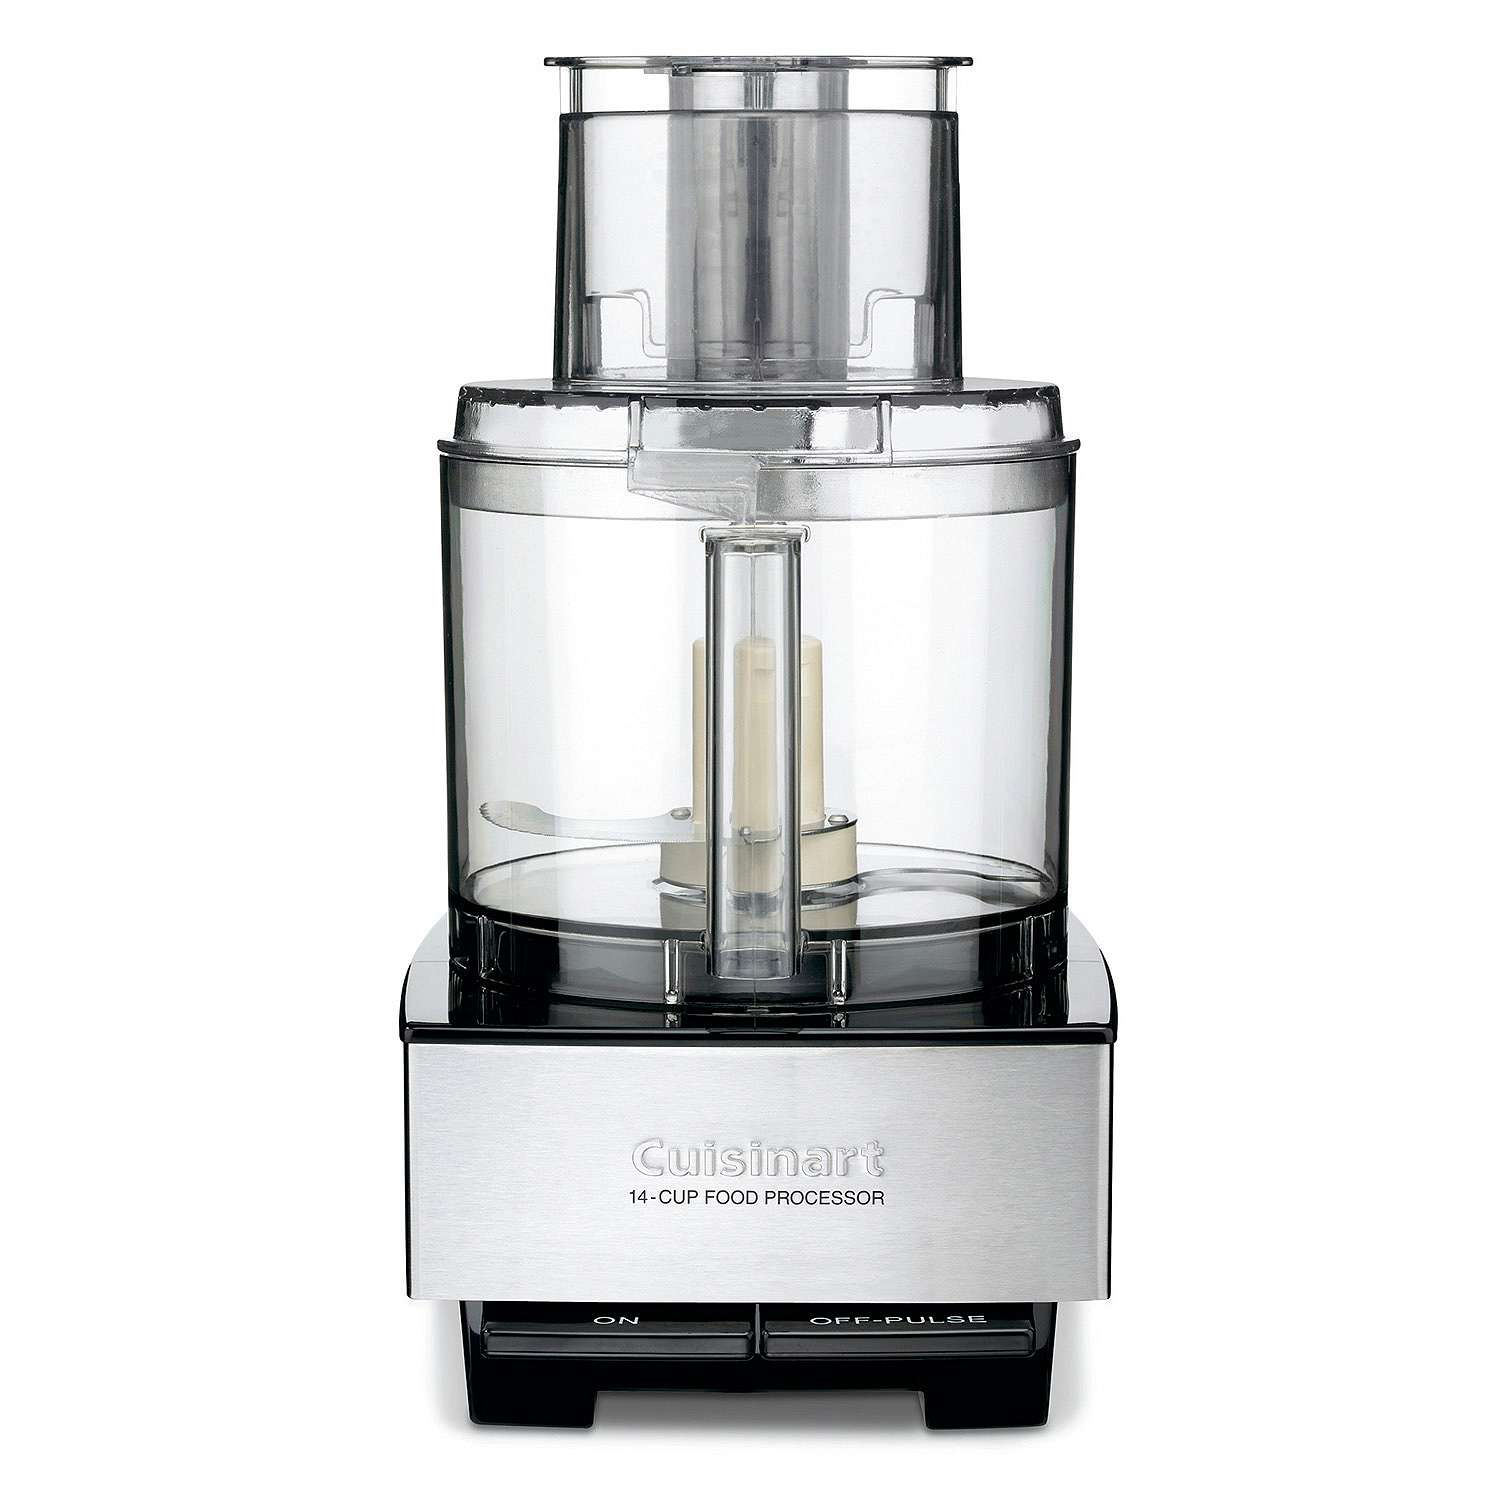
  1. To a food processor or high-powered blender, add all the ingredients except the chocolate chips.
  2. Process the dough until smooth, about 1-2 minutes.
  3. Take the blade out of the food processor, or alternatively pour the dough into a bowl, then add the chocolate chips and stir into the batter with a spatula.
  4. Preheat your air fryer to 350° F.
  5. Spray the inside of your air fryer basket with nonstick spray.
  6. Scoop 1 tablespoon size portions and place into the air fryer, spacing each cookie bite 2 inches apart.
  7. Air fry on 350° F for 7-10 minutes, depending on your air fryer.
  8. Allow to cool for 10 minutes before digging in, enjoy!

  • Prep Time: 10 minutes
  • Category: Dessert, Snack
  • Method: Air Fry
  • Cuisine: American

Nutrition

  • Serving Size: 1
  • Calories: 86
  • Sugar: 3g
  • Sodium: 159mg
  • Fat: 4g
  • Carbohydrates: 9g
  • Fiber: 1g
  • Protein: 4g
  • Cholesterol: 40mg

Recipe Card powered byTasty Recipes

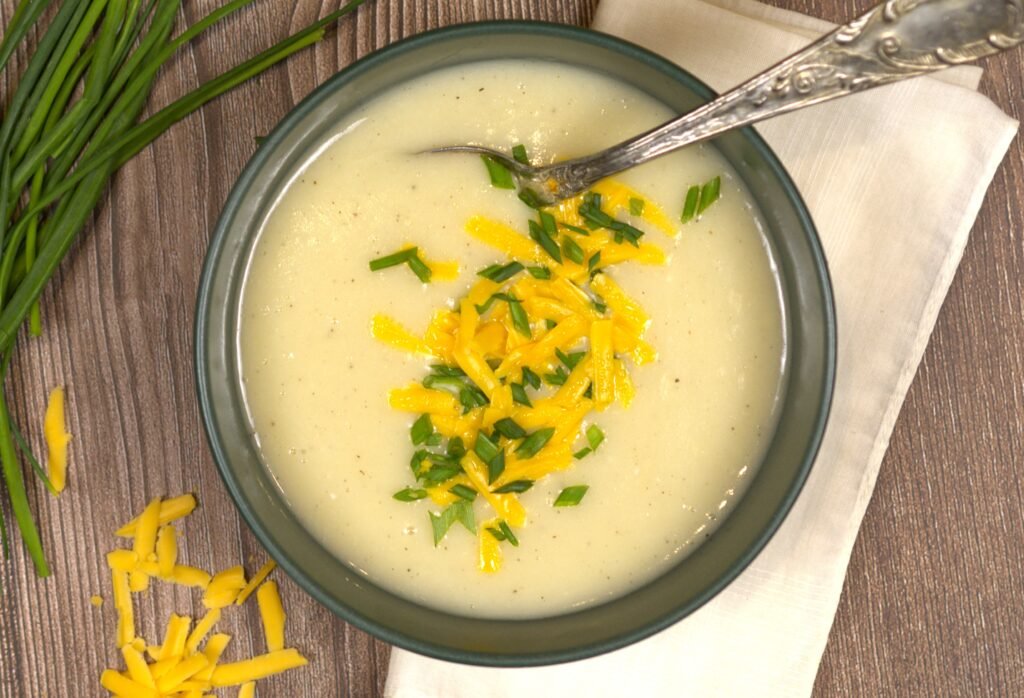
Healthy Baked Potato Soup

Creamy, comforting and absolutely delicious, this healthy baked potato soup wins at dinner time, every time!

Healthy Baked Potato Soup

Print
clock clock iconcutlery cutlery iconflag flag iconfolder folder iconinstagram instagram iconpinterest pinterest iconfacebook facebook iconprint print iconsquares squares iconheart heart iconheart solid heart solid icon

Healthy Baked Potato Soup


5 Stars 4 Stars 3 Stars 2 Stars 1 Star

No reviews

  • Author: Amy MS, RD, LDN
  • Total Time: 30 minutes
  • Yield: 5 Servings 1x
  • Diet: Vegetarian

Description

This healthy baked potato soup with cauliflower is a creamy, lighter twist on the classic. Cauliflower adds extra fiber and smoothness, while keeping the dish rich and satisfying. This is the perfect comfort soup, especially when topped with chives and cheddar cheese.


Ingredients

Units Scale
  • 2 Large Russet Potatoes, peeled and diced into 1-inch pieces
  • 4 cups Frozen Cauliflower florets
  • 1 1/2 cups Vegetable Stock
  • 1 1/2 cups Milk
  • 1/2 cup Greek Yogurt
  • 2 tsp Kosher Salt
  • 3/4 tsp Ground Black Pepper

Instructions

  1. To a dutch oven or large pot, add the vegetable stock, diced potato, frozen cauliflower and 1 tsp salt. Bring mixture to a boil, then lower the heat and simmer for 10-12 minutes, until the potatoes are tender.
  2. Using an immersion blender, blend the cauliflower, potato mixture until smooth.
  3. Then, to the pot add the milk, Greek Yogurt and remaining salt and pepper. Stir together with a wooden spoon or spatula to combine. Turn the heat to low to cook the soup through for an additional 5 minutes.
  4. Taste for seasoning and add salt and preference to taste.
  5. Top with chives, cheddar cheese or crumbled bacon. Enjoy!
  • Prep Time: 10 minutes
  • Cook Time: 20 minutes
  • Category: Dinner, Soup
  • Method: Stovetop
  • Cuisine: American

Nutrition

  • Serving Size: 1/5
  • Calories: 121
  • Sugar: 6g
  • Sodium: 350mg
  • Fat: 2g
  • Carbohydrates: 19g
  • Fiber: 3g
  • Protein: 7g
  • Cholesterol: 7mg
Recipe Card powered byTasty Recipes

Cauliflower Alfredo with Roast Chicken & Broccoli

Cauliflower Alfredo with Roast Chicken & Broccoli

Print
clock clock iconcutlery cutlery iconflag flag iconfolder folder iconinstagram instagram iconpinterest pinterest iconfacebook facebook iconprint print iconsquares squares iconheart heart iconheart solid heart solid icon

Cauliflower Alfredo with Roast Chicken and Broccoli


5 Stars 4 Stars 3 Stars 2 Stars 1 Star

No reviews

  • Author: Amy MS, RD, LDN
  • Total Time: 45 minutes
  • Yield: 8 Servings 1x

Ingredients

Units Scale

Cauliflower Alfredo:

  • 2 cups Cauliflower Florets (frozen works well here)
  • 1 cup Almond Milk, unsweetened (or milk of your choice)
  • 3 tbsp Olive Oil
  • 3 Garlic Cloves, minced
  • 1 1/2 cup Parmesan Cheese, grated
  • 1 lb Whole Wheat Fettuccine Pasta
  • Salt and pepper to taste

Oven Roast Garlic Chicken & Broccoli:

  • 1 lb Boneless, Skinless Chicken Breasts
  • 1/2 tsp Salt
  • 1/4 tsp Ground Black Pepper
  • 3/4 tsp Garlic Powder
  • 2 tsp Olive Oil
  • 2 Heads Broccoli

Instructions

Cauliflower Alfredo:

  1. Bring a large pot of salted water to a boil. Add the 2 cups of cauliflower and cook for 2 minutes then remove with a slotted spoon to your colander to drain.
  2. Add the fettuccine to the boiling water and cook according to the package directions. Note: Do not drain the pasta, we may need some pasta water for the sauce!
  3. While the pasta cooks, continue the Alfredo sauce.
  4. In a blender or food processor, combine the cooked cauliflower and milk. Puree until smooth.
  5. In a large skillet over medium-low heat, add the olive oil. Then add the garlic and cook for 2 minutes.
  6. Next, gently pour the cauliflower puree into the olive oil and garlic and stir to combine.
  7. Then, turn the heat to low and add the Parmesan cheese and stir into the sauce to melt.
  8. Taste for seasonings and add pepper and salt to your liking.
  9. Then, add the pasta directly into the Alfredo sauce. Using tongs toss the pasta to coat with the sauce.
  10. Top the pasta with your roasted chicken and broccoli, enjoy!

Roast Chicken & Broccoli:

  1. Preheat oven to 400° F. Line a sheet tray with foil or parchment paper.
  2. Prepare the broccoli by cutting the florets off the stem and set aside.
  3. Lay the chicken breasts onto the sheet tray. Top evenly with olive oil, salt, pepper and garlic powder.
  4. Place into the oven and bake for 25 minutes, until the chicken reaches 165° F.
  5. At the 15 minute mark, add the broccoli to the sheet tray to roast.
  6. Remove from the oven and slice the chicken breast to serve over the pasta with the roasted broccoli.
  • Prep Time: 20 minutes
  • Cook Time: 25 minutes
  • Category: Dinner, Entree, Main
  • Method: Stovetop, Oven
  • Cuisine: Italian

Nutrition

  • Serving Size: 1/8
  • Calories: 483
  • Sugar: 3g
  • Sodium: 742mg
  • Fat: 15g
  • Carbohydrates: 52g
  • Fiber: 10g
  • Protein: 35g
  • Cholesterol: 72mg
Recipe Card powered byTasty Recipes

Pumpkin Blondies (Gluten Free)

Pumpkin Blondies (Gluten Free)

Print
clock clock iconcutlery cutlery iconflag flag iconfolder folder iconinstagram instagram iconpinterest pinterest iconfacebook facebook iconprint print iconsquares squares iconheart heart iconheart solid heart solid icon

Pumpkin Blondies (Gluten Free)


5 Stars 4 Stars 3 Stars 2 Stars 1 Star

No reviews

  • Author: Amy MS, RD, LDN
  • Total Time: 35 minutes
  • Yield: 16 servings 1x
  • Diet: Gluten Free

Ingredients

Units Scale
  • 3/4 cup Pumpkin Puree
  • 1 cup Almond, Cashew or Peanut Butter
  • 1/4 cup Maple Syrup
  • 1 Egg
  • 1 tsp Vanilla Extract
  • 1 tsp Pumpkin Pie Spice
  • 1/2 tsp Baking Powder
  • 1/2 tsp Baking Soda
  • 1/4 tsp Kosher Salt
  • 1/3 cup Chocolate Chips + 2 tablespoons

Instructions

  1. Preheat oven to 350° F. Spray an 8×8 baking pan with nonstick spray, set aside.
  2. To a large bowl add the pumpkin, almond butter, maple syrup, egg, vanilla, pumpkin pie spice, baking powder, baking soda and salt. Stir together with a spatula to fully combine.
  3. Next, fold in 1/3 cup chocolate chips.
  4. Pour the batter into your prepared pan and smooth the top so the batter is even. Top with the extra 2 tbsp of chocolate chips.
  5. Place the pan into the oven and bake for 25 minutes until the blondies are set.
  6. Allow the blondies to cool on a wire rack for at least 15 minutes before digging in. Enjoy!

Notes

  1. If your nut butter was kept in the fridge, microwave it for 20-30 seconds to soften it and make mixing much smoother!
  • Prep Time: 10 minutes
  • Cook Time: 25
  • Category: Dessert, Snack
  • Method: Bake
  • Cuisine: American

Nutrition

  • Serving Size: 1 Blondie
  • Calories: 153
  • Sugar: 7g
  • Sodium: 112mg
  • Fat: 11g
  • Carbohydrates: 10g
  • Fiber: 3g
  • Protein: 6g
  • Cholesterol: 62mg
Recipe Card powered byTasty Recipes

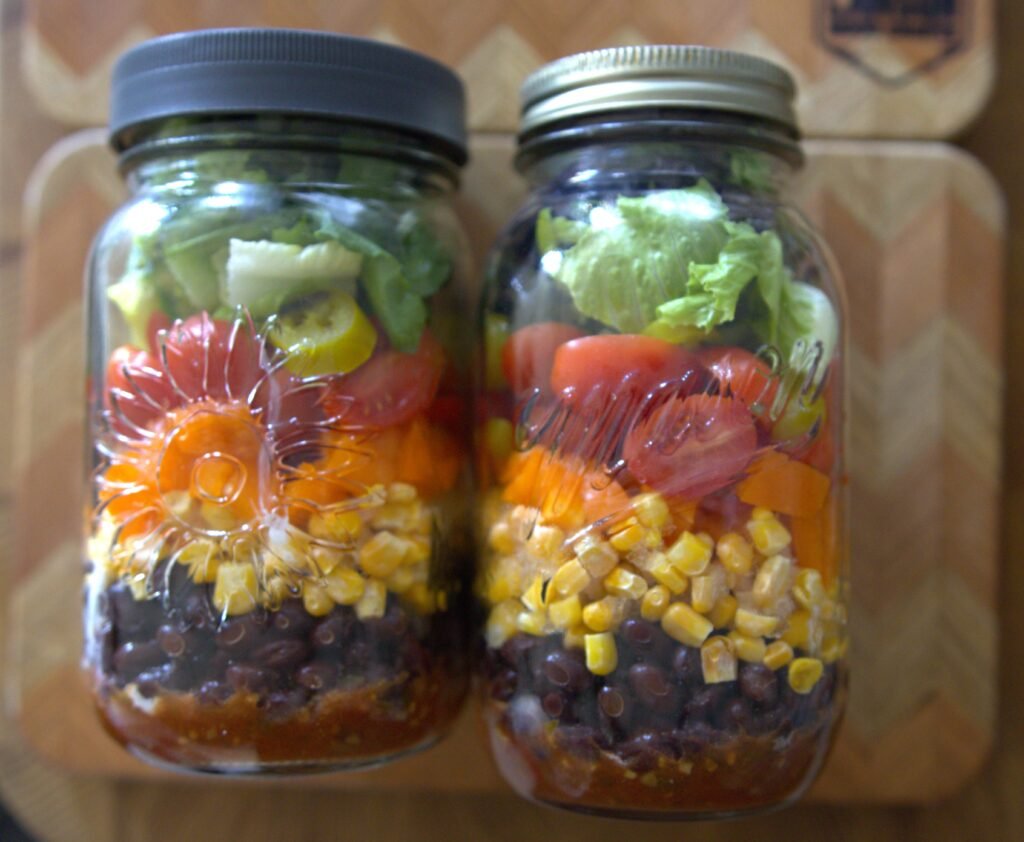
Taco Salads in a Jar

Taco Salads in a Jar

Print
clock clock iconcutlery cutlery iconflag flag iconfolder folder iconinstagram instagram iconpinterest pinterest iconfacebook facebook iconprint print iconsquares squares iconheart heart iconheart solid heart solid icon

Taco Salads in a Jar


5 Stars 4 Stars 3 Stars 2 Stars 1 Star

No reviews

  • Author: Amy MS, RD, LDN
  • Total Time: 10 minutes
  • Yield: 2 Salads 1x
  • Diet: Vegetarian

Description

Taco Salads in a Jar are an easy and delicious meal prep! With layers of beans, veggies and the simplest dressing these salads will elevate your lunch game!


Ingredients

Units Scale
  • 4 tbsp Salsa
  • 4 tbsp Greek Yogurt
  • 1 Can, 15oz Black Beans, drained and rinsed
  • 1 cup Frozen Corn
  • 1 Orange Bell Pepper, diced
  • 1 pint Cherry Tomatoes, sliced in half lengthwise
  • 12 tbsp Jarred Jalapenos
  • 1 cup Romaine Lettuce
  • Optional: 1/2 cup Crushed Taco Shell, 1/4 cup Shredded Cheddar Cheese

Instructions

  1. Set out two large mason jars.
  2. Pour 2 tbsp salsa into the bottom of each jar. Top with 2 tbsp Greek Yogurt.
  3. Add 1/2 of the rinsed black beans to each jar.
  4. Next add 1/2 cup frozen corn to each jar.
  5. Top the corn with half of the cherry tomatoes and 1-2 tbsp jalapenos.
  6. Finally, top each jar with 1/2 cup Romaine lettuce.
  7. Seal your jars with lids and pop them into the refrigerator until you are ready to enjoy!
  • Prep Time: 10 minutes
  • Category: Lunch, Salad
  • Method: No-Cook
  • Cuisine: Mexican

Nutrition

  • Serving Size: 1 Salad
  • Calories: 317
  • Sugar: 11g
  • Sodium: 664mg
  • Fat: 2.5g
  • Carbohydrates: 60g
  • Fiber: 17g
  • Protein: 19g
  • Cholesterol: 4.4mg
Recipe Card powered byTasty Recipes

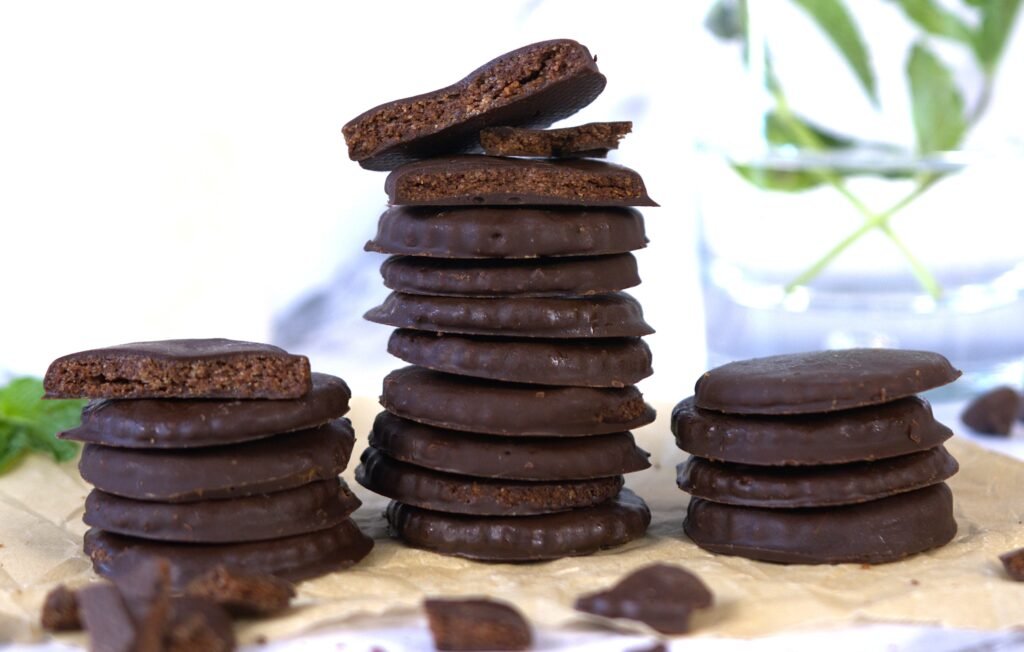
Homemade Thin Mint Cookies (Gluten-Free)

Homemade Thin Mint Cookies (Gluten-Free)

Print
clock clock iconcutlery cutlery iconflag flag iconfolder folder iconinstagram instagram iconpinterest pinterest iconfacebook facebook iconprint print iconsquares squares iconheart heart iconheart solid heart solid icon
Thin Mint Cookies

Homemade Thin Mint Cookies (Gluten-Free)


5 Stars 4 Stars 3 Stars 2 Stars 1 Star

No reviews

  • Author: Amy MS, RD, LDN
  • Total Time: 45 minutes
  • Yield: 3840 Cookies 1x
  • Diet: Gluten Free

Description

Homemade Thin Mint Cookies are even better than the Girl Scout’s version! A perfect crisp cookie center with a delicious chocolate peppermint coating, now you can have Thin Mint Cookies anytime of the year!


Ingredients

Units Scale

Cookie Wafer:

  • 1 1/2 cup Almond Flour
  • 1/4 cup Cocoa Powder
  • 1/2 tsp Xanthan Gum
  • Pinch Salt
  • 3 tbsp Unsalted Butter
  • 4 tbsp Maple Syrup
  • 1 tbsp Water
  • 3/4 tsp Peppermint Extract

Chocolate Coating:

  • 1 cup Dark Chocolate Chips
  • 2 tsp Coconut Oil
  • 3/4 tsp Peppermint Extract

Instructions

  1. Preheat oven to 350° F. Cover a sheet tray with a silpat or parchment paper and set aside.
  2. In a medium-sized mixing bowl, add the almond flour, cocoa powder, Xanthan Gum and salt. Whisk to combine.
  3. Slice the butter into small cubes and add to the dry ingredients. Using a fork or pastry cutter, cut the butter into very small pieces into the almond flour mixture (smaller than pea size!). Then add the maple syrup, water and peppermint extract and stir together with a spatula.
  4. Form the dough into a disc, wrap in plastic wrap and place into the refrigerator for 15 minutes. This helps to make rolling the cookies out much easier!
  5. After 15 minutes, remove the dough from the refrigerator and place onto your work surface. Place a piece of parchment paper or plastic wrap over the dough, then roll it out, this makes rolling much easier! Roll the dough out to about 1/8″ thick.
  6. Next, use a 2″ circle cutter, cut out the cookies and place onto your prepared sheet tray.
  7. Bake for 12-17 minutes. (Be sure to check the cookies at 12 minutes, you want them to be crispy but don’t allow them to burn!) Allow cookie wafers to cool completely.
  8. While the cookie wafers cool, make the chocolate coating. To a microwave safe bowl add the dark chocolate chips and coconut oil.
  9. Microwave on 25 second intervals, stirring in between each, until the chocolate is just melted. Then add in the peppermint extract and stir to combine.
  10. Take a chocolate wafer, dip into the melted chocolate coating, turning the wafer to coat the entire cookie. Let any excess chocolate drip off into the bowl and place the cookie onto your prepared sheet tray with a silpat or parchment paper.
  11. Continue with remaining wafers, coating each in chocolate.
  12. Place the coated cookies into the freezer for 10 minutes or refrigerator for at least 15 minutes to allow the chocolate to set.
  13. Store the cookies in an airtight container in the freezer or refrigerator, however you like your thin mints! Enjoy!
  • Prep Time: 30 minutes
  • Cook Time: 15
  • Category: Dessert, Cookie
  • Method: Bake
  • Cuisine: American

Nutrition

  • Serving Size: 4 Cookies
  • Calories: 155
  • Sugar: 6g
  • Sodium: 19mg
  • Fat: 12g
  • Carbohydrates: 11g
  • Fiber: 3g
  • Protein: 4g
  • Cholesterol: 8g
Recipe Card powered byTasty Recipes

7 Foods to Help You Sleep Better Tonight

7 Foods to Help You Sleep Better Tonight

Picture of Amy Lawson MS, RD, LDN

Amy Lawson MS, RD, LDN

woman in bed

Did you know that about one-third of Americans aren’t getting the recommended 7-9 hours of sleep each night? Poor sleep is linked to increased risks of heart disease, obesity, and type 2 diabetes, which makes it so key to prioritize sleep.

While there are many ways to improve your sleep—like exercising and reducing screen time at night—this post is all about nutrition! Let’s dive into the key nutrients that promote better sleep and discover seven foods that can help you get a good night’s rest.

Key Nutrients for Sleep

Certain nutrients and compounds in our food can really help our sleep quality and quantity. Here are some of the sleep-enhancing all-stars to know:

  • Melatonin: A hormone that directly regulates our sleep-wake cycle.

  • Serotonin: This neurotransmitter plays a critical role in establishing our sleep patterns.

  • Tryptophan: This essential amino acid helps produce serotonin and melatonin, hormones that regulate our sleep-wake cycle. Pairing carbohydrates with tryptophan-rich foods can enhance melatonin production.

  • Magnesium: This mineral can help reduce stress and boost melatonin production.

  • Vitamin D: Important for the synthesis of melatonin.

  • Zinc: Supports the conversion of tryptophan into serotonin and melatonin.

7 Sleep Boosting Foods

Kiwi

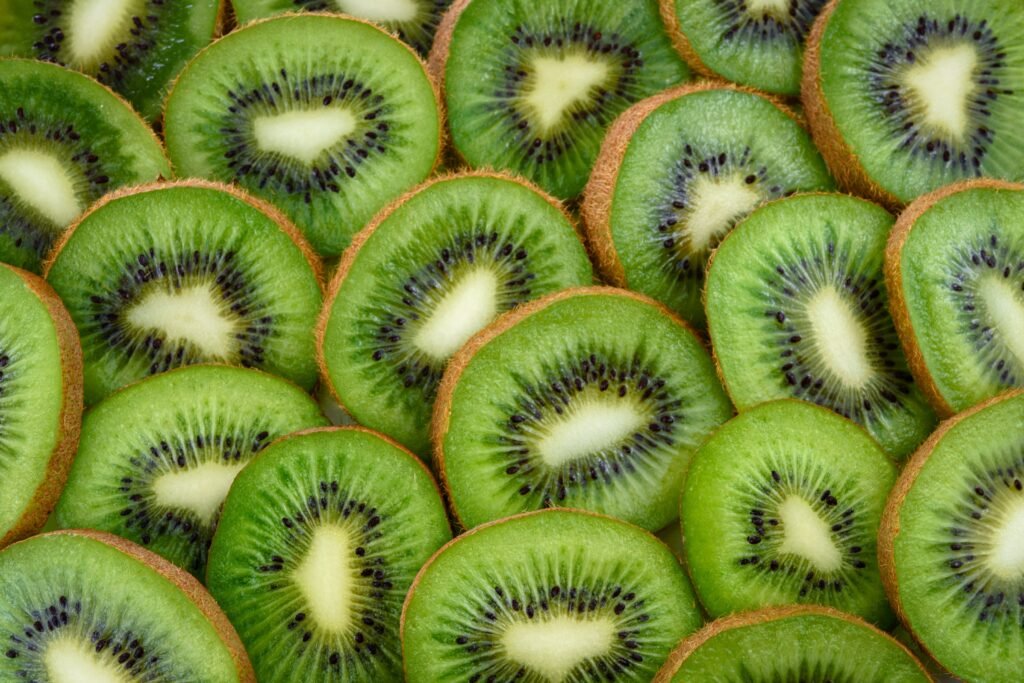
Kiwi is often overlooked but is a powerful sleep aid! Rich in melatonin, studies show that eating two kiwis an hour before bed for four weeks can significantly improve sleep quality. A study on adults with sleep disorders found improvements in total sleep time and how quickly they fell asleep.

Salmon

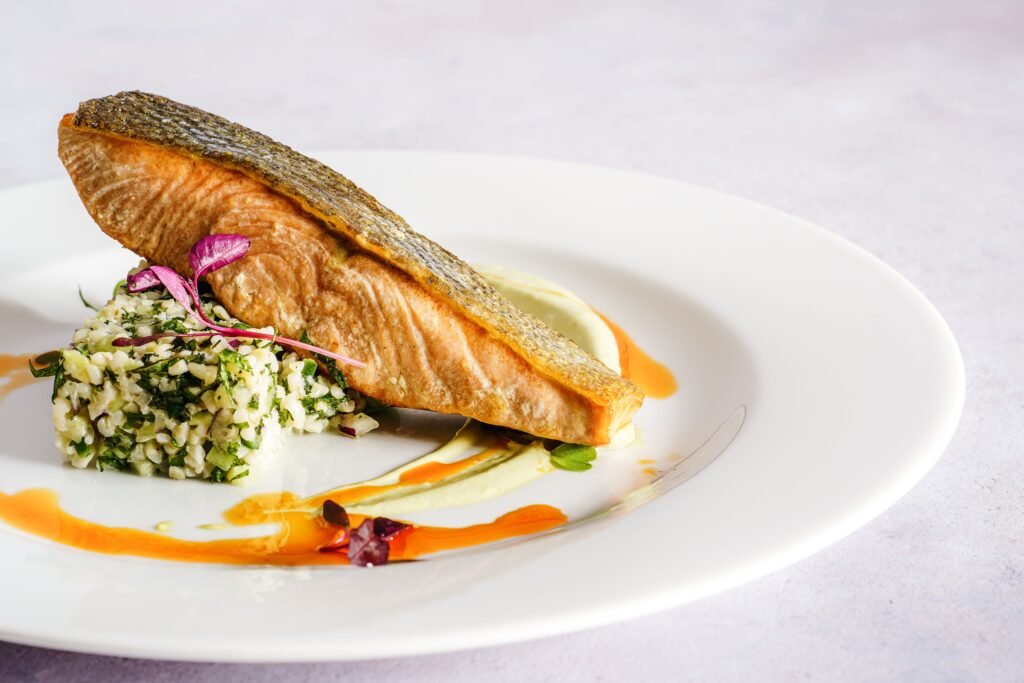
Not only is salmon known for its heart and brain health benefits due to omega-3 fatty acid content, but its vitamin D content also plays a vital role in enhancing sleep quality. Men who consumed salmon three times a week reported falling asleep faster and enjoying better sleep quality.

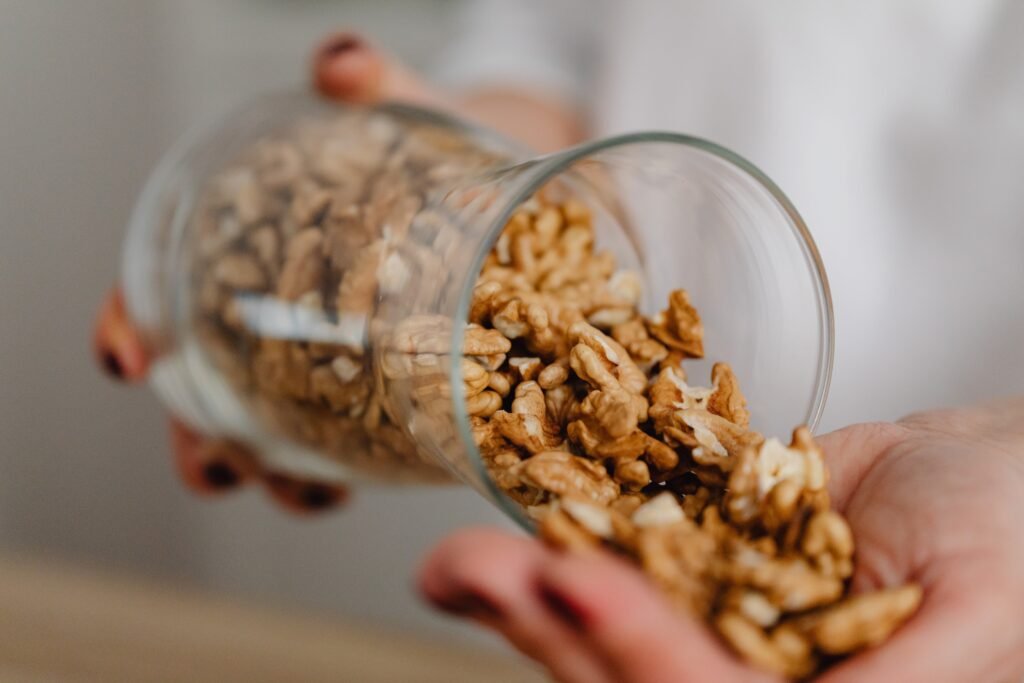
Walnuts

Walnuts pack a trifecta of sleep-promoting nutrients: melatonin, serotonin, and magnesium. Plus, the alpha-linolenic acid (ALA) in walnuts can be converted to DHA, which further boosts serotonin production.


Pumpkin Seeds

Small but mighty, pumpkin seeds are rich in tryptophan, magnesium, and zinc. Just 100 grams can provide a hefty dose of these sleep-enhancing nutrients.


Dark Greens

Leafy greens are not just good for your health; they also support better sleep. The magnesium and calcium in these veggies work together to enhance sleep duration and quality.


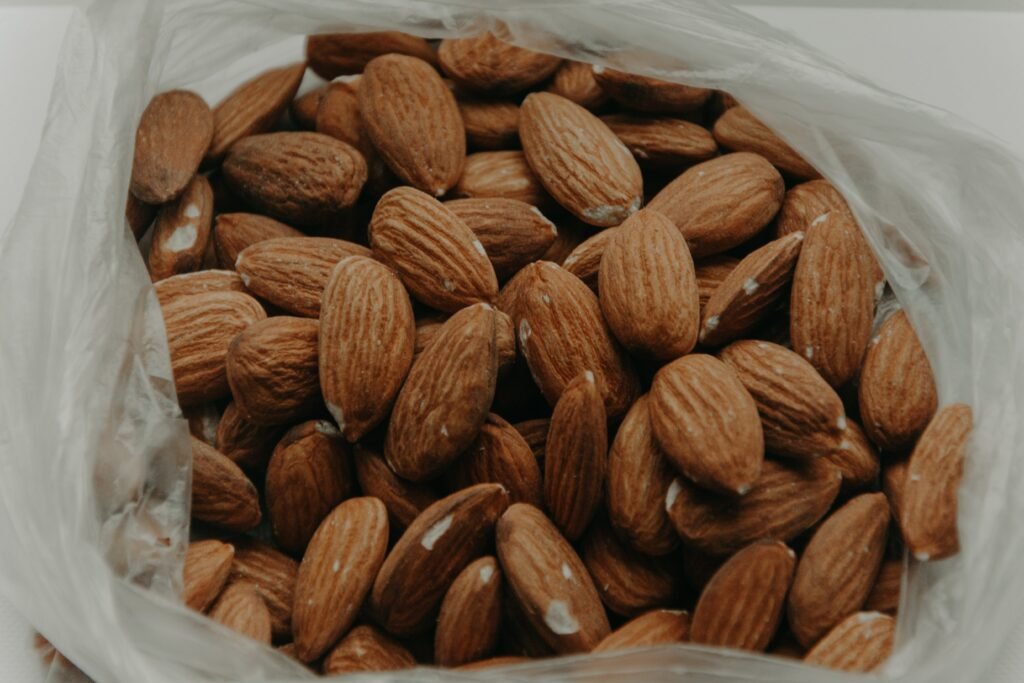
Almonds

Almonds are another excellent source of magnesium, which can help calm your mind and body before bed. With 77mg of magnesium and 76mg of calcium per ounce, they’re perfect for an evening snack.

Try making your own trail mix with almonds, walnuts, pumpkin seeds, and a few dark chocolate chips for a tasty treat!

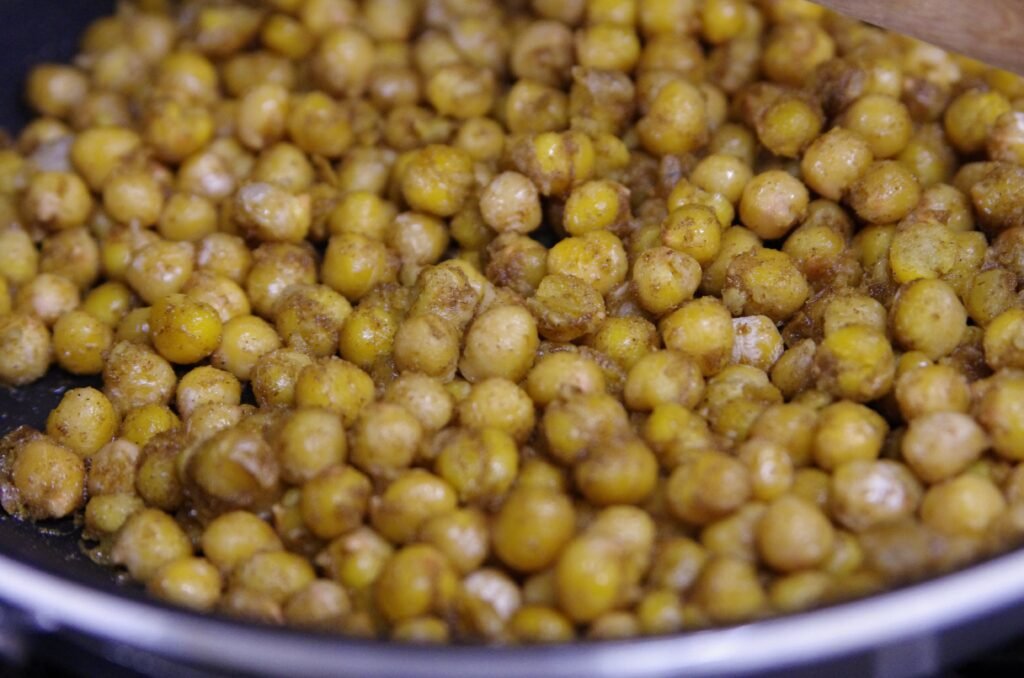
Chickpeas

Rich in vitamin B6 and tryptophan, chickpeas also provide a good amount of magnesium. One cup contains about 230mg of magnesium, making them a great bedtime snack. Try roasting them for a crunchy, sleep-promoting treat.


Foods to Avoid for Better Sleep

While incorporating sleep-friendly foods is essential, it’s equally important to avoid certain items that can negatively impact your rest:

  • Alcohol: Alcohol may seem like a relaxant, but it actually reduces sleep quality and increases disturbances during the night. Avoid it close to bedtime for a more restful sleep.

  • Caffeine: While coffee can be a comforting morning ritual, consuming caffeine in the afternoon or evening can really mess with your sleep at nighttime. Caffeine can stay in your system for several hours, so try to keep your cup of joe to the morning only.


Thrive's Final Thoughts on Foods for Sleep

Incorporating these foods into your daily routine can make a big difference in your sleep quality. Also, keep in mind that eating a diet rich in whole foods, fruits, vegetables, legumes, whole grains, nuts, and seeds will provide the key nutrients your body needs for optimal sleep.

Listen to your body’s cues: if you find yourself hungry before bed, opt for a light, satisfying snack like yogurt with granola or a simple turkey sandwich on whole grain bread. Do you need to eat before bed for good sleep? It depends! While eating right before bed isn’t necessary for everyone, it’s about finding what works best for you.

Want to dive a little deeper? Watch my video for a deep dive on foods for better sleep!


References:

Arab, A., Rafie, N., Amani, R., & Shirani, F. (2023). The Role of Magnesium in Sleep Health: A Systematic Review of Available Literature. Biological Trace Element Research, 201(1), 121–128. https://doi.org/10.1007/s12011-022-03162-1 Del Brutto, O. H., Mera, R. M., Ha, J., Gillman, J., Zambrano, M., & Castillo, P. R. (2016). Dietary fish intake and sleep quality: A population-based study. Sleep Medicine, 17, 126–128. https://doi.org/10.1016/j.sleep.2015.09.021 Doherty, R., Madigan, S., Nevill, A., Warrington, G., & Ellis, J. G. (2023). The Impact of Kiwifruit Consumption on the Sleep and Recovery of Elite Athletes. Nutrients, 15(10), 2274. https://doi.org/10.3390/nu15102274 Hansen, A. L., Dahl, L., Olson, G., Thornton, D., Graff, I. E., Frøyland, L., Thayer, J. F., & Pallesen, S. (2014). Fish consumption, sleep, daily functioning, and heart rate variability. Journal of Clinical Sleep Medicine: JCSM: Official Publication of the American Academy of Sleep Medicine, 10(5), 567–575. https://doi.org/10.5664/jcsm.3714 Kikuchi, M., Aoki, Y., Kishimoto, N., Masuda, Y., Suzuki, N., Takashimizu, S., Yoshida, K., Aizawa, K., Suganuma, H., & Nishizaki, Y. (2021). Effects of glucoraphanin-rich broccoli sprout extracts on sleep quality in healthy adults: An exploratory study. Journal of Functional Foods, 84, 104574. https://doi.org/10.1016/j.jff.2021.104574 Lin, H.-H., Tsai, P.-S., Fang, S.-C., & Liu, J.-F. (2011). Effect of kiwifruit consumption on sleep quality in adults with sleep problems. Asia Pacific Journal of Clinical Nutrition, 20(2), 169–174. Patan, M. J., Kennedy, D. O., Husberg, C., Hustvedt, S. O., Calder, P. C., Middleton, B., Khan, J., Forster, J., & Jackson, P. A. (2021). Differential Effects of DHA- and EPA-Rich Oils on Sleep in Healthy Young Adults: A Randomized Controlled Trial. Nutrients, 13(1), 248. https://doi.org/10.3390/nu13010248 Ros, E., Izquierdo-Pulido, M., & Sala-Vila, A. (2018). Beneficial effects of walnut consumption on human health: Role of micronutrients. Current Opinion in Clinical Nutrition & Metabolic Care, 21(6), 498–504. https://doi.org/10.1097/MCO.0000000000000508 Wilson, V. C. (1969). The distribution of acetylcholinesterase in adult Hymenolepis spp. Transactions of the Royal Society of Tropical Medicine and Hygiene, 63(4), 428. Zuraikat, F. M., Wood, R. A., Barragán, R., & St-Onge, M.-P. (2021). Sleep and Diet: Mounting Evidence of a Cyclical Relationship. Annual Review of Nutrition, 41(1), 309–332. https://doi.org/10.1146/annurev-nutr-120420-021719

Facebook
Twitter
LinkedIn
Email
Pinterest

What is Mindful Eating?

What is Mindful Eating?

Picture of Amy Lawson MS, RD, LDN

Amy Lawson MS, RD, LDN

Revolutionize Your Relationship with Food: Embrace Mindful Eating

Tired of feeling trapped by a cycle of unhealthy eating habits? It’s time to break free of the cycle, break free of diet culture, and discover the power and benefits of mindful eating. By cultivating awareness and intention in your relationship with food, you can embrace a more balanced and nourishing approach to your meals and eating patterns.

What is Mindful Eating?

Mindful eating is all about being fully present with your food—paying attention to your hunger, satiety, and the entire eating experience. In our busy lives, staying present can be challenging! As a dietitian, I hear from clients all the time who share that they are stressed, overwhelmed and feeling disconnected. The constant hustle of daily life leaves little time to cook, let alone enjoy a meal! What mindful eating does is offer a non-restrictive, positive approach to meals and eating habits that fosters satisfaction and body positivity.

Here are 5 simple steps to get started with mindful eating.


1. Take A Deep Breath

Dandelion

Before you dive into your next meal, take a moment to breathe deeply. This simple act helps relieve stress and brings you back to the present moment. It’s a way to reset and remind yourself that you’re about to nourish your body.

Try it now: take a deep breath in, hold for a moment, and then exhale slowly. How do you feel?

This practice not only lightens your mood but also helps you check in with yourself—Are you hungry? Thirsty? Taking a deep breath can center you and help you appreciate the benefits of your meal, whether it’s a balanced breakfast or a satisfying snack.

2. No Screens During Meal Time

How many times do you find yourself eating in front of a screen—whether it’s the TV, computer, or phone? I’m guilty of it too. Eating while distracted can lead to overeating and mindless eating. Studies show that people who eat in front of the TV consume up to 25% more calories than those who eat at a table.

And research shows that families who eat together regularly have better communication, make healthier food choices, and experience improved emotional well-being.

To begin, try having at least one meal a day without screens. Put your phone in another room and focus on savoring your food. Allow yourself to relax and enjoy your meal without distractions.


3. Eat Slowly and Savor Each Bite

Eating slowly is a crucial aspect of mindful eating. Many of us rush through meals, especially when time is tight. I experienced this firsthand after having twins. My meal times became rushed, sneaking in bites for myself between caring for newborn twin boys. Soon enough I found myself eating fast through every meal, I wasn’t tasting my food, I was inhaling it so that my hands were free to take care of my boys. It wasn’t until I noticed this pattern that I realized I needed to slow down. Eating slowly helps with digestion, allows you to taste and savor your food, and gives your body time to signal to your brain that you’re satisfied, preventing overeating.


4. Notice What Is On Your Plate

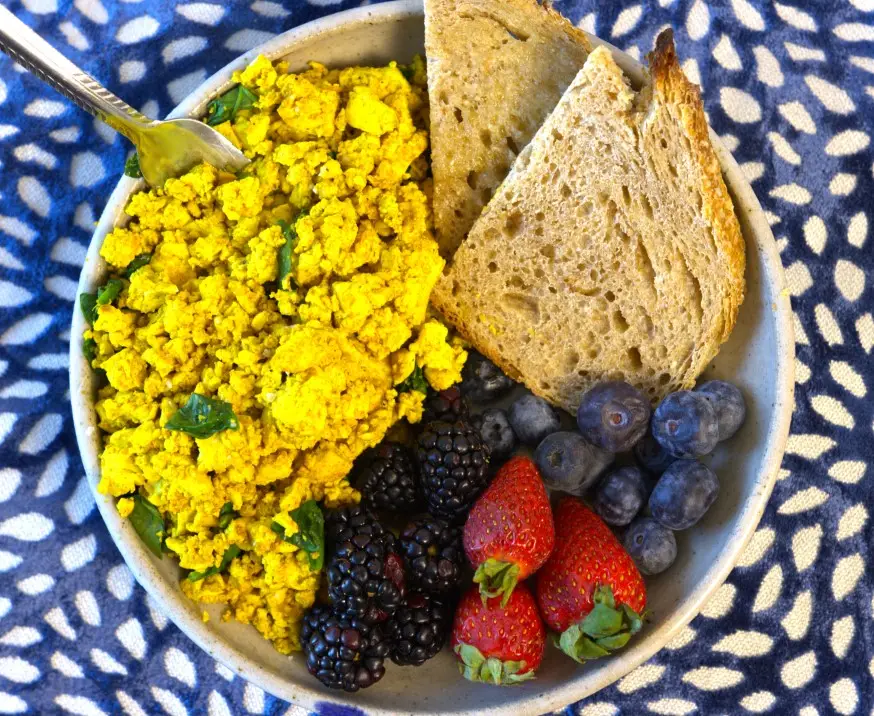
Tofu Scramble

Have you ever noticed that we eat with our eyes first? A colorful, well-plated dish can spark excitement before we even take a bite!

Next time you sit down for a meal, take a moment to soak in the aromas. Does that smell remind you of a cozy family dinner? Scents have this amazing ability to trigger memories and emotions, making your meal feel even more special.

And let’s not forget about texture! Think about it: that creamy risotto, crunchy salad, or perfectly grilled steak. Each bite offers something unique, adding depth to your experience

By tuning into these sensory details, you can turn a simple meal into something truly satisfying. So, for your next meal, take a moment to appreciate the colors, smells, textures, and tastes.


5. Listen to Your Body's Cues

When you sit down for a meal, check in with yourself. How hungry are you at the start? Halfway through, ask if you’re satisfied or still craving more.

We all have habits from childhood—like cleaning our plates or going for seconds just because it’s there. Challenge those! Give yourself permission to stop when you’re full, even if food is left.

Trust your body’s cues and savor every bite. Mindful eating is all about enjoying your meals and feeling good about your choices!


Dig In, Screens Off, Savor Each Bite

These five tips for mindful eating are your path to ditching diet culture and discovering the joy of food freedom! By tuning into your meals, you’ll not only enjoy every bite but also build a healthier, happier relationship with food. So, let’s savor those flavors and nourish our bodies and minds.

Facebook
Twitter
LinkedIn
Email
Pinterest

8 Powerful Foods to Fight Inflammation: A Guide to Eating for Better Health

What if the foods you ate could help you fight off diseases? Imagine if your refrigerator was stocked with items that actively work to reduce inflammation and keep chronic diseases at bay.

In this post, I’m diving into eight potent foods that can help you combat inflammation and improve your overall health.

Understanding Inflammation

To start, let’s clarify what inflammation is. There are two main types:

      1. Acute Inflammation: This occurs suddenly in response to an injury, such as a cut or a sprain. It’s the body’s natural way of healing the affected area and this is a good thing!

      1. Chronic Inflammation: Unlike acute inflammation, chronic inflammation persists even without a threat. This ongoing inflammation can contribute to a range of chronic conditions like cardiovascular disease, autoimmune disorders, non-alcoholic fatty liver disease, arthritis, type 2 diabetes, Alzheimer’s Disease, and certain cancers.

    Now that you know what inflammation is, let’s get into how you can use food to fight it!

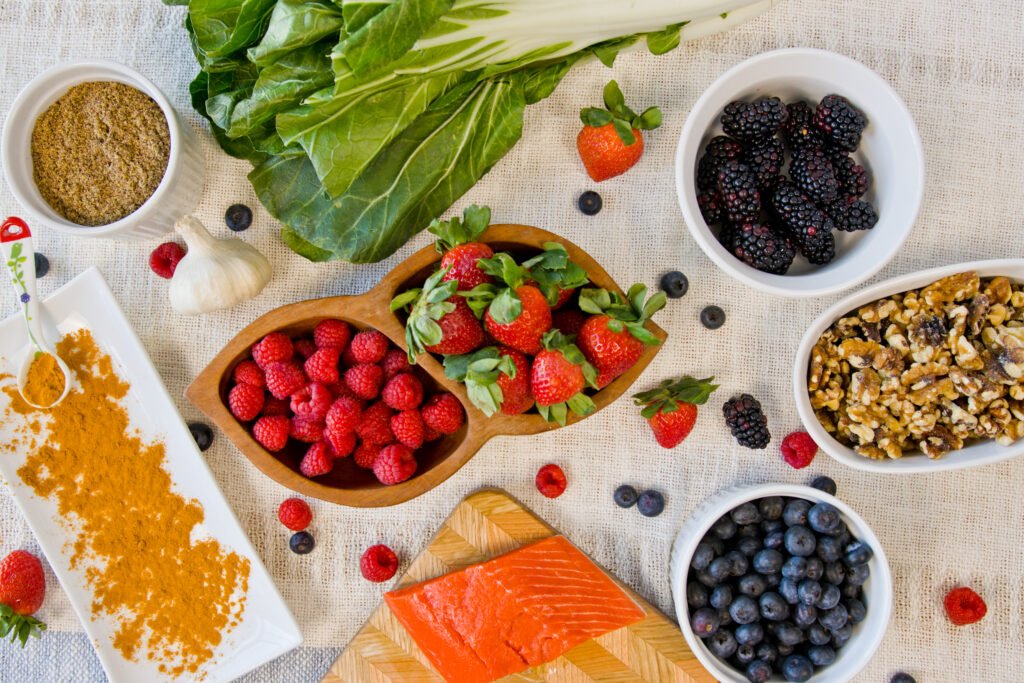
    1. Berries

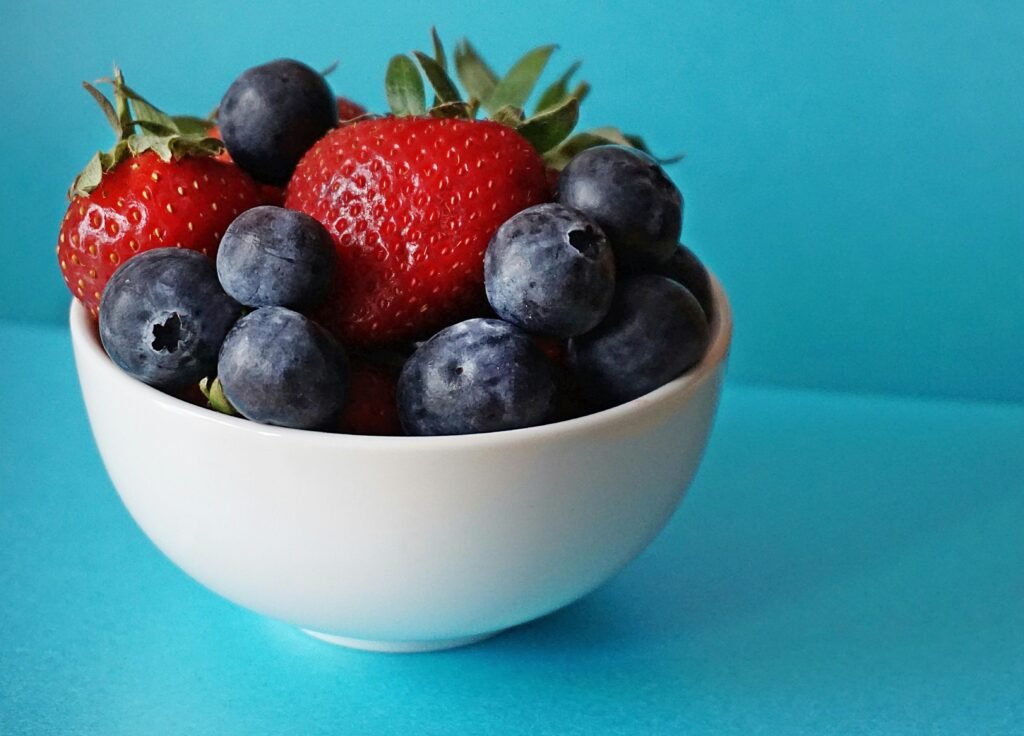
    Berries, including strawberries, blueberries, and raspberries, are powerhouses of antioxidants, fiber, and vitamin C. They contain phytochemicals called anthocyanins that combat inflammation. Research even suggests that a diet rich in berries can promote longevity. Incorporate them into your weekly meals by snacking on them raw, topping your yogurt, or trying out delicious recipes like Triple Berry Dutch Baby, Berries & Greens Smoothie, and Brain-Boosting Blueberry Cookies.

    2. Dark Leafy Greens

    Dark leafy greens like spinach, kale, bok choy, and Swiss chard are packed with nutrients, especially beta-carotene. Beta-carotene has been linked to decreased inflammation markers. Experiment with different greens to add variety to your diet and benefit your gut microbiome. Try recipes such as Mediterranean White Bean Tuna & Spinach Salad and Simple Sauteed Bok Choy.

    3. Garlic

    Garlic isn’t just flavorful; it’s also a potent anti-inflammatory agent. It contains compounds that limit the effects of pro-inflammatory molecules. Add garlic to your meals, sauces, and homemade salad dressings. For inspiration, check out Easy Homemade Salsa and Lentil Bolognese recipes.

    4. Olive Oil

    Known for its health benefits, olive oil is rich in antioxidants and phenolic compounds. It has been shown to reduce inflammation similarly to ibuprofen, an anti-inflammatory drug. Use it in various recipes such as Simple Balsamic Dressing and Creamy Zucchini Pasta.

    5. Omega-3 Foods

    Omega-3 fatty acids are essential fats that our bodies can’t produce on their own and they play a crucial role in cell building, hormone production, and reducing inflammation. Foods rich in Omega-3s include fatty fish like salmon, flaxseed, chia seeds, walnuts, and soybeans. Try recipes like Buffalo Salmon Quinoa & Chickpea Salad and Honey & Flaxseed Granola.

    6. Nuts

    Nuts are not only delicious but also packed with magnesium, which contributes to their anti-inflammatory properties. Regular nut consumption has been linked to a lower risk of cardiovascular disease and type 2 diabetes. Incorporate nuts into your diet with recipes such as Maple & Olive Oil Granola, Easy Trail Mix, and Banana Nut Muffins.

    7. Beans & Legumes

    Beans and legumes are nutritional powerhouses, rich in fiber, protein, and antioxidants. They contain bioactive compounds like polyphenols that have anti-inflammatory, antioxidant, and antihypertensive properties. Explore bean recipes like Greek-Style Nachos and Chickpea Blondies.

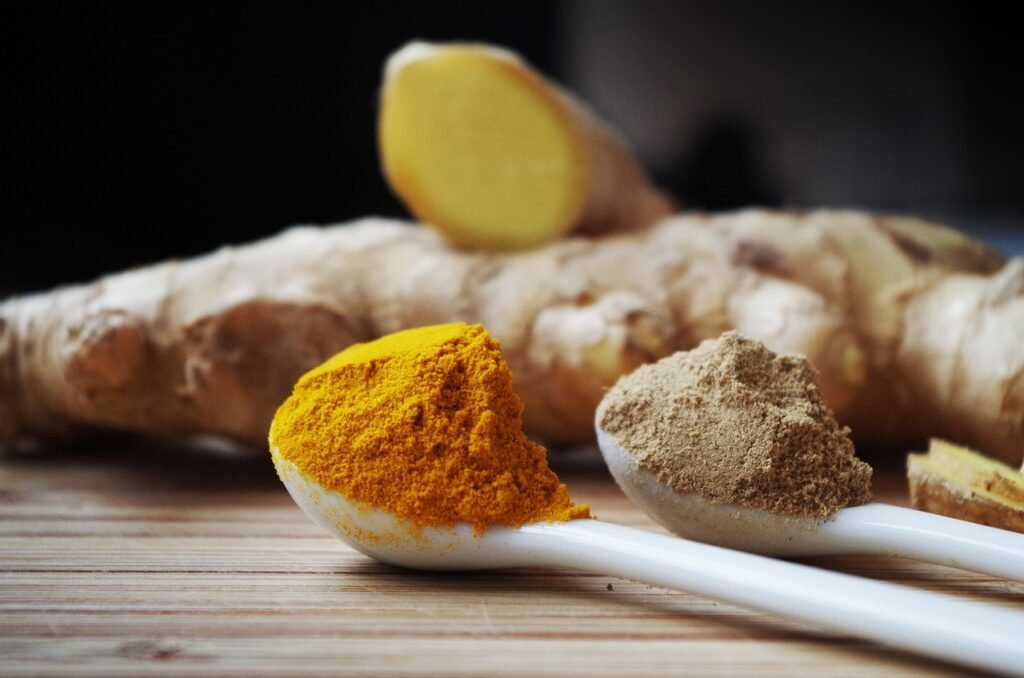
    8. Turmeric

    Turmeric is a vibrant yellow spice known for its compound, curcumin, which has powerful anti-inflammatory and antioxidant properties.

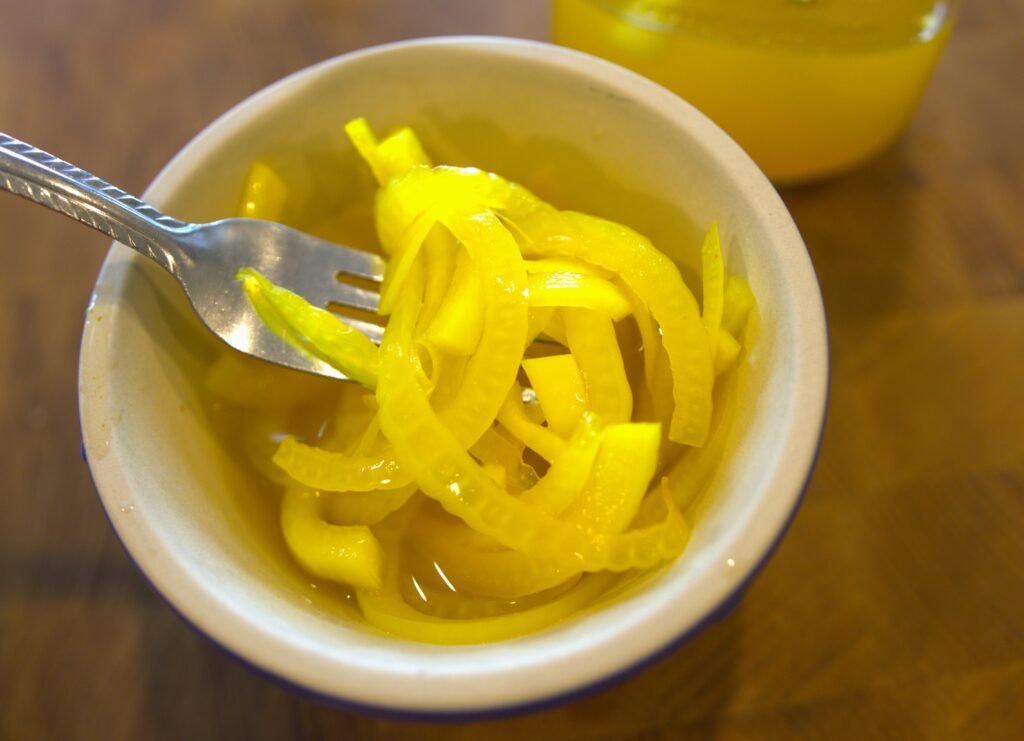
    Curcumin can suppress inflammation through various mechanisms. Add turmeric to your meals in creative ways, such as Turmeric Pickled Onions and Sunrise Banana Pancakes.

    Foods to Avoid

    While incorporating anti-inflammatory foods into your diet, it’s equally important to be mindful of foods that can increase inflammation. Ultra-processed foods, fried and fast foods, and excessive sugar should be limited. Reducing these foods can help maintain a healthy inflammatory balance in your body.

    Thrive RDN’s Final Perspective

    Many of the anti-inflammatory foods mentioned here are staples in the Mediterranean diet, known for its health benefits. If you’re interested in exploring more about Mediterranean eating, check out our 7 Tips to Start Eating Mediterranean guide.

    I hope these tips inspire you to add more anti-inflammatory foods to your meals and support your health. I’d love to hear what your favorite anti-inflammatory foods are, leave me a comment below!

    Feel free to reach out with any questions or suggestions. Here’s to your health and delicious meals!


    References:

    Hewlings, S., & Kalman, D. (2017). Curcumin: A Review of Its Effects on Human Health. Foods, 6(10), 92. https://doi.org/10.3390/foods6100092

    Joseph, S. V., Edirisinghe, I., & Burton-Freeman, B. M. (2014). Berries: Anti-inflammatory Effects in Humans. Journal of Agricultural and Food Chemistry, 62(18), 3886–3903. https://doi.org/10.1021/jf404405

    Juárez-Chairez, M. F., Meza-Márquez, O. G., Márquez-Flores, Y. K., & Jiménez-Martínez, C. (2022). Potential anti-inflammatory effects of legumes: A review. British Journal of Nutrition, 128(11), 2158–2169. https://doi.org/10.1017/S0007114522000137

    Land Lail, H., Feresin, R. G., Hicks, D., Stone, B., Price, E., & Wanders, D. (2021). Berries as a Treatment for Obesity-Induced Inflammation: Evidence from Preclinical Models. Nutrients, 13(2), 334. https://doi.org/10.3390/nu13020334

    Parkinson, L., & Keast, R. (2014). Oleocanthal, a Phenolic Derived from Virgin Olive Oil: A Review of the Beneficial Effects on Inflammatory Disease. International Journal of Molecular Sciences, 15(7), 12323–12334. https://doi.org/10.3390/ijms150712323

    Peng, Y., Ao, M., Dong, B., Jiang, Y., Yu, L., Chen, Z., Hu, C., & Xu, R. (2021). Anti-Inflammatory Effects of Curcumin in the Inflammatory Diseases: Status, Limitations and Countermeasures. Drug Design, Development and Therapy, Volume 15, 4503–4525. https://doi.org/10.2147/DDDT.S327378

    Rajaram, S., Damasceno, N. R. T., Braga, R. A. M., Martinez, R., Kris-Etherton, P., & Sala-Vila, A. (2023). Effect of Nuts on Markers of Inflammation and Oxidative Stress: A Narrative Review. Nutrients, 15(5), 1099. https://doi.org/10.3390/nu15051099

    Schultz, H., Ying, G.-S., Dunaief, J. L., & Dunaief, D. M. (2021). Rising Plasma Beta-Carotene Is Associated With Diminishing C-Reactive Protein in Patients Consuming a Dark Green Leafy Vegetable–Rich, Low Inflammatory Foods Everyday (LIFE) Diet. American Journal of Lifestyle Medicine, 15(6), 634–643. https://doi.org/10.1177/1559827619894954

    Shin, J.-H., Ryu, J. H., Kang, M. J., Hwang, C. R., Han, J., & Kang, D. (2013). Short-term heating reduces the anti-inflammatory effects of fresh raw garlic extracts on the LPS-induced production of NO and pro-inflammatory cytokines by downregulating allicin activity in RAW 264.7 macrophages. Food and Chemical Toxicology, 58, 545–551. https://doi.org/10.1016/j.fct.2013.04.002

    Simopoulos, A. P. (2002). Omega-3 Fatty Acids in Inflammation and Autoimmune Diseases. Journal of the American College of Nutrition, 21(6), 495–505. https://doi.org/10.1080/07315724.2002.10719248

    Stromsnes, K., Correas, A. G., Lehmann, J., Gambini, J., & Olaso-Gonzalez, G. (2021). Anti-Inflammatory Properties of Diet: Role in Healthy Aging. Biomedicines, 9(8), 922. https://doi.org/10.3390/biomedicines9080922

    Yu, Z., Malik, V. S., Keum, N., Hu, F. B., Giovannucci, E. L., Stampfer, M. J., Willett, W. C., Fuchs, C. S., & Bao, Y. (2016). Associations between nut consumption and inflammatory biomarkers,. The American Journal of Clinical Nutrition, 104(3), 722–728. https://doi.org/10.3945/ajcn.116.134205

    Share:

    Facebook
    Twitter
    Pinterest
    LinkedIn

    Nutrient-Packed Berry Parfait

    Nutrient-Packed Berry Parfait

    Print
    clock clock iconcutlery cutlery iconflag flag iconfolder folder iconinstagram instagram iconpinterest pinterest iconfacebook facebook iconprint print iconsquares squares iconheart heart iconheart solid heart solid icon

    Nutrient-Packed Berry Parfait


    5 Stars 4 Stars 3 Stars 2 Stars 1 Star

    No reviews

    • Author: Amy MS, RD, LDN
    • Total Time: 5 minutes
    • Yield: 1 Serving 1x
    • Diet: Vegetarian

    Description

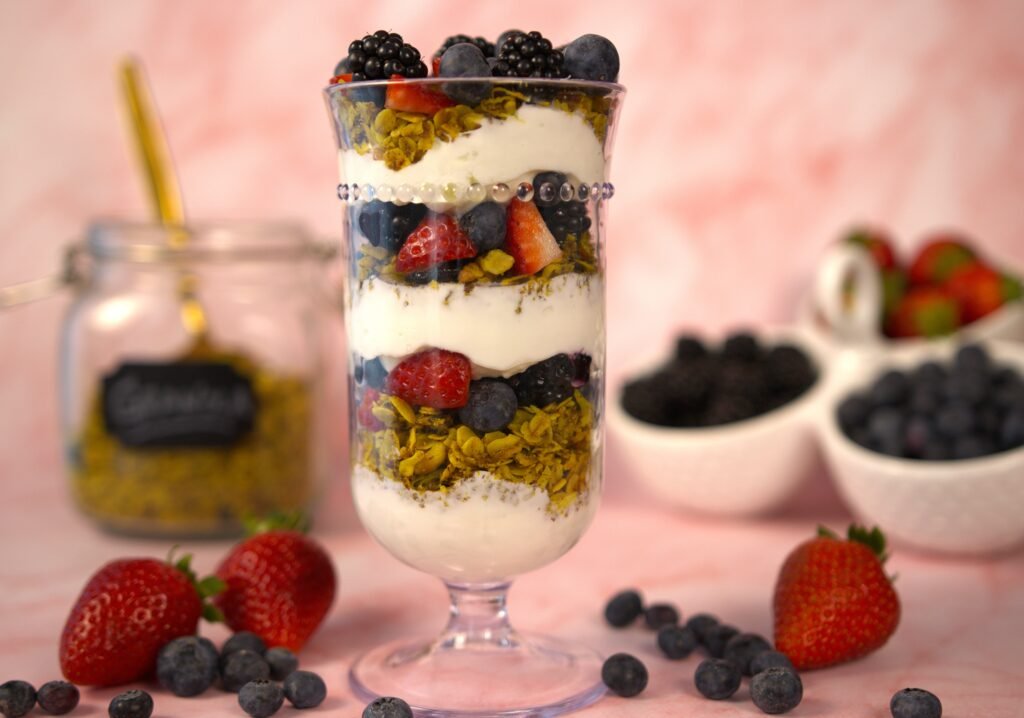
    Berry Parfait is nutrient-packed breakfast, dessert or snack! This anti-inflammatory recipe is easy-to-make with layers of fresh berries, Greek yogurt, and crunchy granola.


    Ingredients

    Units Scale
    • 3/4 cup Greek Yogurt
    • 1/3 cup Granola
    • 1/2 cup Mixed Berries (Strawberries, Blueberries, Blackberries, Raspberries- choose your favorites!)

    Instructions

    1. To a tall glass or mason jar, add 3 spoonfuls of yogurt.
    2. Top with 3 spoonfuls of granola.
    3. Top with a mixture of your favorite berries, creating an even layer on top of the granola.
    4. Repeat with remaining ingredients, finishing with berries on top. Enjoy!
    • Prep Time: 5 minutes
    • Category: Breakfast, Snack, Dessert
    • Method: No Cook
    • Cuisine: American

    Nutrition

    • Serving Size: 1
    • Calories: 297
    • Sugar: 20g
    • Sodium: 125mg
    • Fat: 6g
    • Carbohydrates: 40g
    • Fiber: 4g
    • Protein: 23g
    • Cholesterol: 9mg
    Recipe Card powered byTasty Recipes

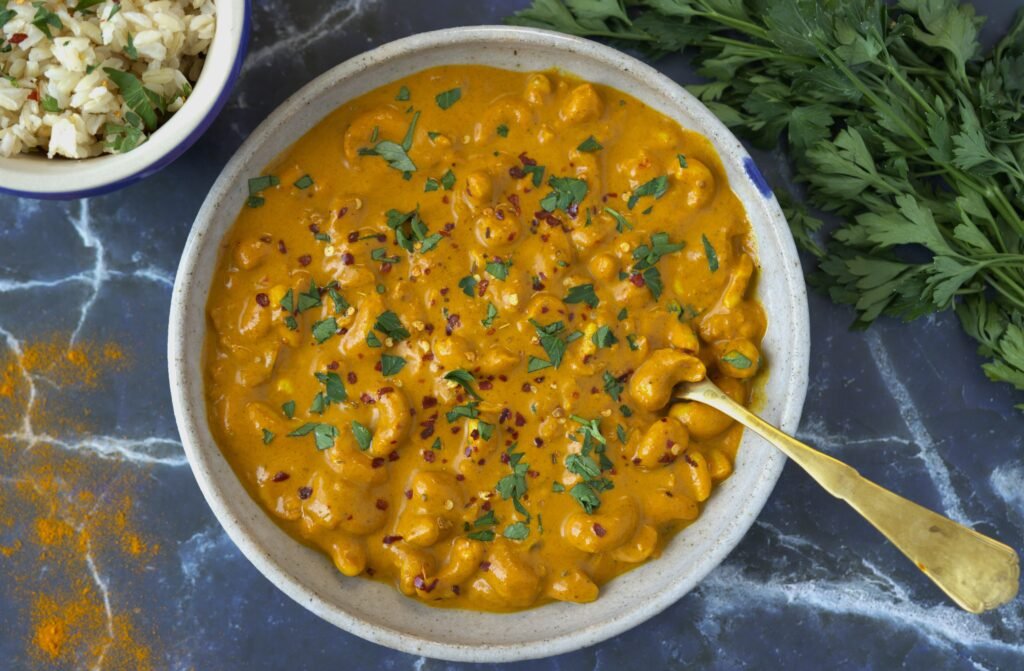
    Easy Cashew Curry (An Anti-Inflammatory Dish!)

    Easy Cashew Curry (An Anti-Inflammatory Dish!)

    Print
    clock clock iconcutlery cutlery iconflag flag iconfolder folder iconinstagram instagram iconpinterest pinterest iconfacebook facebook iconprint print iconsquares squares iconheart heart iconheart solid heart solid icon

    Easy Cashew Curry (An Anti-Inflammatory Dish!)


    5 Stars 4 Stars 3 Stars 2 Stars 1 Star

    No reviews

    • Author: Amy MS, RD, LDN
    • Total Time: 25 minutes
    • Yield: 6 Servings 1x
    • Diet: Vegan

    Description

    Easy Cashew Curry is a creamy, anti-inflammatory dish brimming with cashews and vibrant vegetables, simmered in a blend of soothing spices. This comforting meal is not only delicious but also quick, making it a perfect weeknight meal.


    Ingredients

    Units Scale
    • 1 tbsp Olive Oil
    • 1/2 Large White Onion, diced
    • 4 Cloves Garlic, Minced
    • 1 tbsp Fresh Ginger, Minced
    • 2 tsp Turmeric
    • 2 tsp Ground Coriander
    • 1 tsp Smoked Paprika
    • 1 tsp Curry Powder
    • 2 tbsp Tomato Paste
    • 2 cups Vegetable Stock
    • 2 cups Coconut Milk
    • 2 cups Raw Cashews

    Instructions

    1. Heat a large sautee pan to medium heat. Add the olive oil, then the diced onion. Cook for 7-8 minutes until the onion is translucent and begins to brown slightly.
    2. Turn the heat down to low and add the garlic and ginger to the pan. Cook for 1-2 minutes.
    3. Next, add the spices, turmeric, coriander, smoked paprika and curry powder. Stir into the onion mixture. Then add the tomato paste and stir again.
    4. Next add the vegetable stock, stirring up any browned bits on the bottom of the pan (this is flavor!)
    5. Then add the coconut milk and cashews, stir again to combine.
    6. Bring the mixture to a simmer, cover and cook for 10 minutes.
    7. After 10 minutes check the curry, stir again and crack the lid to allow some steam to escape.
    8. Cook for another 10 minutes.
    9. Then, turn off the heat and add a pinch of salt if desired.
    10. Serve with brown rice, flatbread and sauteed greens for an anti-inflammatory packed meal.

    Notes

    1. If you like more heat, top the curry with crushed red pepper flakes, sriracha or your favorite hot sauce.
    • Prep Time: 5 minutes
    • Cook Time: 20 minutes
    • Category: Dinner, Vegan
    • Method: Stovetop
    • Cuisine: Sri Lankan

    Nutrition

    • Serving Size: 1 Serving
    • Calories: 414
    • Sugar: 5g
    • Sodium: 27mg
    • Fat: 35g
    • Carbohydrates: 19g
    • Fiber: 3g
    • Protein: 9g
    • Cholesterol: 0mg
    Recipe Card powered byTasty Recipes

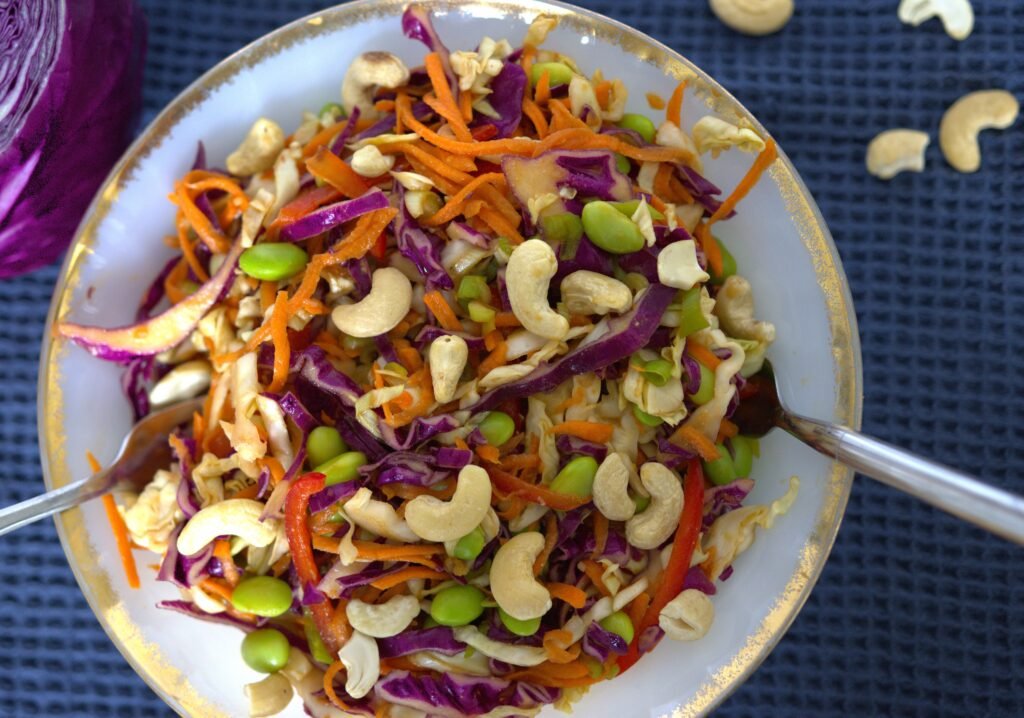
    Rainbow Crunch Salad with Miso Dressing

    Rainbow Crunch Salad with Miso Dressing

    Print
    clock clock iconcutlery cutlery iconflag flag iconfolder folder iconinstagram instagram iconpinterest pinterest iconfacebook facebook iconprint print iconsquares squares iconheart heart iconheart solid heart solid icon

    Rainbow Crunch Salad with Miso Dressing


    5 Stars 4 Stars 3 Stars 2 Stars 1 Star

    No reviews

    • Author: Amy MS, RD, LDN
    • Total Time: 10 minutes
    • Yield: 4 Servings 1x
    • Diet: Vegetarian

    Description

    Rainbow Crunch Salad, features a vibrant mix of crisp cabbage and crunchy textures tossed in a tangy and savory miso dressing.


    Ingredients

    Units Scale

    Salad:

    • 1 cup Shredded Green Cabbage
    • 1 cup Shredded Purple Cabbage
    • 1 cup Grated Carrots
    • 4 Scallions, sliced
    • 1 Bell Pepper, juilened
    • 1 cup Shelled Edamame (if frozen, be sure to thaw before adding to salad)

    Miso Dressing:

    • 2 tsp White Miso Paste
    • 1 Garlic Clove, minced
    • 1/4 cup PB Fit
    • 1/4 cup Soy Sauce
    • 2 tsp Sesame Oil
    • 2 tbsp Rice Wine Vinegar
    • 1 tbsp Honey
    • 1 tbsp Water
    • 1 tsp Chili Paste

    Instructions

    1. Add all the salad ingredients to a large mixing bowl. Using two spoons, toss the vegetables together. Set aside.
    2. In a medium-sized mixing bowl, add all the ingredients for the miso dressing. Whisk together until no lumps remain.
    3. Pour the dressing over top of the vegetables. Use the spoons to toss the vegetables and dressing together.
    4. Top with sliced almonds, roasted cashews or pepitas if you’d like extra crunch!
    • Prep Time: 10 minutes
    • Category: Salad
    • Method: No Cook

    Nutrition

    • Serving Size: 1 Serving
    • Calories: 154
    • Sugar: 27g
    • Sodium: 1145mg
    • Fat: 20g
    • Carbohydrates: 26g
    • Fiber: 20g
    • Protein: 7g
    • Cholesterol: 0mg
    Recipe Card powered byTasty Recipes

    Anti-Inflammatory Granola

    Anti-Inflammatory Granola

    Print
    clock clock iconcutlery cutlery iconflag flag iconfolder folder iconinstagram instagram iconpinterest pinterest iconfacebook facebook iconprint print iconsquares squares iconheart heart iconheart solid heart solid icon

    Anti-Inflammatory Granola


    5 Stars 4 Stars 3 Stars 2 Stars 1 Star

    No reviews

    • Author: Amy MS, RD, LDN

    Ingredients

    Units Scale
    • 2 cups Old Fashioned Oats
    • 1 cup Unsweetened Coconut
    • 1/2 cup Ground Flaxseed
    • 1 cup Nuts
    • 1/2 cup Dried Cherries
    • 1 tsp Turmeric
    • 1 tsp Cinnamon
    • 1/4 tsp Ground Ginger
    • 1/4 tsp Cardamom
    • 1/4 cup Olive Oil
    • 1/4 cup Honey
    • 3 tbsp Water
    • Pinch Salt

    Recipe Card powered byTasty Recipes

    Homemade Egg McMuffin (Thrive Muffin)

    Homemade Egg McMuffin (Thrive Muffin)

    Print
    clock clock iconcutlery cutlery iconflag flag iconfolder folder iconinstagram instagram iconpinterest pinterest iconfacebook facebook iconprint print iconsquares squares iconheart heart iconheart solid heart solid icon

    Homemade Egg McMuffin (Thrive Muffin)


    5 Stars 4 Stars 3 Stars 2 Stars 1 Star

    No reviews

    • Author: Amy MS, RD, LDN
    • Total Time: 13 minutes
    • Yield: 1 1x

    Description

    Skip the drive-thru and make breakfast at home with our delicious Egg McMuffin recipe—nicknamed “Thrive Muffins” by my kids for good reason! These homemade versions are not only tastier and quicker to prepare but also a healthier choice compared to fast food. Enjoy a scrumptious breakfast that’s fresh, nutritious, and made with love.


    Ingredients

    Units Scale
    • 1 Whole Wheat English Muffin
    • 1 Egg
    • 1 Slice Canadian Bacon
    • 10 grams Sharp Cheddar Cheese
    • 1/2 tbsp Olive Oil

    Instructions

    1. Heat a large cast iron skillet over medium heat.
    2. Once the pan has heated up, add the olive oil.
    3. Spray a biscuit cutter that is the same size as your English Muffin with nonstick spray and place into the pan, top side down so that it sits flat in your pan.
    4. Split the English Muffin in half. Place each half cut side down into the heated pan with olive oil. Then add the Canadian bacon to the pan.
    5. Next, crack the egg into the center of the biscuit cutter. Cover with a small lid to speed up cooking time and get a perfectly cooked egg.
    6. After 2 minutes, flip the Canadian bacon and English Muffin.
    7. Then, using tongs or a pot holder, remove the lid from the egg (caution the lid is hot!). Use the tongs again to lift the biscuit cutter out of the pan, leaving the egg in the pan. Then, flip the egg over with a spatula to cook on the other side
    8. Place the cheese onto the top of the egg to allow the cheese to melt.
    9. After 2 more minutes of cooking, now it is time to plate!
    10. Using a spatula, move the English Muffin to a plate. Place the Canadian bacon on the bottom half of the muffin, then top with the egg and cheese and finally close the sandwich with the top of the muffin.
    • Prep Time: 3 minutes
    • Cook Time: 10
    • Category: Breakfast
    • Method: Stovetop
    • Cuisine: American

    Nutrition

    • Serving Size: 1 Sandwich
    • Calories: 331
    • Sugar: 2g
    • Sodium: 563mg
    • Fat: 17g
    • Carbohydrates: 27g
    • Fiber: 3g
    • Protein: 18g
    • Cholesterol: 206mg
    Recipe Card powered byTasty Recipes

    Yellow Plum Sorbet

    Yellow Plum Sorbet

    Print
    clock clock iconcutlery cutlery iconflag flag iconfolder folder iconinstagram instagram iconpinterest pinterest iconfacebook facebook iconprint print iconsquares squares iconheart heart iconheart solid heart solid icon

    Yellow Plum Sorbet


    5 Stars 4 Stars 3 Stars 2 Stars 1 Star

    No reviews

    • Author: Amy MS, RD, LDN
    • Total Time: 0 hours
    • Yield: 6 Servings 1x
    • Diet: Vegetarian

    Description

    Bright and refreshing, this plum sorbet combines ripe sorriso plums with a touch of lemon juice and a hint of honey for a delicious, summer treat. This recipe was developed for the Black Forest Farmer’s Market.


    Ingredients

    Units Scale
    • 1 1/22 lbs Ripe Sorriso Plums
    • 2 tsp Lemon Juice
    • 1/2 cup Maple Syrup
    • 1/2 cup Water

    Instructions

    1. Halve, pit and cut plums into 1 1/2-inch dice. Place diced plums into a large sauce pan.
    2. To the sauce pan add maple syrup and lemon juice.
    3. Cover and bring to a simmer. Then, simmer uncovered for 8 minutes. Remove from heat and allow mixture to cool to room temperature.
    4. In a food processor or blender, blend the mixture until smooth. Then place the mixture into a container and chill for at least 2 hours.
    5. When the sorbet mixture is completely chilled, freeze the mixture using an ice cream maker, according to your machine’s directions.
    6. Once frozen, scoop into bowls and enjoy! Or place the frozen sorbet into a freezer-safe container and keep in the freezer until ready to enjoy.
    • Prep Time: 15 minutes
    • Cook Time: 10 minutes + 3 Hour Freeze Time
    • Category: Dessert
    • Method: Ice Cream Machine
    • Cuisine: Italian
    Recipe Card powered byTasty Recipes

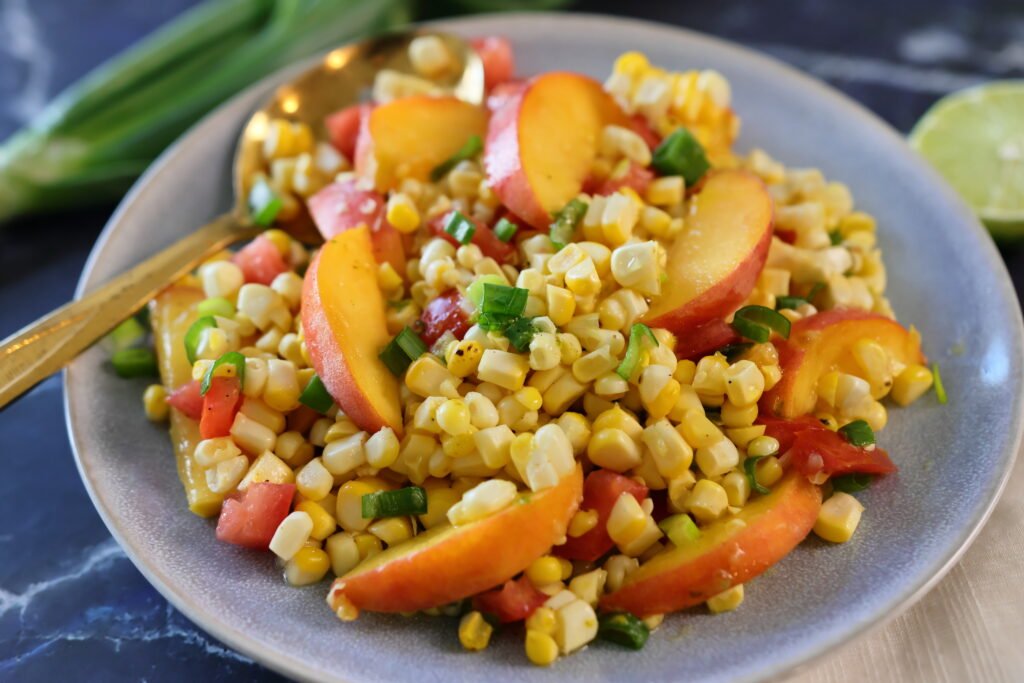
    Sweet Corn & Stone Fruit Summer Salad

    Sweet Corn & Stone Fruit Summer Salad

    Print
    clock clock iconcutlery cutlery iconflag flag iconfolder folder iconinstagram instagram iconpinterest pinterest iconfacebook facebook iconprint print iconsquares squares iconheart heart iconheart solid heart solid icon

    Sweet Corn & Stone Fruit Summer Salad


    5 Stars 4 Stars 3 Stars 2 Stars 1 Star

    No reviews

    • Author: Amy MS, RD, LDN
    • Total Time: 15 minutes
    • Diet: Vegetarian

    Description

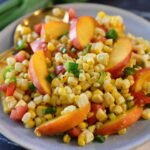
    This vibrant summer salad combines juicy peaches and ripe tomatoes with crisp, fresh sweet corn, all tossed in a zesty lime vinaigrette. This recipe was developed for the Black Forest Farmer’s Market.


    Ingredients

    Units Scale

    Salad:

    • 4 Ears Corn, shucked
    • 2 Ripe Peaches
    • 3 Tomatoes
    • 3 Spring Onions

    Lime-Honey VInaigrette:

    • 1/4 cup Olive Oil
    • 2 tsp Lime Zest
    • 2 tsp Lime Juice
    • 1 tbsp Maple Syrup or Honey
    • 2 tsp Dijon Mustard
    • 1/8 tsp Kosher Salt
    • 1/8 tsp Ground Black Pepper

    Instructions

    1. To make the dressing, whisk all ingredients together, then set aside.
    2. Cut the corn kernels off the cob and place into a large mixing bowl.
    3. Slice the peaches and place into the bowl with the corn.
    4. Dice the tomatoes into 1/2 inch dice and add to the bowl.
    5. Next, chop the spring onions and add to the bowl.
    6. Drizzle half the vinaigrette over top the salad and stir together with a spoon, taking care to not bruise the peaches!
    7. Taste the salad and add more dressing to your taste preferences. Enjoy!
    • Prep Time: 15 minutes
    • Category: Salad
    • Method: No Cook
    • Cuisine: American
    Recipe Card powered byTasty Recipes

    Cherry Oatmeal Bars

    Cherry Oatmeal Bars

    Cherry Oatmeal Bars
    Print
    clock clock iconcutlery cutlery iconflag flag iconfolder folder iconinstagram instagram iconpinterest pinterest iconfacebook facebook iconprint print iconsquares squares iconheart heart iconheart solid heart solid icon
    Cherry Oatmeal Bars

    Cherry Oatmeal Bars


    5 Stars 4 Stars 3 Stars 2 Stars 1 Star

    No reviews

    • Author: Amy MS, RD, LDN
    • Total Time: 35 minutes
    • Yield: 32 1x
    • Diet: Vegan

    Description

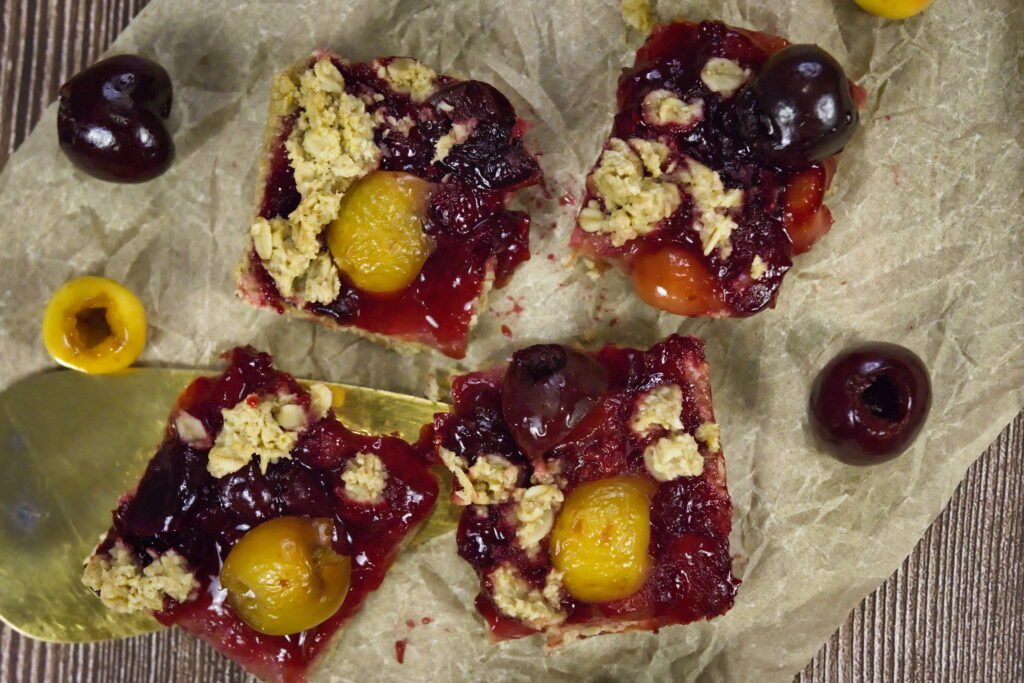
    Fresh cherry and oatmeal bars. The perfect dessert or grab & go snack that is packed full of antioxidants and fiber! This recipe was developed for the Park Union Farmer’s Market.


    Ingredients

    Units Scale

    Oatmeal Crumb:

    • 1 3/4 cup Oat Flour
    • 1 1/4 cup Old Fashioned Oats
    • 1 1/2 tsp Cinnamon
    • 1/4 tsp Salt
    • 1/4 tsp Baking Powder
    • 1/2 cup Coconut Oil
    • 1/2 cup Applesauce
    • 1/3 cup Maple Syrup
    • 1 tsp Vanilla Extract
    • 1 tsp Lemon Zest

    Cherry Filling:

    • 3 cups Pitted Cherries
    • 2 tbsp Maple Syrup
    • 1 tbsp Lemon Juice
    • 2 tsp Cornstarch

    Instructions

    1. Preheat oven to 350° F. Grease a 9×13 dark pan with nonstick spray. Set aside.
    2. In a small sauce pan, add the cherry filling ingredients, pitted cherries, maple syrup, lemon juice and cornstarch. Turn the heat to medium and bring the mixture to a low boil.
    3. In a large mixing bowl, add the oat flour, oats, cinnamon, baking powder and salt. Whisk together to combine.
    4. Next add the liquid ingredients, coconut oil, applesauce, maple syrup, vanilla extract and lemon zest.
    5. Using a spatula, stir the crumb mixture together.
    6. Set 3/4 cup of the mixture aside for the topping.
    7. Pour the remaining mixture into your prepared pan and spread evenly, pressing down with a spatula to ensure crumb crust cooks evenly.
    8. Par bake the crumb crust! Pop into the oven and bake for 10 minutes. This helps to get a slightly crispy bottom to your bars.
    9. After 10 minutes, remove the pan from the oven and spread the cherry filling evenly over top of the crumb crust. Top with the remaining filling by dropping small teaspoon size bits over top the cherry filling.
    10. Place the pan back into the oven and bake for an additional 20-25 minutes.
    11. Remove from the oven and allow to cool fully before slicing. Enjoy!
    • Prep Time: 15
    • Cook Time: 20
    • Category: Dessert, Snack
    • Method: Bake
    • Cuisine: American

    Nutrition

    • Serving Size: 1 Bar
    Recipe Card powered byTasty Recipes

    Zucchini & Yellow Squash Rosettes

    Zucchini & Yellow Squash Rosettes

    Zucchini Rosette
    Print
    clock clock iconcutlery cutlery iconflag flag iconfolder folder iconinstagram instagram iconpinterest pinterest iconfacebook facebook iconprint print iconsquares squares iconheart heart iconheart solid heart solid icon
    Zucchini Rosette

    Zucchini & Yellow Squash Rosettes


    5 Stars 4 Stars 3 Stars 2 Stars 1 Star

    No reviews

    • Total Time: 15 minutes
    • Yield: 4050 Rosettes 1x
    • Diet: Vegetarian

    Description

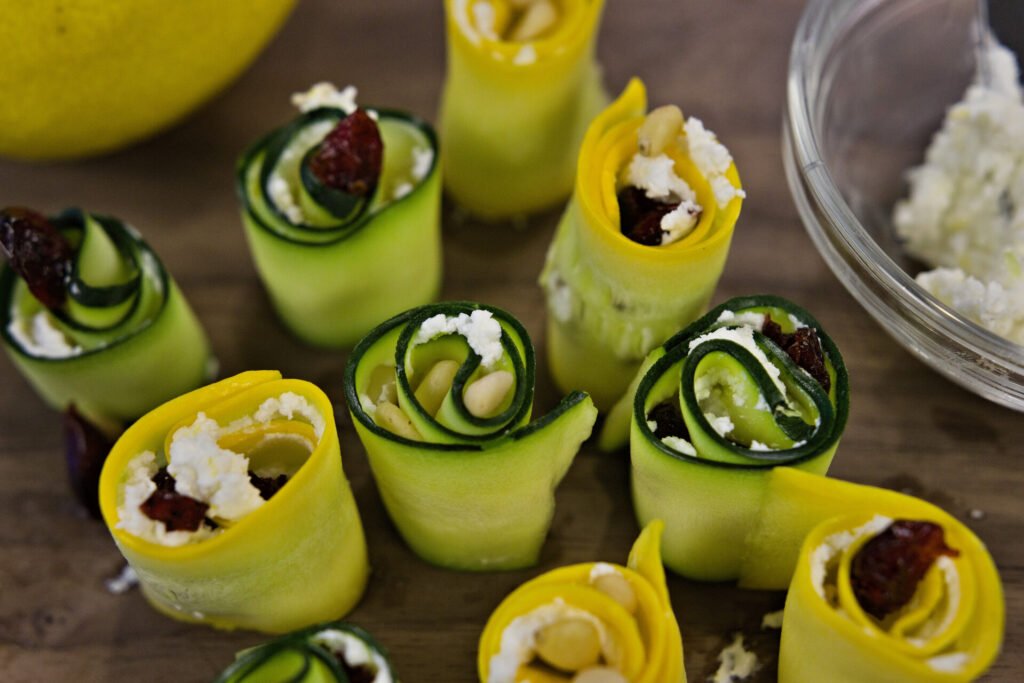
    Zucchini and Yellow Squash Rosettes are a recipe that’s as beautiful as they are delicious. Packed with tangy goat cheese, sweet cranberries and crunchy pine nuts. This appetizer is perfect for impressing guests or adding elegance to any meal. This recipe was created for the Park Union Farmer’s Market.


    Ingredients

    Units Scale
    • 1 Medium Zucchini
    • 1 Medium Yellow Squash
    • 2 oz Goat Cheese
    • 1/2 tsp Lemon Zest
    • 1/2 tbsp Lemon Juice
    • 1/4 cup Dried Cranberries
    • 1/4 cup Pine Nuts

    Instructions

    1. Trim the ends of the zucchini and squash. Then, using a vegetable peeler, peel long ribbons of both the zucchini and squash.
    2. Mix the goal cheese filling. Using a microplane zester, zest and juice the lemon. In a small mixing bowl combine the goat cheese, lemon zest and lemon juice, Mix together with a fork to fully incorporate.
    3. Toast the pine nuts. Place the pine nuts into a dry skillet, in a single layer. Turn the heat to medium-low and toast for 2-3 minutes, continually stirring or tossing the skillet to
    4. Place the zucchini and squash ribbons onto a cutting board or work surface. Using a butter knife or small spatula, spread 1/2 to 1 tsp of goat cheese mixture onto each ribbon. Top the goat cheese with a few cranberries and pine nuts. Roll up. Continue until all the ribbons have been filled. Enjoy!
    • Prep Time: 15 minutes
    • Category: Appetizer
    • Method: No Cook
    • Cuisine: Mediterranean

    Nutrition

    • Serving Size: 3
    • Calories: 32
    • Sugar: 2g
    • Sodium: 12mg
    • Fat: 2g
    • Carbohydrates: 2g
    • Fiber: 0g
    • Protein: 2g
    • Cholesterol: 2mg
    Recipe Card powered byTasty Recipes

    Blackberry Tart

    Blackberry Tart

    Print
    clock clock iconcutlery cutlery iconflag flag iconfolder folder iconinstagram instagram iconpinterest pinterest iconfacebook facebook iconprint print iconsquares squares iconheart heart iconheart solid heart solid icon

    Blackberry Tart


    5 Stars 4 Stars 3 Stars 2 Stars 1 Star

    No reviews

    • Author: Amy MS, RD, LDN
    • Total Time: 40 minutes
    • Yield: 8 Servings 1x
    • Diet: Vegan

    Description

    This healthy blackberry tart features a delicate olive oil crust, tart blackberries and fresh lemon for a show-stopper summertime treat!


    Ingredients

    Units Scale

    Tart Dough:

    • 1/2 cup Whole Wheat Flour
    • 3/4 cup All Purpose Flour
    • 2 tbsp Brown Sugar
    • 2 tsp Lemon Zest (zest from 1 medium-sized lemon
    • 1/3 cup Olive Oil
    • 1 Egg
    • 1/4 tsp Kosher Salt
    • 34 tbsp Ice Water (as needed to bring dough together)

    Tart Filling:

    • 16 oz Blackberries (fresh or frozen)
    • 5 tsp Lemon Juice
    • 3 tbsp Sugar
    • 1 tbsp All Purpose Flour
    • 1 tbsp Coarse Sugar (optional for topping)

    Instructions

    1. Preheat your oven to 400°F
    2. Spray a tart pan or pie pan with nonstick spray, set aside.
    3. In the bowl of a food processor add all the dough ingredients except water. Pulse together for 10-15 seconds to mix the dough. If the dough seems very crumbly, add ice water, 1 tablespoon at a time to bring the dough together. It should stay together when you pinch with your fingers.
    4. Grab you pie or tart pan and place your dough into the pan. Using your hands or the bottom of a measuring cup, press the dough evenly into the pan. Start at the center of the pan and work your way out to evenly distribute the dough around the entire pan and slightly up the edges, just as you would a pie crust. Refrigerate your dough while you mix up the filling.
    5. In a medium size bowl, add the blackberries, lemon juice, sugar and flour. Mix together gently with a spatula.
    6. Remove your tart crust from the refrigerator and pour the blackberry filling into the crust. Give the pan a gentle shake back and forth to evenly distribute the blackberries. Top the berries with 1 tablespoon of coarse sugar.
    7. Place the tart pan onto a sheet tray (this is a must if you do not want to spend the next day cleaning your oven!) and place into the oven.
    8. Bake at 400° F for 30 minutes.
    9. Remove from the oven and allow to cool at least 10 minutes before digging in. Enjoy!
    • Prep Time: 10 minutes
    • Cook Time: 30
    • Category: Dessert
    • Method: Bake
    • Cuisine: Mediterranean

    Nutrition

    • Serving Size: 1 Slice
    • Calories: 223
    • Sugar: 11g
    • Sodium: 83mg
    • Fat: 10g
    • Carbohydrates: 28g
    • Fiber: 4g
    • Protein: 4g
    • Cholesterol: 23mg
    Recipe Card powered byTasty Recipes

    Dark Chocolate Cherry Cashew Bars

    Dark Chocolate Cherry Cashew Bars

    Print
    clock clock iconcutlery cutlery iconflag flag iconfolder folder iconinstagram instagram iconpinterest pinterest iconfacebook facebook iconprint print iconsquares squares iconheart heart iconheart solid heart solid icon

    Dark Chocolate Cherry Cashew Bars


    5 Stars 4 Stars 3 Stars 2 Stars 1 Star

    No reviews

    • Author: Amy MS, RD, LDN
    • Total Time: 20 minutes
    • Yield: 16 Bars 1x
    • Diet: Vegetarian

    Ingredients

    Units Scale
    • 1 cup Raw Cashews
    • 1/2 cup Raw Almonds
    • 1/2 cup Unsalted Peanuts
    • 1/2 cup Dried Cherries
    • 2 tbsp Ground Flaxseed
    • 1/8 tsp Sea Salt
    • 3 tbsp Honey
    • 2 tbsp Maple Syrup
    • 1/2 cup Semi Sweet or Dark Chocolate Chips
    • 1 tsp Coconut Oil

    Instructions

    1. Preheat oven to 325° F. Line an 8×8 inch baking pan with parchment paper and set aside.
    2. In a large mixing bowl, add the nuts, cherries and flaxseed and stir together with a spatula.
    3. Set a small sauce pan over medium-low heat and add the honey and maple syrup. Cook until the liquid just starts to simmer. Remove from heat.
    4. Pour the liquid mixture over the nuts and stir with a spatula to combine. Then pour the mixture into your prepared pan. Working quickly, press the mixture evenly into the pan. (It helps to place another piece of parchment paper over top to press evenly and avoid getting your hands sticky!)
    5. Place into the oven and bake for 15 minutes.
    6. Remove from the oven and allow to cool for 15 minutes on a wire rack. Then place into the refridgerator to fully cool for 15 minutes.
    7. Just before the 15 minutes are up, make the chocolate for the bottom and deocrative topping.
    8. In a medium sized microwave safe bowl, add the dark chocolate chips and coconut oil. Microwave on 25 second intervals, stirring in between each, until the chocolate is just melted.
    9. Remove the bars from the refrigerator and place parchment onto a cutting board. Using a sharp knife, slice the bars into 16 equal portions.
    10. Set a silpat out on a large sheet tray.
    11. Using an spatula or spoon, spread a thin layer of chocolate onto the bottom of each bar. Place onto the silpat. Continue with remaining bars.
    12. Using the remaining chocolate, drizzle chocolate over top of the bars for a decorative finish.
    13. Place the bars back into the refrigerator for the chocolate to fully harden. Bars will keep in an airtight container for 5-7 days. Enjoy!
    • Prep Time: 5
    • Cook Time: 15
    • Category: Snack
    • Method: Bake

    Nutrition

    • Serving Size: 1 Bar
    • Calories: 143
    • Sugar: 11g
    • Sodium: 22mg
    • Fat: 8g
    • Saturated Fat: 2g
    • Unsaturated Fat: 6g
    • Carbohydrates: 15g
    • Fiber: 1g
    • Protein: 4g
    • Cholesterol: 0mg
    Recipe Card powered byTasty Recipes

    Homemade Chocolate Chip Clif Bars

    Homemade Chocolate Chip Clif Bars

    Print
    clock clock iconcutlery cutlery iconflag flag iconfolder folder iconinstagram instagram iconpinterest pinterest iconfacebook facebook iconprint print iconsquares squares iconheart heart iconheart solid heart solid icon

    Homemade Chocolate Chip Clif Bars


    5 Stars 4 Stars 3 Stars 2 Stars 1 Star

    No reviews

    • Author: Amy MS, RD, LDN
    • Total Time: 10 minutes
    • Yield: 12 Bars 1x
    • Diet: Vegetarian

    Description

    Make your own homemade, no-bake Chocolate Chip Clif Bars!


    Ingredients

    Units Scale
    • 1 cup Pitted Dates
    • 1 cup Old Fashioned Oats
    • 1 cup Crisp Rice Cereal
    • 2 Scoops Vanilla Protein Powder
    • 2 tbsp Ground Flaxseed
    • 1/2 tsp Ground Cinnamon
    • 1/8 tsp Salt
    • 1/2 cup Cashew Butter
    • 1/4 cup Honey
    • 1 tsp Vanilla Extract
    • 1/4 cup Mini Chocolate Chips

    Instructions

    1. Set out an 8×8 baking pan and line with parchment paper, set aside.
    2. In the bowl of a food processor, add the dates and process until they are broken down into very small pieces.
    3. Next, add the remaining ingredients (except chocolate chips) the oats, rice cereal, protein powder, flaxseed, cinnamon, salt, cashew butter, honey, vanilla. Process again for 20 seconds.
    4. Remove the blade from the food processor. Add in the mini chocolate chips and stir with a spatula.
    5. Pour the mixture into your prepared pan and press evenly with your hands or the back of a measuring cup.
    6. Place the pan into the refrigerator to set for at least 30 minutes.
    7. After 30 minutes, remove the pan from the refrigerator. Lift out the parchment paper and place onto a cutting board.
    8. Cut the bars into 12 equal sections. Store in an airtight container in the refrigerator. Enjoy!
    • Prep Time: 10
    • Category: Snack
    • Method: No Cook

    Nutrition

    • Serving Size: 1 bar
    • Calories: 198
    • Sugar: 15g
    • Sodium: 84mg
    • Fat: 9g
    • Fiber: 2g
    • Protein: 6g
    • Cholesterol: 8mg
    Recipe Card powered byTasty Recipes

    Crunchy Oats and Honey Granola Bars

    Crunchy Oats & Honey Granola Bars

    Print
    clock clock iconcutlery cutlery iconflag flag iconfolder folder iconinstagram instagram iconpinterest pinterest iconfacebook facebook iconprint print iconsquares squares iconheart heart iconheart solid heart solid icon

    Crunchy Oats & Honey Granola Bars


    5 Stars 4 Stars 3 Stars 2 Stars 1 Star

    5 from 1 review

    • Author: Amy MS, RD, LDN
    • Total Time: 23 minutes
    • Yield: 8 Bars 1x
    • Diet: Vegetarian

    Description

    These bars are a homemade version of Nature Valley Oats ‘n Honey Bars made with wholesome oats, honey and simple pantry ingredients.


    Ingredients

    Units Scale
    • 1 1/2 cups Old Fashioned Oats
    • 1/3 cup Oat Flour
    • 1/2 tsp Ground Cinnamon
    • 1/4 tsp Baking Soda
    • 1/8 tsp Salt
    • 3 tbsp Coconut Oil
    • 3 tbsp Honey
    • 2 tbsp Brown Sugar
    • 1 tsp Vanilla Extract

    Instructions

    1. Preheat oven to 350 F. Line an 8×8 inch baking dish with parchment paper. Set aside
    2. In a small sauce pan, add the coconut oil, honey and brown sugar. Heat on medium low until the coconut oil has melted and the brown sugar dissolves into the mixture. Remove from heat.
    3. In a large mixing bowl, add the oats, oat flour, cinnamon, baking soda and salt.
    4. Next, pour the liquid ingredients into the bowl with the oats and stir with a spatula to combine.
    5. Pour the mixture into your prepared pan and spread evenly with a spatula.
    6. Bake for 15-18 minutes until the bars are slightly browned.
    7. Remove from the oven and cool on a wire rack.
    • Prep Time: 8
    • Cook Time: 15
    • Category: Snack, Bar
    • Method: Bake
    • Cuisine: American

    Nutrition

    • Serving Size: 1 Bar
    • Calories: 155
    • Sugar: 7g
    • Sodium: 76mg
    • Fat: 6g
    • Carbohydrates: 23g
    • Fiber: 2g
    • Protein: 3g
    • Cholesterol: 0mg
    Recipe Card powered byTasty Recipes

    Roasted Turnips & Garlic Scape Chimichurri on Baked Potato Chips

    Roasted Turnips & Garlic Scape Chimichurri on Baked Potato Chips

    Print
    clock clock iconcutlery cutlery iconflag flag iconfolder folder iconinstagram instagram iconpinterest pinterest iconfacebook facebook iconprint print iconsquares squares iconheart heart iconheart solid heart solid icon

    Roasted Turnips & Garlic Scape Chimichurri on Baked Potato Chips


    5 Stars 4 Stars 3 Stars 2 Stars 1 Star

    No reviews

    • Author: Amy MS, RD, LDN
    • Total Time: 1 hour 30 minutes
    • Diet: Vegetarian

    Description

    Market fresh produce turn these simple ingredients into a show-stopper appetizer, Roasted Turnips with Kale & Garlic Scape Chimichuri on top oven Baked Potato Chips! This recipe was created for the Black Forest Farmer’s Market.


    Ingredients

    Units Scale

    Roasted Turnips

    • 1 lb Turnips (4 cups) Trimmed, scrubbed and diced into 1/2-inch pieces
    • 2 tbsp Olive Oil
    • 1/2 tsp Kosher Salt
    • 1/4 tsp Paprika
    • 1/4 tsp Onion Powder
    • 1/4 tsp Garlic Powder
    • 1/4 tsp Ground Black Pepper

    Kale & Garlic Scape Chimichuri

    • 1 cup Baby Kale
    • 5 Garlic Scapes
    • 1/2 cup Olive Oil
    • 1 tbsp Red Wine Vinegar
    • 1 tbsp Lime Juice
    • 1/2 tsp Kosher Salt
    • 1/2 tsp Ground Black Pepper
    • 1/4 tsp Red Pepper Flakes (Optional)

    Oven Baked Potato Chips

    • 1 lb Russet Potatoes (2-3 potatoes), Scrubbed
    • 3 tbsp Olive Oil
    • 1 tsp Kosher Salt

    Instructions

    Roasted Turnips:

    1. Preheat oven to 400° F. Get out a sheet tray. Set aside.
    2. In a large bowl, toss together the turnips, olive oil, spices, salt and pepper.
    3. Spread the mixture out onto your sheet tray in an even layer.
    4. Roast for 25-30 minutes, stirring halfway through roasting until the turnips are nicely golden brown and slightly crispy.

    Kale and Garlic Scape Chimichuri:

    1. Into the bowl of a food processor, add all the ingredients, kale, garlic scapes, olive oil, red wine vinegar, lime juice, salt, pepper and red pepper flakes.
    2. Process on 15 second intervals until the chimichuri reaches your desired consistency. (Traditionally chimichuri is not blended until smooth but left slightly chunky.)
    3. Taste and adjust seasonings as needed.

    Oven Baked Potato Chips:

    1. Preheat oven to 375°F Convect or 400°F regular. Get out a large sheet tray and set aside.
    2. Using a mandoline or a sharp knife, slice the potatoes into 1/8″ slices. Place the slices into a large bowl of warm water. This helps to remove some of the starch from the potatoes.
    3. Drain the potato slices and pat them dry with a clean dish towel or paper towel.
    4. In a large bowl toss the potato slices with the olive oil and salt.
    5. Place the potato slices onto your sheet tray in one single layer. This make take a few rounds, do not overlap or the chips will not cook evenly.
    6. Bake for 10 minutes, then using a spatula, flip the chips over and bake for another 10 minutes on the other side. Take care in the last few minutes to watch so that the chips do not burn!
    7. Remove from the oven and allow to cool on a wire rack.

    Assembly:

    1. Place one chip onto a plate, top with a tablespoon of roasted turnips, then top with a drizzle of chimichuri. Continue with remaining ingredients. Enjoy!
    • Prep Time: 30
    • Cook Time: 60
    • Category: Appetizer
    • Method: Roast
    • Cuisine: Mediterranean
    Recipe Card powered byTasty Recipes

    Whole Wheat Naan Bread

    Whole Wheat Naan Bread

    Print
    clock clock iconcutlery cutlery iconflag flag iconfolder folder iconinstagram instagram iconpinterest pinterest iconfacebook facebook iconprint print iconsquares squares iconheart heart iconheart solid heart solid icon

    Whole Wheat Naan Bread


    5 Stars 4 Stars 3 Stars 2 Stars 1 Star

    No reviews

    • Author: Amy MS, RD, LDN
    • Total Time: 2 hours 25 minutes
    • Yield: 16 1x
    • Diet: Vegetarian

    Description

    Whole Wheat Naan Bread is soft, fluffy, and lightly charred, it’s the perfect accompaniment to Greek Chicken & Chickpeas.


    Ingredients

    Units Scale
    • 1 1/2 cups Warm Water
    • 2 tsp Honey
    • 2 tsp Dry Active Yeast
    • 2 tbsp Olive Oil
    • 1 1/2 tsp Kosher Salt
    • 1 1/2 cups Whole Wheat Flour
    • 3 cups All Purpose Flour
    • 3/4 cup Greek Yogurt

    Instructions

    1. Make the Dough. In a large bowl or stand mixer, add the warm water, honey and yeast. Allow the yeast to bloom for 4-5 minutes.
    2. When the yeast is bubbly, add the remaining ingredients. Using the dough hook attachment or a spatula, mix everything together until the dough is smooth and elastic (approximately 2- 4 minutes).
    3. Cover and allow to rise until doubled in size, about 2 hours.
    4. Roll & Cook Naan Bread.  Remove the dough from bowl and divide into 16 equal portions.
    5. Preheat a cast iron pan over medium high heat.
    6. With a rolling pin, roll one portion of dough out into an 8-inch circle.
    7. Place onto preheated pan and cook for 1 minute on each side. Then set aside to cool.
    8. Repeat until all dough has been cooked!
    • Prep Time: 10 minutes + 2 Hours
    • Cook Time: 15 minutes
    • Category: Bread, Mediterranean
    • Method: Stovetop
    • Cuisine: Mediterranean

    Nutrition

    • Serving Size: 1
    • Calories: 149
    • Fat: 2g
    • Carbohydrates: 27g
    • Fiber: 2g
    • Protein: 5g
    Recipe Card powered byTasty Recipes

    Greek Chicken & Chickpeas

    Greek Chicken & Chickpeas

    Print
    clock clock iconcutlery cutlery iconflag flag iconfolder folder iconinstagram instagram iconpinterest pinterest iconfacebook facebook iconprint print iconsquares squares iconheart heart iconheart solid heart solid icon

    Greek Chicken & Chickpeas


    5 Stars 4 Stars 3 Stars 2 Stars 1 Star

    5 from 1 review

    • Author: Amy MS, RD, LDN

    Description

    Greek Chicken & Chickpeas is a flavorful and flexitarian dinner that will impress your guests and family!


    Ingredients

    Scale
    • 2 lbs Chicken Breasts, diced into 1-inch pieces
    • 2, 15oz Cans Chickpeas, drained and rinsed
    • 1 Large Onion, diced
    • 2 Lemons, zested and juiced
    • 4 Garlic Cloves, minced
    • 3/4 cup Olive Oil
    • 3 tsp Oregano
    • 2 tsp Kosher Salt
    • 1 tsp Ground Black Pepper

    Instructions

    1. Set out two separate mixing bowls, one will be for the chicken, the other for the chickpeas. (Note: If you do not mind the meat and chickpeas mixed together then feel free to use one large bowl!)
    2. To one bowl, mix up the marinade. Add the olive oil, diced onion, garlic, lemon zest and juice, oregano, salt and pepper. Whisk together to combine.
    3. Pour half of the marinade into the other bowl. You should have half of the marinade in each bowl.
    4. Add the chickpeas to one bowl and cover then add the chicken to the other bowl and cover it. Place both bowls into the refrigerator to marinate for at least 1 hour and up to 6 hours.
    5. When you are ready to cook. Heat two large cast iron pans over medium high heat. Add 2 tsp olive oil to each pan.
    6. When the pans are heated, add the chickpeas to one pan and the chicken to the other.
    7. Cook the chicken and chickpeas, stirring frequently, for 15-20 minutes until the chicken is cooked through and the chickpeas are crispy. The cast iron pan will help to crisp and slightly char the chicken and chickpeas. This is good flavor! (Note that the chicken should be cooked through to 165 F).
    8. Serve the chicken and chickpeas over whole wheat naan bread, tzatizki sauce, tomato and cucumber salad and top with feta and kalamata olives. Enjoy!

    Notes

    • Category: Dinner
    • Method: Stovetop
    • Cuisine: Greek
    Recipe Card powered byTasty Recipes

    Tomato & Cucumber Salad

    Tomato & Cucumber Salad

    Print
    clock clock iconcutlery cutlery iconflag flag iconfolder folder iconinstagram instagram iconpinterest pinterest iconfacebook facebook iconprint print iconsquares squares iconheart heart iconheart solid heart solid icon

    Tomato & Cucumber Salad


    5 Stars 4 Stars 3 Stars 2 Stars 1 Star

    No reviews

    • Author: Amy MS, RD, LDN
    • Total Time: 5 minutes
    • Yield: 4 Servings 1x
    • Diet: Vegetarian

    Description

    Tomato and cucumber salad is bright and fresh, the perfect topping for Greek Chicken and Chickpeas or simple side dish to add to any meal.


    Ingredients

    Units Scale
    • 1 pint Cherry Tomatoes
    • 1 English Cucumber, seeded and diced
    • 1/2 Small Red Onion, thinly sliced
    • 1 tbsp Dill, minced
    • 1/2 tbsp Olive Oil
    • 1 tbsp Red Wine Vinegar
    • 1/4 tsp Kosher Salt
    • 1/2 tsp Ground Black Pepper

    Instructions

    1. In a medium-sized mixing bowl, combine all ingredients.
    2. Gently mix together with a wooden spoon.
    3. Taste and adjust seasonings to your preference. Enjoy!
    • Prep Time: 5 minutes
    • Category: Salad
    • Method: No Cook
    • Cuisine: Greek

    Nutrition

    • Serving Size: 1/4
    • Calories: 36
    • Sugar: 2g
    • Sodium: 179g
    • Fat: 2g
    • Carbohydrates: 5g
    • Fiber: 1g
    • Protein: 1g
    • Cholesterol: 0mg
    Recipe Card powered byTasty Recipes

    Tzatziki Sauce

    Tzatziki Sauce

    Print
    clock clock iconcutlery cutlery iconflag flag iconfolder folder iconinstagram instagram iconpinterest pinterest iconfacebook facebook iconprint print iconsquares squares iconheart heart iconheart solid heart solid icon

    Tzatziki Sauce


    5 Stars 4 Stars 3 Stars 2 Stars 1 Star

    No reviews

    • Author: Amy MS, RD, LDN
    • Total Time: 8 minutes
    • Yield: 16 Servings 1x

    Description

    Creamy homemade Tzatziki sauce is filled with cucumber, dill, lemon and garlic. The perfect accompaniment to your next Mediterranean meal.


    Ingredients

    Units Scale
    • 2 cups Greek Yogurt
    • 1 Cucumber, grated
    • 2 tbsp Lemon Juice
    • 2 Gloves Garlic, minced
    • 1 1/2 tbsp Dill, minced
    • 1/2 tsp Kosher Salt
    • 1/2 tsp Ground Black Pepper

    Instructions

    1. Set out a medium sized mixing bowl and place a clean dish towel over top.
    2. With a box grater, grate the entire cucumber right over the towel and bowl. Then, wring out the moisture from the cucumber using the towel. Discard the liquid and place the grated cucumber into the empty bowl.
    3. Add the remaining ingredients to the bowl and give it a thorough stir with a spoon or whisk.
    4. Cover and place into the refrigerator until ready to serve. The flavors will enhance with a little time in the fridge!
    • Prep Time: 8 minutes
    • Category: Sauce
    • Cuisine: Greek

    Nutrition

    • Serving Size: 1/16
    • Calories: 22
    • Sugar: 1g
    • Sodium: 92mg
    • Fat: 0g
    • Carbohydrates: 2g
    • Fiber: 0g
    • Protein: 3g
    • Cholesterol: 2mg
    Recipe Card powered byTasty Recipes

    Mediterranean Pesto Pasta with Chicken, Veggies & Chickpeas

    Mediterranean Pesto Pasta with Chicken, Veggies & Chickpeas

    Print
    clock clock iconcutlery cutlery iconflag flag iconfolder folder iconinstagram instagram iconpinterest pinterest iconfacebook facebook iconprint print iconsquares squares iconheart heart iconheart solid heart solid icon

    Mediterranean Pesto Pasta with Chicken, Veggies & Chickpeas


    5 Stars 4 Stars 3 Stars 2 Stars 1 Star

    No reviews

    • Author: Amy MS, RD, LDN
    • Total Time: 25 minutes

    Description

    Mediterranean Pesto Pasta is fresh, vibrant and satisfying! This dish is infinitely adaptable with your favorite veggies or in-season produce.


    Ingredients

    Units Scale
    • 1 lb Whole Wheat Penne Pasta
    • 1 lb Chicken Breast, cut into 1 1/2 inch dice
    • 2 Medium Zucchini
    • 2 Bell Peppers (Orange, Red or Yellow)
    • 1 pint Cherry Tomatoes
    • 2 Tbsp Olive Oil
    • 1 15 oz Can Chickpeas, drained and rinsed
    • 4 Tbsp Spinach Pesto

    Instructions

    1. Make your pesto and then set aside to cook the rest of the dish.
    2. Cook your pasta according to the box directions.
    3. While the pasta cooks, cook your chicken and veggies
    4. Heat a large skillet (cast iron pan if you have it!) over medium high heat, add 1 tbsp of olive oil
    5. When your pan is hot, add the chicken. Cook for 8-10 minutes until nicely browned and cooked through. Place cooked chicken on a plate and set aside.
    6. While the chicken cooks, prep your veggies. Rinse your veggies and get ready to chop!
    7. Dice the vegetables into 1 1/2 inch pieces
      1. Zucchini: Slice in half length-wise, then dice into half moon shape
      2. Bell Pepper: Cut around the pepper and remove the core, then slice into strips, then dice
      3. Cherry Tomatoes: Slice in half lengthwise
    8. Add another tablespoon of olive oil to the skillet and adjust skillet heat to medium. Add the chickpeas to the skillet.
    9. Next add the zucchini and bell pepper to your pan. Cook for 5-7 minutes, stirring occasionally and turning over the veggies to cook evenly on each side.
    10. Now its time to put the dish together!
    11. In a large bowl, add the 3-4 tablespoons of pesto to the bottom. Next, add the pasta, chicken and veggies, including the cherry tomatoes you chopped earlier. Top with another tablespoon of pesto. Using a large spoon, mix the dish together, taking care to not mash your veg!
    12. Taste the pasta and add additional pesto per your preference.
    13. Serve immediately and enjoy a taste of a Mediterranean Summer!
    • Prep Time: 10 minutes
    • Cook Time: 15 minutes
    • Category: Dinner, Mediterranean
    • Method: Stovetop
    • Cuisine: Italian

    Nutrition

    • Serving Size: 1/6
    • Calories: 460
    • Sugar: 7g
    • Sodium: 625mg
    • Fat: 14g
    • Carbohydrates: 77g
    • Fiber: 39g
    • Protein: 40g
    • Cholesterol: 74mg
    Recipe Card powered byTasty Recipes

    Turmeric Pickled Onions

    Turmeric Pickled Onions

    Print
    clock clock iconcutlery cutlery iconflag flag iconfolder folder iconinstagram instagram iconpinterest pinterest iconfacebook facebook iconprint print iconsquares squares iconheart heart iconheart solid heart solid icon

    Turmeric Pickled Onions


    5 Stars 4 Stars 3 Stars 2 Stars 1 Star

    No reviews

    • Author: Amy MS, RD, LDN

    Description

    Packed with anti-inflammatory benefits and delicious flavor, Turmeric Pickled Onions are a great topping for any meal!


    Ingredients

    Units Scale
    • 1 Large Sweet Onion
    • 1 cup Distilled White Vinegar
    • 1/2 cups Water
    • 1 tbsp Kosher Salt
    • 1/4 cup Sugar
    • 1/2 tsp Turmeric

    Instructions

    1. Combine all the ingredients into a mason jar or a glass container with a lid.
    2. Allow to marinate for at least 12 hours, ideally 24 hours.
    3. Serve on top of fajitas, tacos, sandwiches, salads, so many ways!


    Recipe Card powered byTasty Recipes

    Braided Pesto Garlic Knots

    Braided Pesto Garlic Knots

    Print
    clock clock iconcutlery cutlery iconflag flag iconfolder folder iconinstagram instagram iconpinterest pinterest iconfacebook facebook iconprint print iconsquares squares iconheart heart iconheart solid heart solid icon

    Pesto Garlic Knots


    5 Stars 4 Stars 3 Stars 2 Stars 1 Star

    No reviews

    • Author: Amy MS, RD, LDN
    • Total Time: 45 minutes
    • Yield: 6 1x

    Description

    Braided Pesto Garlic Knots are delicious bites packed with spinach pesto, garlic and cheese. Perfect as an appetizer or side dish!


    Ingredients

    Units Scale

    Instructions

    1. Start by making the Whole Wheat Pizza Dough and Spinach Pesto.
    2. Roll the pizza dough into a square, roughly 12×12 inches.
    3. Using a spatula, spread the pesto onto the dough, leaving about a 1/2 inch border around all sides.
    4. Evenly sprinkle the mozzarella over the pesto.
    5. Next, take the top half of the dough and fold down to meet the bottom. You are basically folding the dough in half here. (Check out the video for a play-by-play!)
    6. Then, using a knife or bench scraper, cut the dough horizontally into 6 sections. You should have 6 rectangles at this point.
    7. Now, take one of your rectangles and vertically cut two slits into the dough, keeping the top portion intact. Continue with remaining rectangles.
    8. Next it’s time to braid! Take one of your rectangles and fold the left dough portion over the middle section then repeat with the left side. Continue braiding until you reach the end of the dough. Then, pinch the bottom of the dough to seal. Now take the end you sealed and roll it up towards the other end. You will now have a braided pesto knot! Continue with the rest of the rectangles.
    9. Place the knots into a 9×9 baking dish and brush with a little olive oil.
    10. Place into the oven and bake for 30-35 minutes until golden brown. Note if the tops get a little too brown, cover with foil for the last 5 minutes. Allow to cool slightly and serve with marinara sauce or extra pesto. Enjoy!
    • Prep Time: 15 minutes
    • Cook Time: 30 minutes
    • Category: Appetizer, Dinner
    • Method: Bake
    • Cuisine: Italian

    Nutrition

    • Serving Size: 1
    • Calories: 216
    • Sodium: 406mg
    • Fat: 7g
    • Carbohydrates: 33g
    • Fiber: 3g
    • Protein: 8g
    • Cholesterol: 6mg
    Recipe Card powered byTasty Recipes

    Greek Chickpea Salad in a Jar

    Greek Chickpea Salad in a Jar

    Print
    clock clock iconcutlery cutlery iconflag flag iconfolder folder iconinstagram instagram iconpinterest pinterest iconfacebook facebook iconprint print iconsquares squares iconheart heart iconheart solid heart solid icon

    Greek Chickpea Salad in a Jar


    5 Stars 4 Stars 3 Stars 2 Stars 1 Star

    5 from 1 review

    • Author: Amy MS, RD, LDN
    • Total Time: 8 minutes
    • Yield: 2 Salads 1x
    • Diet: Vegetarian

    Description

    Chickpea Greek Salad is the easiest and tastiest plant-based meal prep!


    Ingredients

    Units Scale

    Chickpea Greek Salad:

    • 1 Can, 15 oz Chickpeas, drained and rinsed
    • 1 Cucumber, Peeled, Seeded and Diced
    • 1/2 cup Cherry Tomatoes, sliced in half lengthwise
    • 1/4 cup Kalamata Olives
    • 1/4 cup Banana Peppers
    • 1/2 cup Feta Cheese
    • 1 cup Mixed Greens

    Greek Salad Vinaigrette:

    • 1/3 cup Red Wine or Balsamic Vinegar
    • 1/3 cup Olive Oil
    • 2 tsp Dijon Mustard
    • 2 tsp Honey
    • 1 tsp Oregano
    • 1/2 tsp Kosher Salt
    • 1/4 tsp Ground Black Pepper

    Instructions

    1. Add all the Greek Vinaigrette ingredients to a small bowl or mason jar and whisk to combine.
    2. Get out two large mason jars for the salads.
    3. Add 2 tbsp Greek Salad Vinaigrette to the bottom of each of the jars.
    4. Next, add the salad ingredients. 1/2 can of the drained, rinsed chickpeas to each jar.
    5. Then half the diced cucumber, half the cherry tomatoes, half kalamata olives and half banana peppers.
    6. Top with 1/4 cup feta cheese in each jar and finally 1/2 cup of Mixed Greens on top.
    7. Put the mason jar lid on and store in the refrigerator until you are ready to dig in!
    • Prep Time: 8 minutes
    • Category: Salad
    • Method: No Cook
    • Cuisine: Greek

    Nutrition

    • Serving Size: 1 Salad
    • Calories: 204
    • Sugar: 3g
    • Sodium: 643mg
    • Fat: 12g
    • Carbohydrates: 17g
    • Fiber: 2g
    • Protein: 8g
    • Cholesterol: 33mg
    Recipe Card powered byTasty Recipes

    Apple Pie Overnight Oats

    Apple Pie Overnight Oats

    Print
    clock clock iconcutlery cutlery iconflag flag iconfolder folder iconinstagram instagram iconpinterest pinterest iconfacebook facebook iconprint print iconsquares squares iconheart heart iconheart solid heart solid icon
    Apple Pie Overnight Oats

    Apple Pie Overnight Oats


    5 Stars 4 Stars 3 Stars 2 Stars 1 Star

    No reviews

    • Author: Amy MS, RD, LDN
    • Total Time: 5 minutes
    • Yield: 1 1x
    • Diet: Vegetarian

    Description

    Apple Pie Overnight Oats have all the warm and comforting flavors of apple pie in wholesome overnight oats. The best meal prep breakfast!


    Ingredients

    Units Scale
    • 1/2 cup Soy Milk (Unsweetened)
    • 1/4 cup Greek Yogurt
    • 1/2 cup Old Fashioned Oats
    • 1 Tbsp Maple Syrup
    • 1/2 tsp Cinnamon
    • 1/2 cup Diced Apple

    Topping:

    • 1 tsp Almond or Oat Flour
    • 1 tsp Maple Syrup
    • 1 tbsp Pecans, chopped

    Instructions

    1. Add all the ingredients (except the toppings) to a mason jar or container with a lid. Stir together to fully mix.
    2. Pop a lid on the mason jar or container and place into the refrigerator overnight.
    3. The next morning, mix up the topping and add to the top of your oats. Enjoy!
    • Prep Time: 5 minutes
    • Category: Breakfast
    • Cuisine: American

    Nutrition

    • Serving Size: 1
    • Calories: 401
    • Sugar: 31g
    • Sodium: 84mg
    • Fat: 10g
    • Carbohydrates: 65g
    • Fiber: 7g
    • Protein: 16g
    • Cholesterol: 3mg
    Recipe Card powered byTasty Recipes

    Almond Lemon Cookies

    Almond Lemon Cookies

    Print
    clock clock iconcutlery cutlery iconflag flag iconfolder folder iconinstagram instagram iconpinterest pinterest iconfacebook facebook iconprint print iconsquares squares iconheart heart iconheart solid heart solid icon
    Almond Lemon Cookies Gluten Free

    Almond Lemon Cookies


    5 Stars 4 Stars 3 Stars 2 Stars 1 Star

    No reviews

    • Author: Amy RD, LDN
    • Total Time: 22 minutes
    • Yield: 1112 cookies 1x
    • Diet: Gluten Free

    Description

    Lemon almond cookies are moist, light and gluten-free goodness!


    Ingredients

    Units Scale
    • 1 1/2 cups Almond Flour
    • 1/3 cup Honey
    • 1/8 tsp Baking Soda
    • 1 Medium Sized Lemon, Zested and Juiced
    • 1 Large Egg White
    • 2 tbsp Powdered Sugar
    • 2 tbsp Slivered Almonds (optional)

    Instructions

    1. Preheat oven to 350° F. Get out a baking sheet and set aside.
    2. Place the egg white into a small bowl and beat with a fork until slightly frothy. Set aside.
    3. In a medium-sized mixing bowl add the almond flour, lemon zest, lemon juice, honey, baking soda, and egg white. Stir together with a spatula. The mixture should resemble wet sand.
    4. Using a 1 1/2 inch scoop, scoop the dough and place onto the baking sheet. Continue until all dough has been used.
    5. Sprinkle each raw cookie with a few slivered almonds and gently press the cookies with your hands to flatten them every so slightly.
    6. Place the tray into the oven and bake the cookies for 12 minutes until just golden on the edges. You do not want to over cook!
    7. After 12 minutes, allow the cookies to cool on a wire rack for at least 10 minutes.
    8. Sprinkle with powdered sugar and enjoy!
    • Prep Time: 10 minutes
    • Cook Time: 12 minutes
    • Category: Dessert
    • Method: Bake

    Nutrition

    • Serving Size: 1
    • Calories: 124
    • Sugar: 10g
    • Sodium: 20mg
    • Fat: 8g
    • Carbohydrates: 13g
    • Fiber: 2g
    • Protein: 4g
    • Cholesterol: 0mg
    Recipe Card powered byTasty Recipes

    Easy Tofu Scramble

    Easy Tofu Scramble

    Tofu Scramble
    Print
    clock clock iconcutlery cutlery iconflag flag iconfolder folder iconinstagram instagram iconpinterest pinterest iconfacebook facebook iconprint print iconsquares squares iconheart heart iconheart solid heart solid icon
    Tofu Scramble

    Easy Tofu Scramble


    5 Stars 4 Stars 3 Stars 2 Stars 1 Star

    No reviews

    • Author: Amy RD, LDN
    • Total Time: 12 minutes
    • Yield: 2 Servings 1x

    Description

    This easy tofu scramble is packed with protein and is a great way to start your day!


    Ingredients

    Scale
    • (1) Block Firm Tofu, 14 oz
    • 2 tsp Olive Oil
    • 2 tsp Nutritional Yeast
    • 3/4 tsp Ground Turmeric
    • 1/2 tsp Garlic Powder
    • l/4 tsp Onion Powder
    • Pinch Salt
    • Pinch Black Pepper
    • 1 tbsp Almond or Soy Milk, Unsweetened
    • Handful of Baby Spinach, (Optional)

    Instructions

    1. Heat the olive oil in a pan over medium high heat. Add the drained tofu and crumble with a spatula or a fork right in the pan.
    2. Cook the tofu for 4-5 minutes, stirring frequently until most of the moisture is gone.
    3. Turn the pan down to medium and add the nutritional yeast, turmeric, garlic powder, onion powder, salt and pepper and then stir into the tofu. Continue to cook another 5 minutes.
    4. Add the spinach (if using) and 1 tbsp plant-based milk and cook for 1 more minute until the spinach starts to wilt.
    5. Transfer to a plate and serve with sourdough toast, fruit and enjoy!
    • Prep Time: 2 minutes
    • Cook Time: 10 minutes
    • Category: Breakfast

    Nutrition

    • Serving Size: 1
    • Calories: 260
    • Sugar: 0g
    • Sodium: 127mg
    • Fat: 14g
    • Saturated Fat: 2g
    • Unsaturated Fat: 4g
    • Carbohydrates: 7g
    • Fiber: 6g
    • Protein: 27g
    • Cholesterol: 0mg
    Recipe Card powered byTasty Recipes

    Nut-Free Protein Granola Bars

    Nut-Free Protein Granola Bars

    Print
    clock clock iconcutlery cutlery iconflag flag iconfolder folder iconinstagram instagram iconpinterest pinterest iconfacebook facebook iconprint print iconsquares squares iconheart heart iconheart solid heart solid icon

    Nut-Free Protein Granola Bars


    5 Stars 4 Stars 3 Stars 2 Stars 1 Star

    No reviews

    • Author: Amy RD, LDN
    • Total Time: 15 minutes
    • Yield: 8 Servings 1x
    • Diet: Vegetarian

    Description

    These protein granola bars are a great snack or pre-workout boost. Plus they are nut-free!


    Ingredients

    Units Scale
    • 1 1/2 cups Old Fashioned Oats
    • 1/4 cup Oat Flour
    • 1/3 cup Protein Powder
    • 2 tbsp Flaxseed + 2 tbsp water
    • 1/4 tsp Salt
    • 1/2 tsp Ground Cinnamon
    • 3 tbsp Mini Chocolate Chips
    • 1/4 cup Coconut Oil
    • 1/4 cup Honey
    • 1 tsp Vanilla Extract

    Instructions

    1. Preheat oven to 350 F. Line a 10×4″ pan (bread/loaf pan) with parchment paper and set aside.
    2. In a small bowl, mix together the flaxseed and water. Allow the flaxseed to soak up the water while you mix the remaining ingredients.
    3. To a large mixing bowl add the oats, oat flour, protein powder, and salt. Mix together with a wooden spoon or spatula.
    4. To a microwave safe bowl, add the coconut oil and heat on 20 second internals until melted. Then add the honey and vanilla extract and stir to mix. Then add the flaxseed water mixture and stir together.
    5. Next, pour the coconut oil mixture into the oat mixture and stir together. Add the mini chocolate chips and stir again. The mixture should resemble wet sand.
    6. Using a spatula, scoop the mixture into your prepared pan, spreading it evenly throughout the pan. Then, using your hands, the spatula or the bottom of a measuring cup press the dough firmly and evenly into the pan.
    7. Place into the oven and bake for 10-12 minutes until slightly browned on top.
    8. Allow the pan to cool on a wire rack for at least 10 minutes. Remove the parchment paper from the pan and allow the granola bars to cool on the wire rack for another 15 minutes until fully cooled.
    9. Using a knife, cut the bars into 8 servings. Enjoy!
    10. Optional Topping:
      1. In a microwave safe bowl add 1 tbsp chocolate chips and 1/2 tsp coconut oil. Microwave on 20 second intervals until melted.
      2. Using a spoon, drizzle the melted chocolate across the tops of the bars. Allow to cool for the chocolate to set.
    • Prep Time: 5 minutes
    • Cook Time: 10 minutes
    • Category: Snack, Dessert
    • Method: Bake
    • Cuisine: American

    Nutrition

    • Serving Size: 1 Bar
    • Calories: 207
    • Sugar: 13g
    • Sodium: 83mg
    • Fat: 10g
    • Saturated Fat: 7g
    • Unsaturated Fat: 2g
    • Carbohydrates: 26g
    • Fiber: 2g
    • Protein: 6g
    • Cholesterol: 3mg
    Recipe Card powered byTasty Recipes

    Black Bean & Sweet Potato Enchiladas

    Black Bean & Sweet Potato Enchiladas

    Print
    clock clock iconcutlery cutlery iconflag flag iconfolder folder iconinstagram instagram iconpinterest pinterest iconfacebook facebook iconprint print iconsquares squares iconheart heart iconheart solid heart solid icon
    Black Bean & Sweet Potato Enchiladas

    Black Bean & Sweet Potato Enchiladas


    5 Stars 4 Stars 3 Stars 2 Stars 1 Star

    No reviews

    • Author: Amy RD, LDN
    • Total Time: 55 minutes
    • Yield: 12 Enchiladas 1x
    • Diet: Vegetarian

    Description

    These enchiladas are sure to be your next weeknight favorite dinner! Black Bean & Roasted Sweet Potato Enchiladas are packed with flavor and fiber in each bite.


    Ingredients

    Units Scale

    Roasted Sweet Potatoes:

    • 1 Large Sweet Potato, peeled and small diced to 1/2″ inch
    • 2 tsp Olive Oil
    • 1/4 tsp Ground Cumin
    • 1/4 tsp Chili Powder
    • 1/4 tsp Smoked Paprika

    Enchiladas:

    • 2 cans, 15 oz Black Beans, drained and rinsed
    • 1 Red Bell Pepper, diced
    • 2 Scallions, diced
    • 1 cup Cheddar Cheese, Grated
    • 1 tsp Chili Powder
    • 1/2 tsp Ground Cumin
    • 1/2 tsp Smoked Paprika
    • 1/4 tsp Onion Powder
    • 1/4 tsp Garlic Powder
    • 1/4 tsp Kosher Salt
    • 1012 Flour Tortillas, about 8-inches in diameter

    Instructions

    Roasted Sweet Potatoes:

    1. Preheat your oven to 400° F. Get out a large sheet tray and set aside.
    2. Place your diced sweet potato on the sheet tray, then add spices and mix together with clean hands or a spatula.
    3. Pop the sweet potato sheet tray into the oven and roast for 20-25 minutes until nicely browned, stirring halfway.

    Enchiladas:

    1. Prepare a 9×13 baking dish by coating it in nonstick spray. Set aside.
    2. While the sweet potato roasts, mix up the enchilada filling. Into a large bowl add all the filling ingredients, black beans, bell pepper, scallions, grated cheese, chili powder, cumin, paprika, onion powder, garlic powder and salt. Give the mixture a stir with a spoon or spatula.
    3. After the sweet potato has roasted and cooled slightly, add to the black bean mixture and give the filling mixture one more mix with your spoon.
    4. Next roll up the enchiladas. Place one tortilla on your work surface, add 1/2 cup of enchilada filling to one end of the tortilla, then carefully, lift up the end of the tortilla to fold it over the filling and then roll it up and place into your baking dish. Continue with the remaining filling and tortillas.
    5. Turn your oven down to 350 F and bake the enchiladas for 25-30 minutes until they just start to brown and crisp at the edges.
    6. Top with your favorite toppings such as a dollop of Greek Yogurt, salsa, guacamole and a dash of hot sauce. Enjoy!

    Notes

    1. Nutrition facts are for 2 enchiladas, without toppings.
    • Prep Time: 25 min
    • Cook Time: 30 min
    • Category: Dinner
    • Method: Bake
    • Cuisine: Mexican

    Nutrition

    • Serving Size: 2 Enchiladas
    • Calories: 160
    • Sugar: 8g
    • Sodium: 485mg
    • Fat: 11g
    • Carbohydrates: 21g
    • Fiber: 12g
    • Protein: 7g
    • Cholesterol: 9mg
    Recipe Card powered byTasty Recipes

    Carrot Cake Quick Bread

    Carrot Cake Quick Bread

    Print
    clock clock iconcutlery cutlery iconflag flag iconfolder folder iconinstagram instagram iconpinterest pinterest iconfacebook facebook iconprint print iconsquares squares iconheart heart iconheart solid heart solid icon
    Carrot Cake Quick Bread

    Carrot Cake Quick Bread


    5 Stars 4 Stars 3 Stars 2 Stars 1 Star

    No reviews

    • Author: Amy RD, LDN
    • Total Time: 1 hour
    • Diet: Vegetarian

    Description

    Carrot Cake Quick Bread is the perfect spring dessert!


    Ingredients

    Units Scale

    Carrot Cake Bread:

    • 3/4 cup All Purpose Flour
    • 1/2 cup Oat Flour
    • 1/2 cup Whole Wheat Flour
    • 1 tsp Baking Powder
    • 1/2 tsp Baking Soda
    • 1/2 tsp Salt
    • 1 1/2 tsp Ground Cinnamon
    • 1/2 tsp Nutmeg
    • 1/2 tsp Cardamom (Optional)
    • 2 Tbsp Ground Flaxseed
    • 1/2 cup Olive Oil
    • 1/2 cup Honey
    • 1/2 cup Unsweetened Applesauce
    • 1 cup Grated Carrot
    • 2 Eggs
    • 1 tsp Vanilla Extract
    • 1/3 cup Walnuts, chopped

    Icing Glaze:

    • 1/4 cup Powdered Sugar
    • 2 tsp Milk

    Instructions

    1. Set out all ingredients and equipment needed for happy baking!
    2. Preheat oven to 325° F. Spray a bread pan with nonstick cooking spray and set aside.
    3. In a large mixing bowl, add all the dry ingredients and whisk together (Oat Flour, AP Flour, Wheat Flour, Baking Powder, Baking Soda, Salt, Cinnamon, Nutmeg, Cardamom, Flaxseed).
    4. In a medium mixing bowl add the wet ingredients and whisk to combine (Olive Oil, Honey, Applesauce, Carrot, Eggs, Vanilla Extract).
    5. Next, pour the wet ingredients into the dry ingredients and mix together with a spatula. Take care to not over mix!
    6. Add in the chopped walnuts to the batter.
    7. Pour the batter into prepared bread pan and bake for 40-50 minutes, until just browned around the edges and a toothpick comes out clean from the center. *Note! Keep an eye on your quick bread. If it starts to brown too much before the 50 minutes, cover your bread pan with foil and place back into the oven to finish cooking.*
    8. Remove from the oven and allow to cool on a wire rack for 5 minutes. Then, run a butter knife along the edges of the pan and carefully remove the bread from the pan.
    9. While the bread cools, prepare the glaze icing
    10. In a small bowl whisk together the powdered sugar and 2 tsp milk.
    11. Using a spoon, drizzle the icing over top of the bread.
    12. Slice into 1 inch sections and enjoy!

    Notes

    1. Keep an eye on your quick bread. If it starts to brown too much before the 50 minutes, cover your bread pan with foil and place back into the oven to finish cooking.
    • Prep Time: 10 min
    • Cook Time: 50 min
    • Category: Dessert
    • Method: Bake
    • Cuisine: American

    Nutrition

    • Serving Size: 1 Slice
    • Calories: 233
    • Sugar: 13g
    • Sodium: 180mg
    • Fat: 11g
    • Carbohydrates: 29g
    • Fiber: 2g
    • Protein: 3g
    • Cholesterol: 27mg
    Recipe Card powered byTasty Recipes

    Breakfast Granola Cups

    Breakfast Granola Cups

    Print
    clock clock iconcutlery cutlery iconflag flag iconfolder folder iconinstagram instagram iconpinterest pinterest iconfacebook facebook iconprint print iconsquares squares iconheart heart iconheart solid heart solid icon
    Granola Cups

    Breakfast Granola Cups


    5 Stars 4 Stars 3 Stars 2 Stars 1 Star

    No reviews

    • Author: Amy RD, LDN
    • Total Time: 20 minutes
    • Yield: 8 cups 1x

    Description

    Homemade granola cups are a wholesome and nutritious breakfast or snack. Fill them with Greek Yogurt and berries for more protein, antioxidants and flavor.


    Ingredients

    Units Scale
    • 2 cups Old Fashioned Oats
    • 1/4 cup Ground Flaxseed
    • 3/4 tsp Ground Cinnamon
    • 1/4 cup Maple Syrup
    • 1/4 cup + 1 tbsp Peanut Butter
    • 1 Egg White

    Instructions

    1. Preheat oven to 350° F. Grease a muffin tin with nonstick spray or coconut oil, set aside.
    2. In a large bowl, combine the oats, flaxseed and cinnamon and stir together with a spatula.
    3. To a small microwave safe bowl, add the maple syrup and peanut butter. Microwave for 20-25 seconds just to soften the peanut butter so it is easy to stir.
    4. Next, pour the peanut butter mixture into the oat mixture. Stir together with a spatula, making sure that all dry ingredients are coated in the wet ingredients.
    5. Whisk the egg white with a fork until slightly frothy then pour into the oat mixture and stir together.
    6. Divide the oat mixture into 8 muffin cups. Using your fingers, press the the mixture into the muffin tin to form cup shapes. Continue with the remaining granola cups.
    7. Place muffin tin into the oven and bake for 15-18 minutes until the granola cups just start to turn golden brown.
    8. Allow the cups to cool in the muffin tin for at least 15 minutes. This is KEY, otherwise they will fall apart! Then, run a spatula or butter knife around the edge of each cup to gently release from the muffin tin.
    9. To serve, fill each cup with a spoonful of Greek Yogurt and top with fresh berries. Enjoy!
    • Prep Time: 5 minutes
    • Cook Time: 15 minutes
    • Category: Breakfast
    • Method: Bake
    • Cuisine: American

    Nutrition

    • Serving Size: 1 cup
    • Calories: 194
    • Sugar: 8g
    • Sodium: 53mg
    • Fat: 8g
    • Carbohydrates: 24g
    • Fiber: 3g
    • Protein: 9g
    • Cholesterol: 0mg
    Recipe Card powered byTasty Recipes

    Key Lime Energy Bites

    Key Lime Energy Bites

    Key Lime Energy Bites
    Key Lime Energy Bites
    Print
    clock clock iconcutlery cutlery iconflag flag iconfolder folder iconinstagram instagram iconpinterest pinterest iconfacebook facebook iconprint print iconsquares squares iconheart heart iconheart solid heart solid icon
    Key Lime Energy Bites

    Key Lime Energy Bites


    5 Stars 4 Stars 3 Stars 2 Stars 1 Star

    5 from 2 reviews

    • Author: Amy RD, LDN
    • Total Time: 10 minutes
    • Yield: 14 1x
    • Diet: Gluten Free

    Description

    Zesty Key Lime Energy Bites: Tangy citrus bliss meets wholesome energy in these no-bake bites! Perfect for a refreshing snack boost anytime.


    Ingredients

    Scale
    • 1 cup Pitted Dates
    • 1/2 cup Raw Cashews
    • 1 Scoop Vanilla Protein Powder
    • 1/2 cup Unsweetened Shredded Coconut (Plus 1/4 cup for optional topping)
    • Zest from 1 Lime
    • 2 tsp Lime Juice
    • 1/2 tsp Vanilla Extract
    • 13 tsp Water (if needed)

    Instructions

    1. Add the dates and cashews to the bowl of a food processor. Process for 1-2 minutes until the dates and nuts are broken down into small pieces.
    2. Add remaining ingredients (except for water). Blend until fully combined and the mixture forms into a ball.
    3. Add 1-3 tsp of water to the mixture if needed to bring together.
    4. Using a 1-inch scoop or tablespoon, scoop out the mixture and then roll gently in your hands to form them into ball shape. This should yield about 14-16 energy bites.
    5. To make them extra pretty, roll them in the extra 1/4 cup unsweetened shredded coconut.

    Notes

    1. Tip! To get the coconut to stick to the bites the best, roll them in a shallow bowl with 1 tbsp of water, then roll in the coconut.
    • Prep Time: 10 minutes
    • Category: Snack
    • Method: Food Processor
    • Cuisine: American

    Nutrition

    • Serving Size: 1 Energy Bite
    • Calories: 68
    • Sugar: 4g
    • Sodium: 10mg
    • Fat: 4g
    • Carbohydrates: 7g
    • Fiber: 1g
    • Protein: 3g
    • Cholesterol: 3mg
    Recipe Card powered byTasty Recipes

    Protein Pancakes

    Protein Pancakes

    Print
    clock clock iconcutlery cutlery iconflag flag iconfolder folder iconinstagram instagram iconpinterest pinterest iconfacebook facebook iconprint print iconsquares squares iconheart heart iconheart solid heart solid icon
    Protein Pancakes

    Protein Pancakes


    5 Stars 4 Stars 3 Stars 2 Stars 1 Star

    5 from 1 review

    • Author: Amy RD, LDN
    • Total Time: 15 minutes
    • Yield: 6 Pancakes 1x

    Ingredients

    Units Scale

    Instructions

    1. In a large bowl, add the 1 cup pancake mix, egg and milk. Whisk together.
    2. Heat a griddle or large skillet over medium heat.
    3. Spray with nonstick spray. Drop spoonfuls of batter onto the pan so that you have 6 pancakes.
    4. Allow to cook for 2-3 minutes until bubbles begin to form on top of the pancakes.
    5. Flip the pancakes and allow to cook for another minute.
    6. Top with your favorite pancake toppings, fruit, maple syrup, peanut butter, and enjoy!
    • Prep Time: 5 minutes
    • Cook Time: 10 minutes
    • Category: Breakfast
    • Method: Griddle
    • Cuisine: American

    Nutrition

    • Serving Size: 1
    • Calories: 100
    • Sugar: 2g
    • Sodium: 160mg
    • Fat: 2g
    • Carbohydrates: 14g
    • Fiber: 2g
    • Protein: 6g
    • Cholesterol: 31mg
    Recipe Card powered byTasty Recipes

    Mediterranean Egg Wrap

    Mediterranean Egg Wrap

    Print
    clock clock iconcutlery cutlery iconflag flag iconfolder folder iconinstagram instagram iconpinterest pinterest iconfacebook facebook iconprint print iconsquares squares iconheart heart iconheart solid heart solid icon
    Mediterranean Egg Wrap

    Mediterranean Egg Wrap


    5 Stars 4 Stars 3 Stars 2 Stars 1 Star

    No reviews

    • Author: Amy RD, LDN
    • Total Time: 15 minutes
    • Yield: 1 Serving 1x

    Description

    This Mediterranean Egg Wrap is a mix between an omelet and a breakfast burrito but it is so much better than both of those! Plus, it packs in 31 grams of protein per serving!


    Ingredients

    Units Scale
    • 3 Eggs
    • 1 Tbsp Greek Yogurt
    • 2 Tbsp Unsweetened Soy Milk
    • 2 tsp Olive Oil
    • 3 Tbsp Red Bell Pepper, diced
    • 1 oz Baby Bella Mushrooms
    • 1/4 cup Raw Baby Spinach
    • 3/4 oz Cheddar Cheese, grated
    • 1 Whole Wheat Tortilla

    Instructions

    1. Heat a nonstick skillet to medium heat. Add 2 tsp olive oil.
    2. When the pan is heated up, add the peppers and mushrooms and sautee for 1-2 minutes until the mushrooms are nicely browned.
    3. Next add a handful of spinach and sautee for 1 minute.
    4. While the spinach and veggies cook, whisk up the eggs, milk, Greek Yogurt and salt and pepper in a bowl.
    5. Then, pour the egg into the pan, over top of the veggies. Give the pan a little shake to spread the eggs out evenly.
    6. Place the tortilla on top of the egg mixture and allow to cook for 4-5 minutes.
    7. After 5 minutes, run your spatula around the outside edge of the egg to make sure it will easily release and that it is cooked through.
    8. Using a large spatula, flip the mixture over so that the tortilla is now on the bottom. Add the grated cheese and allow the tortilla to brown for 1 minute.
    9. Finally, roll or fold the tortilla egg up. I find that folding into thirds like a letter works well. Then, give the roll up a little press with your spatula to fully crisp the bottom.
    10. Now, slide it onto a plate, cut in half on a diagonal and dig in!
    • Prep Time: 5 minutes
    • Cook Time: 10 minutes
    • Category: Breakfast
    • Method: Skillet
    • Cuisine: Mediterranean

    Nutrition

    • Serving Size: 1
    • Calories: 461
    • Sugar: 2g
    • Sodium: 364
    • Fat: 25g
    • Carbohydrates: 27g
    • Fiber: 4g
    • Protein: 31g
    • Cholesterol: 580mg
    Recipe Card powered byTasty Recipes

    High-Protein Almond Joy Overnight Oats

    High-Protein Almond Joy Overnight Oats

    Print
    clock clock iconcutlery cutlery iconflag flag iconfolder folder iconinstagram instagram iconpinterest pinterest iconfacebook facebook iconprint print iconsquares squares iconheart heart iconheart solid heart solid icon

    High Protein Almond Joy Overnight Oats


    5 Stars 4 Stars 3 Stars 2 Stars 1 Star

    5 from 1 review

    • Author: Amy RD, LDN
    • Total Time: 5 minutes
    • Yield: 1 Serving 1x

    Description

    Packed with 28 grams of protein, (and no protein powder!) these overnight oats will fill you up and leave you satisfied!


    Ingredients

    Units Scale
    • 1/2 cup Unsweetened Soy Milk
    • 1/4 cup Greek Yogurt
    • 1 Tbsp Maple Syrup
    • 1 Tbsp Almond Butter
    • 1/8 tsp Almond Extract
    • 3 Tbsp Hemp Hearts
    • 1/2 cup Old Fashioned Oats
    • 1 Tbsp Semi-Sweet Mini Chocolate Chips
    • 1 tsp Unsweetened Shredded Coconut
    • 1 tsp Sliced Almonds

    Instructions

    1. Add all the ingredients (except the coconut and slice almonds) into a mason jar. Give the mixture a thorough mix with a spoon.
    2. Pop a lid onto the jar and place it into the refrigerator overnight.
    3. The next morning, top with the coconut and sliced almonds. Enjoy!
    • Prep Time: 5 minutes
    • Category: Breakfast
    • Method: No Cook
    • Cuisine: American

    Nutrition

    • Serving Size: 1
    • Calories: 635
    • Sugar: 25g
    • Sodium: 31mg
    • Fat: 34mg
    • Carbohydrates: 61g
    • Fiber: 11g
    • Protein: 28g
    • Cholesterol: 3mg
    Recipe Card powered byTasty Recipes

    Mocha Date Truffles

    Mocha Date Truffles

    Print
    clock clock iconcutlery cutlery iconflag flag iconfolder folder iconinstagram instagram iconpinterest pinterest iconfacebook facebook iconprint print iconsquares squares iconheart heart iconheart solid heart solid icon

    Mocha Date Truffles


    5 Stars 4 Stars 3 Stars 2 Stars 1 Star

    No reviews

    • Author: Amy RD, LDN
    • Total Time: 25 minutes
    • Yield: 20 Truffles 1x

    Description

    Decadent truffles made with dates


    Ingredients

    Units Scale

    Truffle Filling:

    • 1 1/2 cups Pitted Dates
    • 2 tbsp Brewed Coffee
    • 2 tsp Coconut Oil
    • 1/4 cup Cocoa Powder

    Chocolate Coating & Toppings:

    • 1/2 cup Semi-Sweet Chocolate Chips
    • 1 tbsp Coconut Oil
    • Optional Toppings: Sea Salt, Chopped Pecans, Unsweetened Shredded Coconut

    Instructions

    1. In a heat-proof bowl, add the dates and cover with hot water. Let the dates soak for 5 minutes to help them soften.
    2. Drain the dates then add them to the bowl of your food processor, along with the 2 tbsp brewed coffee.
    3. Process until the dates are broken down into small pieces.
    4. Next, add the coconut oil and vanilla extract. Process again until the date mixture becomes slightly smooth.
    5. Now, add the cocoa powder and process again! Stop and scrape down your bowl and then process again. This make take 2-4 minutes depending on your food processor. You are looking for a fairly smooth mixture.
    6. Now it’s time to roll our truffles! Prep a sheet tray with parchment paper and set out on your work surface. Also, grab a bowl and fill it with water to help keep the filling from sticking to your hands.
    7. Scoop out 1/2 tbsp of filling, wet your hands with the water and roll into ball shape, then place onto your parchment paper tray. Continue until all the truffle filling has been rolled.
    8. Next, pop the tray of truffle balls into the freezer to firm up for 15 minutes.
    9. Before you get the truffles out of the freezer, make the chocolate coating
    10. In a microwave safe bowl, add the chocolate chips and coconut oil. Microwave for 25 second intervals, stirring in between each interval, until the chocolate is melted.
    11. Get your toppings ready and set out next to the melted chocolate
    12. Pull the tray of truffle balls out of the freezer.
    13. Dip each truffle ball into the melted chocolate and using a fork, roll the chocolate around and then let some of the chocolate drip off before popping back onto the parchment paper. While the chocolate is still melty, add a sprinkle of your topping of choice.
    14. Continue with the remaining truffles until they are all coated and topped!
    15. Pop the truffles into the fridge to let the chocolate set up and harden for at least 10 minutes.
    16. Enjoy these little bites of chocolate goodness!
    • Prep Time: 10 minutes
    • Cook Time: 15
    • Category: Dessert
    • Method: No Bake
    • Cuisine: American

    Nutrition

    • Serving Size: 1 Truffle
    • Calories: 57
    • Sugar: 7g
    • Sodium: 0mg
    • Fat: 3g
    • Carbohydrates: 9g
    • Fiber: 1g
    • Protein: 0g
    • Cholesterol: 0mg
    Recipe Card powered byTasty Recipes

    Black Bean Brownies with Peanut Butter Swirl

    Black Bean Brownies with Peanut Butter Swirl

    Print
    clock clock iconcutlery cutlery iconflag flag iconfolder folder iconinstagram instagram iconpinterest pinterest iconfacebook facebook iconprint print iconsquares squares iconheart heart iconheart solid heart solid icon

    Black Bean Brownies with Peanut Butter Swirl


    5 Stars 4 Stars 3 Stars 2 Stars 1 Star

    No reviews

    • Author: Amy RD, LDN
    • Total Time: 30 minutes
    • Yield: 16 Brownies 1x

    Description

    Black Bean Brownies are fudgy and rich with a hint of peanut butter, a delicious dessert!


    Ingredients

    Units Scale

    Brownie Batter:

    • 1 Can, 15 oz Black Beans, Drained and Rinsed (no, or low-sodium if you can find it)
    • 1/2 cup Maple Syrup
    • 2 Eggs
    • 2 Tbsp Olive Oil
    • 1/4 tsp Espresso Powder
    • 1/4 tsp Kosher Salt
    • 1 tsp Baking Powder
    • 1/4 cup Cocoa Powder
    • 1/4 cup Oat Flour
    • 1/2 cup Chocolate Chips

    Peanut Butter Swirl:

    • 1/2 cup PBFit Peanut Butter Powder
    • 45 tbsp Soy Milk (or milk of your preference)

    Instructions

    1. Preheat your oven to 350° F and spray an 8×8 inch pan with nonstick spray, then set aside.
    2. To the bowl of a food processor, add the black beans and maple syrup. Process until smooth.
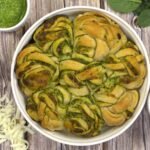
    3. Next, add the two eggs and process again.
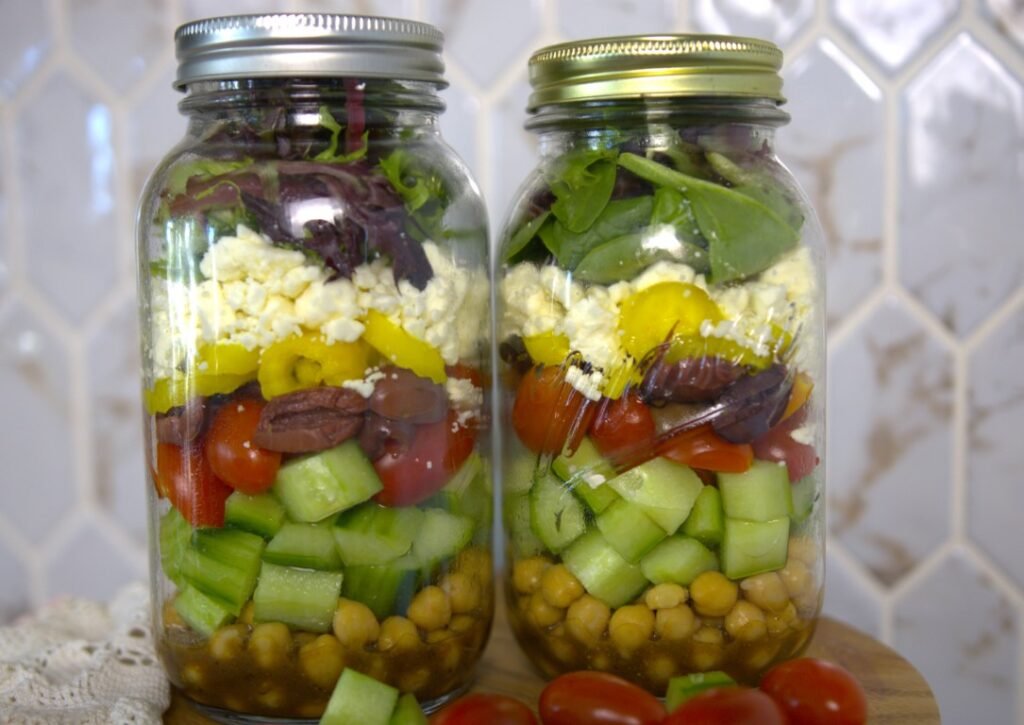
    4. Then, add the olive oil, espresso powder, salt, baking powder, cocoa powder and oat flour and process again to combine all ingredients.
    5. Next, remove the blade from the food processor, scrape down the batter and add the chocolate chips, stirring with a spatula.
    6. Then, pour the batter into your prepared pan and set aside while you make the peanut butter swirl.
    7. To a medium size bowl, add the PBFit and 5 tablespoons of milk. Whisk together. The consistency should be a little thinner than regular peanut butter. If it is too thick, add another tablespoon of milk.
    8. To make the swirl, drop dollops of the PBFit mixture onto the brownie batter, spreading them evenly over top of the batter. Then, using a butter knife, start from one corner and drag the knife through the batter and PB from one end of the pan to the other. Continue going back and forth until you reach the other side of the pan. Then, rotate the pan 90 degrees to create swirls in the other direction. Again, start from one corner and go up and back, snaking your way across the batter. Continue until you get the look that you like.
    9. Place the brownies into the oven and bake for 20 minutes until they are set.
    10. Allow brownies to cool for 15 minutes before digging in. Enjoy!
    • Prep Time: 10 minutes
    • Cook Time: 20 minutes
    • Category: Dessert
    • Method: Bake
    • Cuisine: American

    Nutrition

    • Serving Size: 1 Brownie
    • Calories: 132
    • Sugar: 11g
    • Sodium: 146g
    • Fat: 5g
    • Carbohydrates: 18g
    • Fiber: 2g
    • Protein: 4g
    • Cholesterol: 26mg
    Recipe Card powered byTasty Recipes

    Greek Yogurt Ranch Dip

    Greek Yogurt Ranch Dip

    Greek Yogurt Ranch Dip
    Greek Yogurt Ranch Dip
    Print
    clock clock iconcutlery cutlery iconflag flag iconfolder folder iconinstagram instagram iconpinterest pinterest iconfacebook facebook iconprint print iconsquares squares iconheart heart iconheart solid heart solid icon
    Greek Yogurt Ranch Dip

    Greek Yogurt Ranch Dip


    5 Stars 4 Stars 3 Stars 2 Stars 1 Star

    No reviews

    • Author: Amy RD, LDN
    • Total Time: 5 minutes
    • Yield: 2 Servings 1x

    Description

    This protein-packed take on classic ranch dip is the perfect appetizer or snack.


    Ingredients

    Units Scale
    • 1/2 cup Greek Yogurt
    • 1 tsp Nutritional Yeast
    • 1 tsp Dried Parsley
    • 1/4 tsp Dried Chives
    • 1/4 tsp Garlic Powder
    • 1/4 tsp Onion Powder
    • 1/8 tsp Dried Dill
    • 1/8 tsp Salt
    • 1 1/2 tsp Apple Cider Vinegar

    Instructions

    1. Add all ingredients to a bowl or mason jar.
    2. Whisk together until all spices are incorporated into the yogurt.
    3. Enjoy as a dip for veggies, a spread on wraps and sandwiches, whatever combination you like!

    Notes

    1. To make this into a salad dressing, thin it out with 2-3 tablespoons of water and whisk together.
    • Prep Time: 5 minutes
    • Category: Dips
    • Method: No Bake
    • Cuisine: American

    Nutrition

    • Serving Size: 1/4 cup
    • Calories: 45
    • Sugar: 2g
    • Sodium: 171mg
    • Fat: 0g
    • Carbohydrates: 3g
    • Fiber: 0g
    • Protein: 7g
    • Cholesterol: 3mg
    Recipe Card powered byTasty Recipes

    Mini Rosemary & Parmesan Focaccia Bites

    Mini Rosemary Focaccia Bites

    Print
    clock clock iconcutlery cutlery iconflag flag iconfolder folder iconinstagram instagram iconpinterest pinterest iconfacebook facebook iconprint print iconsquares squares iconheart heart iconheart solid heart solid icon
    Mini Rosemary & Parmesan Foccacia Bites

    Mini Rosemary & Parmesan Focaccia Bites


    5 Stars 4 Stars 3 Stars 2 Stars 1 Star

    No reviews

    • Author: Amy RD, LDN
    • Total Time: 20 minutes
    • Yield: 12 1x

    Description

    Mini Rosemary & Parmesan Focaccia Bites are packed with protein and make the perfect pair with a cozy soup or a flavorful appetizer for your next dinner.


    Ingredients

    Units Scale
    • 1 cup Greek Yogurt
    • 1/2 cup All Purpose Flour
    • 1/2 cup Whole Wheat Flour
    • 1 1/2 tsp Baking Powder
    • 1/8 tsp Kosher Salt
    • 1 tbsp Rosemary, Minced
    • 1/4 cup + 1 tbsp Parmesan Cheese, Grated
    • 6 tsp Olive Oil
    • Flaked Sea Salt for topping, Optional

    Instructions

    1. Preheat oven to 400°F.
    2. Get a muffin tin out and prep for the foccacia bites by pouring 1/2 tsp olive oil into each muffin tin section.
    3. Then, make the dough. To the bowl of a stand mixer, add the Greek Yogurt, flours, baking powder, 1/4 cup Parmesan and salt. Mix on low until all ingredients are incorporated. (Alternatively you can add to a large bowl and mix by hand with a spatula.)
    4. Remove the bowl from the mixer and divide the dough into 12 equal portions.
    5. Then, take each dough portion and flatten slightly with your hands and place into the prepared muffin tin sections.
    6. Top each dough section with the minced rosemary and 1 tbsp grated Parmesan. Then top with a pinch of sea salt on each.
    7. Bake for 12-15 minutes until slightly golden.
    8. Carefully remove the bites from the muffin tin and allow to cool on a wire rack.
    • Prep Time: 5 minutes
    • Cook Time: 15 minutes
    • Category: Appetizer
    • Method: Bake
    • Cuisine: Italian

    Nutrition

    • Serving Size: 1
    • Calories: 84
    • Sugar: 1g
    • Sodium: 114mg
    • Fat: 3g
    • Carbohydrates: 9g
    • Fiber: 1g
    • Protein: 4g
    • Cholesterol: 4mg
    Recipe Card powered byTasty Recipes