Whole Grain Carrot Cake Muffins

Whole Grain Carrot Cake Muffins

Print
clock clock iconcutlery cutlery iconflag flag iconfolder folder iconinstagram instagram iconpinterest pinterest iconfacebook facebook iconprint print iconsquares squares iconheart heart iconheart solid heart solid icon

Whole Grain Carrot Cake Muffins


5 Stars 4 Stars 3 Stars 2 Stars 1 Star

  • Author: Amy MS, RD, LDN
  • Total Time: 30 minutes
  • Yield: 12 Muffins
  • Diet: Vegetarian

Description

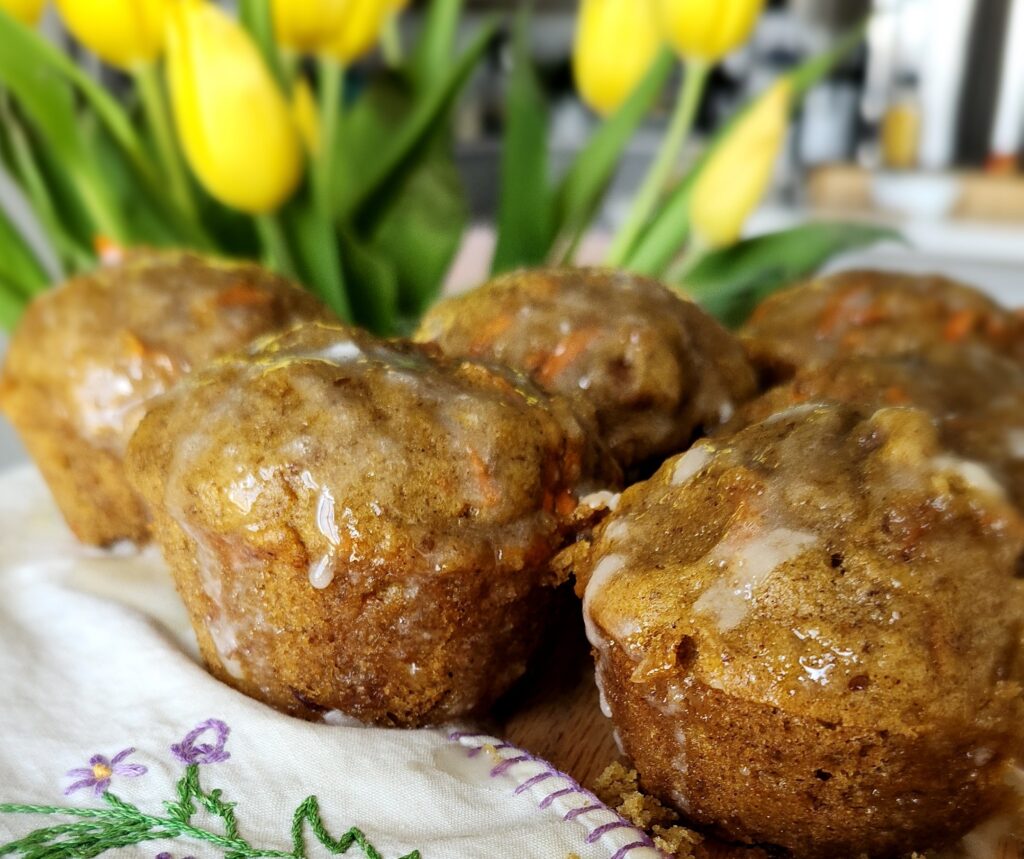
Whole Grain Carrot Cake Muffins are naturally sweetened and made with wholesome ingredients like oats, whole wheat flour, carrots, and olive oil. Perfect for breakfast, snacks, or lunchboxes, they deliver all the cozy flavors of carrot cake in a healthy, meal-prep-friendly muffin.


Ingredients

Units Scale
Muffins:
  • 3/4 cup All Purpose Flour
  • 1/2 cup Oat Flour
  • 1/2 cup Whole Wheat Flour
  • 2 tbsp Ground Flaxseed
  • 1 tsp Baking Powder
  • 1/2 tsp Salt
  • 1 1/2 tsp Ground Cinnamon
  • 1/2 tsp Cardamom
  • 1/2 cup Olive Oil
  • 1/2 cup Honey
  • 1/2 cup Unsweetened Applesauce
  • 1 cup Grated Carrot
  • 2 Eggs
  • 1 tsp Vanilla Extract
  • 1/3 cup Walnuts, chopped
Icing Glaze:
  • 1/4 cup Powdered Sugar
  • 2 tsp Milk

Instructions

  1. Preheat oven to 325° F. Spray a muffin pan with nonstick cooking spray and set aside.
  2. In a large mixing bowl, add all the dry ingredients and whisk together (Oat Flour, AP Flour, Wheat Flour, Baking Powder, Baking Soda, Salt, Cinnamon, Nutmeg, Cardamom, Flaxseed).
  3. In a medium mixing bowl add the wet ingredients and whisk to combine (Olive Oil, Honey, Applesauce, Carrot, Eggs, Vanilla Extract).
  4. Next, pour the wet ingredients into the dry ingredients and mix together with a spatula. Take care to not over mix!
  5. Add the chopped walnuts to the batter and stir to combine.
  6. Spoon the batter evenly into 12 muffin cups.
  7. Place muffin tray into the oven and bake for 20-25 minutes until the tops are golden brown and a toothpick inserted in the center of a muffin comes out clean.
  8. Allow muffins to cool on a wire rack for 10 minutes.
  9. While the muffins cool, prepare the glaze icing. In a small bowl whisk together the powdered sugar and 2 tsp milk. Using a spoon, drizzle the icing over top of each muffin. Enjoy!
  • Prep Time: 10 minutes
  • Cook Time: 20
  • Category: Breakfast, Dessert, Snack
  • Method: Bake
  • Cuisine: American

Nutrition

  • Serving Size: 1 Muffin
  • Calories: 285
  • Sugar: 13g
  • Sodium: 199mg
  • Fat: 16g
  • Saturated Fat: 3g
  • Unsaturated Fat: 11g
  • Carbohydrates: 29g
  • Fiber: 2g
  • Protein: 8g
  • Cholesterol: 168mg
Recipe Card powered byTasty Recipes

Birthday Cake Energy Bites

Birthday Cake Energy Bites

Birthday Cake Energy Bites V2
Print
clock clock iconcutlery cutlery iconflag flag iconfolder folder iconinstagram instagram iconpinterest pinterest iconfacebook facebook iconprint print iconsquares squares iconheart heart iconheart solid heart solid icon
Birthday Cake Energy Bites V2

Birthday Cake Energy Bites


5 Stars 4 Stars 3 Stars 2 Stars 1 Star

5 from 1 review

  • Author: Amy MS, RD, LDN
  • Total Time: 10 minutes
  • Yield: 15
  • Diet: Vegetarian

Description

These Birthday Cake Energy Bites are a no-bake, high-protein snack made with dates, oats, nut butter, vanilla, and sprinkles for a healthy, funfetti-inspired treat. Perfect for meal prep, these gluten-free bites are quick, easy, and naturally sweetened!


Ingredients

Units Scale
  • 1 cup Pitted Dates
  • 1/2 cup Cashew Butter
  • 1/4 cup Oat Flour
  • 1/4 cup Vanilla Protein Powder
  • 2 tsp Vanilla Extract
  • 1/4 cup Sprinkles

Instructions

  1. Add the dates to the bowl of a food processor. Process for 1-2 minutes until the dates are broken down into small pieces or form a ball.
  2. Add the remaining ingredients (except for sprinkles) to the food processor. Blend until fully combined.
  3. Using a 1-inch scoop or tablespoon, scoop out the mixture and then roll gently in your hands to form them into ball shape. This should yield about 14-16 energy bites.
  4. Then roll each ball in sprinkles. Enjoy!
  • Prep Time: 10 minutes
  • Category: Snack
  • Method: No Cook
  • Cuisine: American

Nutrition

  • Serving Size: 1
  • Calories: 106
  • Sugar: 8g
  • Sodium: 28mg
  • Fat: 5g
  • Carbohydrates: 15g
  • Fiber: 1g
  • Protein: 3g
  • Cholesterol: 0mg
Recipe Card powered byTasty Recipes

Pumpkin Roll Out Cookies

Pumpkin Roll Out Cookies

Print
clock clock iconcutlery cutlery iconflag flag iconfolder folder iconinstagram instagram iconpinterest pinterest iconfacebook facebook iconprint print iconsquares squares iconheart heart iconheart solid heart solid icon

Pumpkin Roll Out Cookies


5 Stars 4 Stars 3 Stars 2 Stars 1 Star

  • Author: Amy MS, RD, LDN
  • Total Time: 42 minutes
  • Yield: 24 Cookies
  • Diet: Vegetarian

Description

Soft, spiced, and perfectly festive, these pumpkin roll-out cookies are a family favorite! Easy to cut into fun shapes and topped with a sprinkles for even more fun, they’re perfect for holiday baking or a cozy weekend treat.


Ingredients

Units Scale
  • 1/2 cup Unsalted Butter, softened
  • 1/2 cup Maple Syrup
  • 1/4 cup Brown Sugar
  • 1/2 cup Pumpkin Puree
  • 1 tsp Vanilla Extract
  • 1 cup White Whole Wheat Flour
  • 1 1/4 cup All Purpose Flour
  • 3/4 tsp Baking Powder
  • 2 1/2 tsp Pumpkin Pie Spice
  • 1/4 tsp Kosher Salt

Instructions

  1. In a medium sized mixing bowl, add the flours, baking powder, pumpkin pie spice and salt. Whisk together and set aside.
  2. In the bowl of a stand mixer, add the wet ingredients: butter, maple syrup, brown sugar, pumpkin puree and vanilla extract. Mix on low, then increase the speed to medium and cream together the ingredients until light and fluffy.
  3. Next, turn the mixer to low and slowly add the dry ingredients. Mix until the dough comes together.
  4. Cover the dough with plastic wrap and refrigerate for at least 30 minutes.
  5. Preheat your oven to 350 F.
  6. Roll the dough out to about 1/4 inch thick. Using your cookie cutters, cut the cookies into your favorite shapes. (Top with sprinkles to jazz them up if you’d like!)
  7. Place the cookies onto a silpat lined sheet tray.
  8. Bake for 12-15 minutes until the cookies are set.
  9. Remove from the oven and allow to cool on a wire rack. Enjoy!
  • Prep Time: 30 minutes
  • Cook Time: 12
  • Category: Dessert
  • Method: Bake
  • Cuisine: American

Nutrition

  • Serving Size: 1 Cookie
  • Calories: 104
  • Sugar: 6g
  • Sodium: 48mg
  • Fat: 4g
  • Carbohydrates: 16g
  • Fiber: 1g
  • Protein: 1g
  • Cholesterol: 10mg
Recipe Card powered byTasty Recipes

Festive Chocolate Bark

Festive Chocolate Bark

Festive Chocolate Bark
Print
clock clock iconcutlery cutlery iconflag flag iconfolder folder iconinstagram instagram iconpinterest pinterest iconfacebook facebook iconprint print iconsquares squares iconheart heart iconheart solid heart solid icon
Festive Chocolate Bark

Festive Chocolate Bark


5 Stars 4 Stars 3 Stars 2 Stars 1 Star

5 from 1 review

  • Author: Amy MS, RD, LDN
  • Total Time: 10 minutes
  • Yield: 25 pieces

Description

This chocolate bark is loaded with crunchy nuts and sweet dried fruit, it’s the perfect mix of sweet, salty, and satisfying. Easy to make, totally customizable, and a hit at any holiday gathering—or just for you with a cozy cup of cocoa.


Ingredients

Units Scale
  • 12 oz Chocolate Chips (choose your favorite, dark, semi-sweet or milk chocolate)
  • 3/4 cup Nuts and/or Seeds (I like cashews, pistachios, slivered almonds, pepitas)
  • 1/4 cup Dried Cranberries or Cherries
  • 1/4 cup Unsweetened Shredded Coconut
  • Pinch Flaky Sea Salt

Instructions

  1. Cover a large sheet tray with a silpat or parchment paper, set aside.
  2. Melt the chocolate in a microwave safe bowl, on 30-second intervals, stirring in between each one. (You can also melt the chocolate in a heat-proof bowl over a saucepan of simmering water.)
  3. Using a rubber spatula, pour the chocolate onto the center of the tray and spread it out evenly until it is about 1/4″ thick. It will likely not reach the edges of your sheet tray.
  4. Sprinkle your toppings over top, the nuts/seeds, dried fruit, coconut and finally sea salt. Give the toppings a little press into the chocolate with the palms of your hands or back of a spatula.
  5. Place the sheet tray into the fridge so that the chocolate can set for 15 minutes.
  6. Once the chocolate has hardened, use your hands to break it into pieces. Enjoy!
  • Prep Time: 10 minutes
  • Category: Dessert, Holiday
  • Method: No Bake
  • Cuisine: American

Nutrition

  • Serving Size: 1 piece
  • Calories: 104
  • Sugar: 9g
  • Sodium: 11mg
  • Fat: 7g
  • Carbohydrates: 11g
  • Fiber: 2g
  • Protein: 2g
  • Cholesterol: 5mg
Recipe Card powered byTasty Recipes

Easy Maple Glazed Carrots

Easy Maple Glazed Carrots

Print
clock clock iconcutlery cutlery iconflag flag iconfolder folder iconinstagram instagram iconpinterest pinterest iconfacebook facebook iconprint print iconsquares squares iconheart heart iconheart solid heart solid icon

Easy Maple Glazed Carrots


5 Stars 4 Stars 3 Stars 2 Stars 1 Star

  • Author: Amy MS, RD, LDN
  • Total Time: 10 minutes
  • Yield: 4 Servings

Description

Easy Maple Glazed Carrots are tender yet crisp, coated in a sweet, buttery maple glaze for a simple and flavorful side. This quick and easy recipe adds a touch of warmth and color to any holiday or weeknight meal.


Ingredients

Units Scale
  • 1 lb Carrots, peeled and ends trimmed
  • 1/2 tbsp unsalted Butter
  • 1/2 tbsp Olive Oil
  • 1 tbsp Maple Syrup
  • 1/8 tsp Kosher Salt
  • Ground Black Pepper
  • Parsley, minced for Garnish (Optional)

Instructions

  1. Prep your carrots by slicing them into sticks
  2. Heat a large cast iron pan or sautee pan over medium high heat.
  3. When you pan is warm, add the butter and olive oil.
  4. Next add the carrots, salt and pepper and cook, for 4-5 minutes, stirring occasionally or tossing carrots in the pan so that they brown evenly.
  5. Then add the maple syrup to the pan and cook for an additional minute.
  6. Serve hot or warm. Top with parsley if desired. Enjoy!
  • Prep Time: 5 minutes
  • Cook Time: 5
  • Category: Sides, Holiday
  • Method: Sautee
  • Cuisine: American

Nutrition

  • Serving Size: 1 Serving
  • Calories: 160
  • Sugar: 9g
  • Sodium: 150mg
  • Fat: 5g
  • Carbohydrates: 40g
  • Fiber: 10g
  • Protein: 3g
  • Cholesterol: 4mg
Recipe Card powered byTasty Recipes

Air Fryer Chickpea Chocolate Chip Cookie Bites

Air Fryer Chickpea Chocolate Chip Cookie Bites

Print
clock clock iconcutlery cutlery iconflag flag iconfolder folder iconinstagram instagram iconpinterest pinterest iconfacebook facebook iconprint print iconsquares squares iconheart heart iconheart solid heart solid icon

Air Fryer Chickpea Chocolate Chip Cookie Bites


5 Stars 4 Stars 3 Stars 2 Stars 1 Star

5 from 2 reviews

  • Author: Amy MS, RD, LDN
  • Total Time: 0 hours
  • Yield: 25 Cookie Bites
  • Diet: Gluten Free

Description

Air Fryer Cookie Dough Chickpea Bites are a healthier, delicious twist on traditional cookie dough treats. Made with chickpeas for added protein and fiber, they’re crispy on the outside and soft on the inside, making them a great snack, or fiber-filled dessert treat!


Ingredients

Units Scale
  • 1 can, 15 oz Chickpeas, drained and rinsed
  • 1/2 cup Peanut Butter
  • 1/3 cup Maple Syrup
  • 2 tsp Vanilla Extract
  • 1 Egg
  • 1 tsp Ground Flaxseed
  • 1/2 tsp Kosher Salt
  • 1/2 tsp Baking Powder
  • 1/2 tsp Baking Soda
  • 1/2 tsp Cinnamon
  • 1/2 cup Oat Flour
  • 1/3 cup Mini Chocolate Chips

Instructions

  1. To a food processor or high-powered blender, add all the ingredients except the chocolate chips.
  2. Process the dough until smooth, about 1-2 minutes.
  3. Take the blade out of the food processor, or alternatively pour the dough into a bowl, then add the chocolate chips and stir into the batter with a spatula.
  4. Preheat your air fryer to 350° F.
  5. Cut a piece of parchment paper to fit inside your air fryer and lightly coat it with nonstick spray.
  6. Scoop 1-tablespoon portions of dough and place them in the air fryer, leaving about 2 inches of space between each.
  7. Air fry on 350° F for 7-10 minutes, depending on your air fryer.
  8. Allow to cool for 10 minutes before digging in, enjoy!
  • Prep Time: 10 minutes
  • Cook Time: 7-10 minutes
  • Category: Dessert, Snack
  • Method: Air Fry
  • Cuisine: American

Nutrition

  • Serving Size: 1
  • Calories: 86
  • Sugar: 3g
  • Sodium: 159mg
  • Fat: 4g
  • Carbohydrates: 9g
  • Fiber: 1g
  • Protein: 4g
  • Cholesterol: 40mg
Recipe Card powered byTasty Recipes

Homemade Thin Mint Cookies (Gluten-Free)

Homemade Thin Mint Cookies (Gluten-Free)

Print
clock clock iconcutlery cutlery iconflag flag iconfolder folder iconinstagram instagram iconpinterest pinterest iconfacebook facebook iconprint print iconsquares squares iconheart heart iconheart solid heart solid icon
Thin Mint Cookies

Homemade Thin Mint Cookies (Gluten-Free)


5 Stars 4 Stars 3 Stars 2 Stars 1 Star

5 from 1 review

  • Author: Amy MS, RD, LDN
  • Total Time: 45 minutes
  • Yield: 38-40 Cookies
  • Diet: Gluten Free

Description

Homemade Thin Mint Cookies are even better than the Girl Scout’s version! A perfect crisp cookie center with a delicious chocolate peppermint coating, now you can have Thin Mint Cookies anytime of the year!


Ingredients

Units Scale

Cookie Wafer:

  • 1 1/2 cup Almond Flour
  • 1/4 cup Cocoa Powder
  • 1/2 tsp Xanthan Gum
  • Pinch Salt
  • 3 tbsp Unsalted Butter
  • 4 tbsp Maple Syrup
  • 1 tbsp Water
  • 3/4 tsp Peppermint Extract

Chocolate Coating:

  • 1 cup Dark Chocolate Chips
  • 2 tsp Coconut Oil
  • 3/4 tsp Peppermint Extract

Instructions

  1. Preheat oven to 350° F. Cover a sheet tray with a silpat or parchment paper and set aside.
  2. In a medium-sized mixing bowl, add the almond flour, cocoa powder, Xanthan Gum and salt. Whisk to combine.
  3. Slice the butter into small cubes and add to the dry ingredients. Using a fork or pastry cutter, cut the butter into very small pieces into the almond flour mixture (smaller than pea size!). Then add the maple syrup, water and peppermint extract and stir together with a spatula.
  4. Form the dough into a disc, wrap in plastic wrap and place into the refrigerator for 15 minutes. This helps to make rolling the cookies out much easier!
  5. After 15 minutes, remove the dough from the refrigerator and place onto your work surface. Place a piece of parchment paper or plastic wrap over the dough, then roll it out, this makes rolling much easier! Roll the dough out to about 1/8″ thick.
  6. Next, use a 2″ circle cutter, cut out the cookies and place onto your prepared sheet tray.
  7. Bake for 12-17 minutes. (Be sure to check the cookies at 12 minutes, you want them to be crispy but don’t allow them to burn!) Allow cookie wafers to cool completely.
  8. While the cookie wafers cool, make the chocolate coating. To a microwave safe bowl add the dark chocolate chips and coconut oil.
  9. Microwave on 25 second intervals, stirring in between each, until the chocolate is just melted. Then add in the peppermint extract and stir to combine.
  10. Take a chocolate wafer, dip into the melted chocolate coating, turning the wafer to coat the entire cookie. Let any excess chocolate drip off into the bowl and place the cookie onto your prepared sheet tray with a silpat or parchment paper.
  11. Continue with remaining wafers, coating each in chocolate.
  12. Place the coated cookies into the freezer for 10 minutes or refrigerator for at least 15 minutes to allow the chocolate to set.
  13. Store the cookies in an airtight container in the freezer or refrigerator, however you like your thin mints! Enjoy!
  • Prep Time: 30 minutes
  • Cook Time: 15
  • Category: Dessert, Cookie
  • Method: Bake
  • Cuisine: American

Nutrition

  • Serving Size: 4 Cookies
  • Calories: 155
  • Sugar: 6g
  • Sodium: 19mg
  • Fat: 12g
  • Carbohydrates: 11g
  • Fiber: 3g
  • Protein: 4g
  • Cholesterol: 8g
Recipe Card powered byTasty Recipes

Cherry Oatmeal Bars

Cherry Oatmeal Bars

Cherry Oatmeal Bars
Print
clock clock iconcutlery cutlery iconflag flag iconfolder folder iconinstagram instagram iconpinterest pinterest iconfacebook facebook iconprint print iconsquares squares iconheart heart iconheart solid heart solid icon
Cherry Oatmeal Bars

Cherry Oatmeal Bars


5 Stars 4 Stars 3 Stars 2 Stars 1 Star

  • Author: Amy MS, RD, LDN
  • Total Time: 35 minutes
  • Yield: 32
  • Diet: Vegan

Description

Fresh cherry and oatmeal bars. The perfect dessert or grab & go snack that is packed full of antioxidants and fiber! This recipe was developed for the Park Union Farmer’s Market.


Ingredients

Units Scale

Oatmeal Crumb:

  • 1 3/4 cup Oat Flour
  • 1 1/4 cup Old Fashioned Oats
  • 1 1/2 tsp Cinnamon
  • 1/4 tsp Salt
  • 1/4 tsp Baking Powder
  • 1/2 cup Coconut Oil
  • 1/2 cup Applesauce
  • 1/3 cup Maple Syrup
  • 1 tsp Vanilla Extract
  • 1 tsp Lemon Zest

Cherry Filling:

  • 3 cups Pitted Cherries
  • 2 tbsp Maple Syrup
  • 1 tbsp Lemon Juice
  • 2 tsp Cornstarch

Instructions

  1. Preheat oven to 350° F. Grease a 9×13 dark pan with nonstick spray. Set aside.
  2. In a small sauce pan, add the cherry filling ingredients, pitted cherries, maple syrup, lemon juice and cornstarch. Turn the heat to medium and bring the mixture to a low boil.
  3. In a large mixing bowl, add the oat flour, oats, cinnamon, baking powder and salt. Whisk together to combine.
  4. Next add the liquid ingredients, coconut oil, applesauce, maple syrup, vanilla extract and lemon zest.
  5. Using a spatula, stir the crumb mixture together.
  6. Set 3/4 cup of the mixture aside for the topping.
  7. Pour the remaining mixture into your prepared pan and spread evenly, pressing down with a spatula to ensure crumb crust cooks evenly.
  8. Par bake the crumb crust! Pop into the oven and bake for 10 minutes. This helps to get a slightly crispy bottom to your bars.
  9. After 10 minutes, remove the pan from the oven and spread the cherry filling evenly over top of the crumb crust. Top with the remaining filling by dropping small teaspoon size bits over top the cherry filling.
  10. Place the pan back into the oven and bake for an additional 20-25 minutes.
  11. Remove from the oven and allow to cool fully before slicing. Enjoy!
  • Prep Time: 15
  • Cook Time: 20
  • Category: Dessert, Snack
  • Method: Bake
  • Cuisine: American

Nutrition

  • Serving Size: 1 Bar
Recipe Card powered byTasty Recipes

Zucchini & Yellow Squash Rosettes

Zucchini & Yellow Squash Rosettes

Zucchini Rosette
Print
clock clock iconcutlery cutlery iconflag flag iconfolder folder iconinstagram instagram iconpinterest pinterest iconfacebook facebook iconprint print iconsquares squares iconheart heart iconheart solid heart solid icon
Zucchini Rosette

Zucchini & Yellow Squash Rosettes


5 Stars 4 Stars 3 Stars 2 Stars 1 Star

5 from 1 review

  • Total Time: 15 minutes
  • Yield: 40-50 Rosettes
  • Diet: Vegetarian

Description

Zucchini and Yellow Squash Rosettes are a recipe that’s as beautiful as they are delicious. Packed with tangy goat cheese, sweet cranberries and crunchy pine nuts. This appetizer is perfect for impressing guests or adding elegance to any meal. This recipe was created for the Park Union Farmer’s Market.


Ingredients

Units Scale
  • 1 Medium Zucchini
  • 1 Medium Yellow Squash
  • 2 oz Goat Cheese
  • 1/2 tsp Lemon Zest
  • 1/2 tbsp Lemon Juice
  • 1/4 cup Dried Cranberries
  • 1/4 cup Pine Nuts

Instructions

  1. Trim the ends of the zucchini and squash. Then, using a vegetable peeler, peel long ribbons of both the zucchini and squash.
  2. Mix the goal cheese filling. Using a microplane zester, zest and juice the lemon. In a small mixing bowl combine the goat cheese, lemon zest and lemon juice, Mix together with a fork to fully incorporate.
  3. Toast the pine nuts. Place the pine nuts into a dry skillet, in a single layer. Turn the heat to medium-low and toast for 2-3 minutes, continually stirring or tossing the skillet to
  4. Place the zucchini and squash ribbons onto a cutting board or work surface. Using a butter knife or small spatula, spread 1/2 to 1 tsp of goat cheese mixture onto each ribbon. Top the goat cheese with a few cranberries and pine nuts. Roll up. Continue until all the ribbons have been filled. Enjoy!
  • Prep Time: 15 minutes
  • Category: Appetizer
  • Method: No Cook
  • Cuisine: Mediterranean

Nutrition

  • Serving Size: 3
  • Calories: 32
  • Sugar: 2g
  • Sodium: 12mg
  • Fat: 2g
  • Carbohydrates: 2g
  • Fiber: 0g
  • Protein: 2g
  • Cholesterol: 2mg
Recipe Card powered byTasty Recipes

Carrot Cake Quick Bread

Carrot Cake Quick Bread

Print
clock clock iconcutlery cutlery iconflag flag iconfolder folder iconinstagram instagram iconpinterest pinterest iconfacebook facebook iconprint print iconsquares squares iconheart heart iconheart solid heart solid icon
Carrot Cake Quick Bread

Carrot Cake Quick Bread


5 Stars 4 Stars 3 Stars 2 Stars 1 Star

  • Author: Amy RD, LDN
  • Total Time: 1 hour
  • Diet: Vegetarian

Description

Carrot Cake Quick Bread combines the flavors of classic carrot cake with a healthy twist. Packed with shredded carrots, warm spices, and a touch of sweetness, it’s the perfect treat for breakfast, snack time, or a light dessert!


Ingredients

Units Scale

Carrot Cake Bread:

  • 3/4 cup All Purpose Flour
  • 1/2 cup Oat Flour
  • 1/2 cup Whole Wheat Flour
  • 1 tsp Baking Powder
  • 1/2 tsp Baking Soda
  • 1/2 tsp Salt
  • 1 1/2 tsp Ground Cinnamon
  • 1/2 tsp Nutmeg
  • 1/2 tsp Cardamom (Optional)
  • 2 Tbsp Ground Flaxseed
  • 1/2 cup Olive Oil
  • 1/2 cup Honey
  • 1/2 cup Unsweetened Applesauce
  • 1 cup Grated Carrot
  • 2 Eggs
  • 1 tsp Vanilla Extract
  • 1/3 cup Walnuts, chopped

Icing Glaze:

  • 1/4 cup Powdered Sugar
  • 2 tsp Milk

Instructions

  1. Set out all ingredients and equipment needed for happy baking!
  2. Preheat oven to 325° F. Spray a bread pan with nonstick cooking spray and set aside.
  3. In a large mixing bowl, add all the dry ingredients and whisk together (Oat Flour, AP Flour, Wheat Flour, Baking Powder, Baking Soda, Salt, Cinnamon, Nutmeg, Cardamom, Flaxseed).
  4. In a medium mixing bowl add the wet ingredients and whisk to combine (Olive Oil, Honey, Applesauce, Carrot, Eggs, Vanilla Extract).
  5. Next, pour the wet ingredients into the dry ingredients and mix together with a spatula. Take care to not over mix!
  6. Add in the chopped walnuts to the batter.
  7. Pour the batter into prepared bread pan and bake for 40-50 minutes, until just browned around the edges and a toothpick comes out clean from the center. *Note! Keep an eye on your quick bread. If it starts to brown too much before the 50 minutes, cover your bread pan with foil and place back into the oven to finish cooking.*
  8. Remove from the oven and allow to cool on a wire rack for 5 minutes. Then, run a butter knife along the edges of the pan and carefully remove the bread from the pan.
  9. While the bread cools, prepare the glaze icing
  10. In a small bowl whisk together the powdered sugar and 2 tsp milk.
  11. Using a spoon, drizzle the icing over top of the bread.
  12. Slice into 1 inch sections and enjoy!

Notes

  1. Keep an eye on your quick bread. If it starts to brown too much before the 50 minutes, cover your bread pan with foil and place back into the oven to finish cooking.
  • Prep Time: 10 min
  • Cook Time: 50 min
  • Category: Dessert
  • Method: Bake
  • Cuisine: American

Nutrition

  • Serving Size: 1 Slice
  • Calories: 233
  • Sugar: 13g
  • Sodium: 180mg
  • Fat: 11g
  • Carbohydrates: 29g
  • Fiber: 2g
  • Protein: 3g
  • Cholesterol: 27mg
Recipe Card powered byTasty Recipes

Breakfast Granola Cups

Breakfast Granola Cups

Print
clock clock iconcutlery cutlery iconflag flag iconfolder folder iconinstagram instagram iconpinterest pinterest iconfacebook facebook iconprint print iconsquares squares iconheart heart iconheart solid heart solid icon
Granola Cups

Breakfast Granola Cups


5 Stars 4 Stars 3 Stars 2 Stars 1 Star

  • Author: Amy RD, LDN
  • Total Time: 20 minutes
  • Yield: 8 cups

Description

Homemade granola cups are a wholesome and nutritious breakfast or snack. Fill them with Greek Yogurt and berries for more protein, antioxidants and flavor.


Ingredients

Units Scale
  • 2 cups Old Fashioned Oats
  • 1/4 cup Ground Flaxseed
  • 3/4 tsp Ground Cinnamon
  • 1/4 cup Maple Syrup
  • 1/4 cup + 1 tbsp Peanut Butter
  • 1 Egg White

Instructions

  1. Preheat oven to 350° F. Grease a muffin tin with nonstick spray or coconut oil, set aside.
  2. In a large bowl, combine the oats, flaxseed and cinnamon and stir together with a spatula.
  3. To a small microwave safe bowl, add the maple syrup and peanut butter. Microwave for 20-25 seconds just to soften the peanut butter so it is easy to stir.
  4. Next, pour the peanut butter mixture into the oat mixture. Stir together with a spatula, making sure that all dry ingredients are coated in the wet ingredients.
  5. Whisk the egg white with a fork until slightly frothy then pour into the oat mixture and stir together.
  6. Divide the oat mixture into 8 muffin cups. Using your fingers, press the the mixture into the muffin tin to form cup shapes. Continue with the remaining granola cups.
  7. Place muffin tin into the oven and bake for 15-18 minutes until the granola cups just start to turn golden brown.
  8. Allow the cups to cool in the muffin tin for at least 15 minutes. This is KEY, otherwise they will fall apart! Then, run a spatula or butter knife around the edge of each cup to gently release from the muffin tin.
  9. To serve, fill each cup with a spoonful of Greek Yogurt and top with fresh berries. Enjoy!
  • Prep Time: 5 minutes
  • Cook Time: 15 minutes
  • Category: Breakfast
  • Method: Bake
  • Cuisine: American

Nutrition

  • Serving Size: 1 cup
  • Calories: 194
  • Sugar: 8g
  • Sodium: 53mg
  • Fat: 8g
  • Carbohydrates: 24g
  • Fiber: 3g
  • Protein: 9g
  • Cholesterol: 0mg
Recipe Card powered byTasty Recipes

Key Lime Energy Bites

Key Lime Energy Bites

Key Lime Energy Bites
Print
clock clock iconcutlery cutlery iconflag flag iconfolder folder iconinstagram instagram iconpinterest pinterest iconfacebook facebook iconprint print iconsquares squares iconheart heart iconheart solid heart solid icon
Key Lime Energy Bites

Key Lime Energy Bites


5 Stars 4 Stars 3 Stars 2 Stars 1 Star

5 from 2 reviews

  • Author: Amy RD, LDN
  • Total Time: 10 minutes
  • Yield: 14
  • Diet: Gluten Free

Description

Zesty Key Lime Energy Bites: Tangy citrus bliss meets wholesome energy in these no-bake bites! Perfect for a refreshing snack boost anytime.


Ingredients

Scale
  • 1 cup Pitted Dates
  • 1/2 cup Raw Cashews
  • 1 Scoop Vanilla Protein Powder
  • 1/2 cup Unsweetened Shredded Coconut (Plus 1/4 cup for optional topping)
  • Zest from 1 Lime
  • 2 tsp Lime Juice
  • 1/2 tsp Vanilla Extract
  • 13 tsp Water (if needed)

Instructions

  1. Add the dates and cashews to the bowl of a food processor. Process for 1-2 minutes until the dates and nuts are broken down into small pieces.
  2. Add remaining ingredients (except for water). Blend until fully combined and the mixture forms into a ball.
  3. Add 1-3 tsp of water to the mixture if needed to bring together.
  4. Using a 1-inch scoop or tablespoon, scoop out the mixture and then roll gently in your hands to form them into ball shape. This should yield about 14-16 energy bites.
  5. To make them extra pretty, roll them in the extra 1/4 cup unsweetened shredded coconut.

Notes

  1. Tip! To get the coconut to stick to the bites the best, roll them in a shallow bowl with 1 tbsp of water, then roll in the coconut.
  • Prep Time: 10 minutes
  • Category: Snack
  • Method: Food Processor
  • Cuisine: American

Nutrition

  • Serving Size: 1 Energy Bite
  • Calories: 68
  • Sugar: 4g
  • Sodium: 10mg
  • Fat: 4g
  • Carbohydrates: 7g
  • Fiber: 1g
  • Protein: 3g
  • Cholesterol: 3mg
Recipe Card powered byTasty Recipes

Protein Pancakes

Protein Pancakes

Print
clock clock iconcutlery cutlery iconflag flag iconfolder folder iconinstagram instagram iconpinterest pinterest iconfacebook facebook iconprint print iconsquares squares iconheart heart iconheart solid heart solid icon
Protein Pancakes

Protein Pancakes


5 Stars 4 Stars 3 Stars 2 Stars 1 Star

5 from 1 review

  • Author: Amy RD, LDN
  • Total Time: 15 minutes
  • Yield: 6 Pancakes

Ingredients

Units Scale

Instructions

  1. In a large bowl, add the 1 cup pancake mix, egg and milk. Whisk together.
  2. Heat a griddle or large skillet over medium heat.
  3. Spray with nonstick spray. Drop spoonfuls of batter onto the pan so that you have 6 pancakes.
  4. Allow to cook for 2-3 minutes until bubbles begin to form on top of the pancakes.
  5. Flip the pancakes and allow to cook for another minute.
  6. Top with your favorite pancake toppings, fruit, maple syrup, peanut butter, and enjoy!
  • Prep Time: 5 minutes
  • Cook Time: 10 minutes
  • Category: Breakfast
  • Method: Griddle
  • Cuisine: American

Nutrition

  • Serving Size: 1
  • Calories: 100
  • Sugar: 2g
  • Sodium: 160mg
  • Fat: 2g
  • Carbohydrates: 14g
  • Fiber: 2g
  • Protein: 6g
  • Cholesterol: 31mg
Recipe Card powered byTasty Recipes

Mini Rosemary & Parmesan Focaccia Bites

Mini Rosemary Focaccia Bites

Print
clock clock iconcutlery cutlery iconflag flag iconfolder folder iconinstagram instagram iconpinterest pinterest iconfacebook facebook iconprint print iconsquares squares iconheart heart iconheart solid heart solid icon
Mini Rosemary & Parmesan Foccacia Bites

Mini Rosemary & Parmesan Focaccia Bites


5 Stars 4 Stars 3 Stars 2 Stars 1 Star

  • Author: Amy RD, LDN
  • Total Time: 20 minutes
  • Yield: 12

Description

Mini Rosemary & Parmesan Focaccia Bites are packed with protein and make the perfect pair with a cozy soup or a flavorful appetizer for your next dinner.


Ingredients

Units Scale
  • 1 cup Greek Yogurt
  • 1/2 cup All Purpose Flour
  • 1/2 cup Whole Wheat Flour
  • 1 1/2 tsp Baking Powder
  • 1/8 tsp Kosher Salt
  • 1 tbsp Rosemary, Minced
  • 1/4 cup + 1 tbsp Parmesan Cheese, Grated
  • 6 tsp Olive Oil
  • Flaked Sea Salt for topping, Optional

Instructions

  1. Preheat oven to 400°F.
  2. Get a muffin tin out and prep for the foccacia bites by pouring 1/2 tsp olive oil into each muffin tin section.
  3. Then, make the dough. To the bowl of a stand mixer, add the Greek Yogurt, flours, baking powder, 1/4 cup Parmesan and salt. Mix on low until all ingredients are incorporated. (Alternatively you can add to a large bowl and mix by hand with a spatula.)
  4. Remove the bowl from the mixer and divide the dough into 12 equal portions.
  5. Then, take each dough portion and flatten slightly with your hands and place into the prepared muffin tin sections.
  6. Top each dough section with the minced rosemary and 1 tbsp grated Parmesan. Then top with a pinch of sea salt on each.
  7. Bake for 12-15 minutes until slightly golden.
  8. Carefully remove the bites from the muffin tin and allow to cool on a wire rack.
  • Prep Time: 5 minutes
  • Cook Time: 15 minutes
  • Category: Appetizer
  • Method: Bake
  • Cuisine: Italian

Nutrition

  • Serving Size: 1
  • Calories: 84
  • Sugar: 1g
  • Sodium: 114mg
  • Fat: 3g
  • Carbohydrates: 9g
  • Fiber: 1g
  • Protein: 4g
  • Cholesterol: 4mg
Recipe Card powered byTasty Recipes

Almond Flour Snowball Cookies

Almond Flour Snowball Cookies

Almond Flour Snowball Cookies
Print
clock clock iconcutlery cutlery iconflag flag iconfolder folder iconinstagram instagram iconpinterest pinterest iconfacebook facebook iconprint print iconsquares squares iconheart heart iconheart solid heart solid icon
Almond Flour Snowball Cookies

Almond Flour Snowball Cookies (Gluten-Free)


5 Stars 4 Stars 3 Stars 2 Stars 1 Star

  • Author: Amy RD, LDN
  • Total Time: 17 minutes
  • Yield: 12 Cookies
  • Diet: Gluten Free

Description

Classic snowball cookies made with almond flour to be gluten-free!


Ingredients

Units Scale
  • 1 cup Almond Flour
  • 1 Tbsp Arrowroot Flour or Cornstarch
  • 1/4 tsp Baking Powder
  • 3/4 cup Pecans (1/2 cup finely chopped, 1/4 cup larger chop)
  • 3 Tbsp Butter, softened
  • 2 Tbsp Maple Syrup
  • 1 1/2 tsp Vanilla Extract
  • Pinch Salt
  • 1/4 cup Powdered Sugar

Instructions

  1. Preheat oven to 325° F. Get out a sheet tray and silpat or nonstick cookie sheet, set aside.
  2. In a medium sized bowl, add the almond flour, arrowroot or cornstarch, baking powder, pecans, butter, maple syrup, salt and vanilla extract.
  3. Stir the batter together with a spatula until all ingredients are fully mixed and incorporated.
  4. Using a 1 1/2-inch scoop, scoop the dough and roll it into ball shape with your hands, then place onto your sheet tray or cookie sheet. Continue with remaining dough, you should have about 12 cookies.
  5. Place cookies into the oven and bake for 10-12 minutes until golden.
  6. While the cookies bake, place the powdered sugar into a bowl and set aside.
  7. Allow cookies to cool for 5 minutes and then roll in powdered sugar.
  8. Place onto a cooling rack to finish cooling before digging in!

Notes

  1. The cookies will be a little crumbly while they are hot, allow to cool for at least 15 minutes to keep their shape!
  • Prep Time: 5 minutes
  • Cook Time: 12 minutes
  • Category: Cookies, Dessert, Gluten-Free
  • Method: Bake

Nutrition

  • Serving Size: 1 Cookie
  • Calories: 145
  • Sugar: 5g
  • Sodium: 46mg
  • Fat: 12g
  • Saturated Fat: 3g
  • Unsaturated Fat: 4g
  • Carbohydrates: 9g
  • Fiber: 2g
  • Protein: 3g
  • Cholesterol: 8mg
Recipe Card powered byTasty Recipes

Classic Chocolate Chip Cookies

Classic Chocolate Chip Cookies

Classic Chocolate Chip Cookies
Print
clock clock iconcutlery cutlery iconflag flag iconfolder folder iconinstagram instagram iconpinterest pinterest iconfacebook facebook iconprint print iconsquares squares iconheart heart iconheart solid heart solid icon
Classic Chocolate Chip Cookies

Classic Chocolate Chip Cookies


5 Stars 4 Stars 3 Stars 2 Stars 1 Star

  • Author: Amy RD, LDN
  • Total Time: 25 minutes
  • Yield: 30 Cookies

Description

Classic Chocolate Chip Cookies, crisp on the outside, soft in the center, perfect!


Ingredients

Scale
  • 1 cup Granulated Sugar
  • 1 cup Brown Sugar
  • 1 cup Unsalted Butter (2 sticks, at room temperature)
  • 2 Eggs
  • 1 1/2 tsp Vanilla Extract
  • 1 tsp Baking Soda
  • 2 tbsp Flaxseed (Ground)
  • 1 tsp Kosher Salt
  • 3 cups All Purpose Flour
  • 12 oz Chocolate Chips

Instructions

  1. In the bowl of a stand mixer add the butter and sugars. Mix on medium to medium high until light and creamy.
  2. Next, turn the mixer to low and add the eggs, one at a time until mixed in. Then, add the flaxseed and vanilla extract, mix until just combined.
  3. In a separate bowl whisk together the flour, baking soda and salt.
  4. With the mixer on low, slowly add the flour mixture to the wet ingredients. If necessary scrape down the bowl to make sure all ingredients are fully mixed.
  5. Add the chocolate chips to the dough mixture, mix on low just until the chips are incorporated into the dough.
  6. Cover your bowl or place dough into a container with a lid and refrigerate at least 4 hours or, preferably, over night.
  7. When ready to bake, preheat your oven to 375° F.
  8. Place a silpat mat or parchment paper onto a baking sheet tray. Using an ice cream scoop or large spoon, drop rounded scoops of dough onto your baking trays.
  9. Place sheet tray into the oven and bake at 375 F for 10-11 minutes
  10. Using a spatula remove cookies from hot sheet tray to a cooling rack. Let cool (if you can!) and enjoy!
 
  • Prep Time: 15
  • Cook Time: 10
  • Category: Dessert, Cookie
  • Method: Bake
  • Cuisine: American

Nutrition

  • Serving Size: 1
  • Calories: 207
  • Sugar: 19g
  • Sodium: 74mg
  • Fat: 10g
  • Saturated Fat: 6g
  • Carbohydrates: 30g
  • Fiber: 1g
  • Protein: 2g
  • Cholesterol: 28mg
Recipe Card powered byTasty Recipes

Devin’s Breakfast Waffles

Devin’s Breakfast Waffles

Devin's Waffles
Devin’s Waffles
Print
clock clock iconcutlery cutlery iconflag flag iconfolder folder iconinstagram instagram iconpinterest pinterest iconfacebook facebook iconprint print iconsquares squares iconheart heart iconheart solid heart solid icon
Devin's Waffles

Devin’s Breakfast Waffles


5 Stars 4 Stars 3 Stars 2 Stars 1 Star

5 from 3 reviews

  • Author: Amy RD, LDN
  • Total Time: 30 minutes
  • Yield: 14

Description

Every Sunday my husband Devin makes a batch of these waffles for our family’s breakfasts. It started when my twins were little and the tradition continues, 7 years later! These waffles are delicious and filing, I know you will enjoy!


Ingredients

Units Scale
Dry Ingredients
 
  • 2 cups All Purpose Flour
  • 1 cup Whole Wheat Flour
  • 1 cup Oat Flour
  • 4 tsp Baking Powder
  • 1 1/2 tsp Salt
  • 1/2 cup Vanilla Protein Powder
Wet Ingredients
 
  • 8 Eggs (Separated)
  • 1/4 cup Sugar
  • 1/2 tsp Vanilla Extract
  • 8 tbsp Unsalted Butter
  • 4 cups Buttermilk

Instructions

  1. In a large mixing bowl combine all dry ingredients.
  2. Melt butter. Either in the microwave or in small saucepan on the stove top. Set aside.
  3. Separate your eggs. Place the yolks in a medium size mixing bowl and the egg whites into the bowl of a stand or hand mixer.
  4. Add 1/4 cup sugar to egg yolks. Whisk vigorously until yolks turn a pale yellow color.
  5. Whisk the vanilla extract into the egg yolks and sugar. Next slowly stream in the melted butter, whisking as you add. Whisk in the buttermilk and then set bowl aside.
  6. Using your mixer with the whisk attachment, whisk the egg whites until stiff peaks are formed.
  7. Add the wet ingredients to the dry ingredients and whisk until smooth. Do not over mix.
  8. Gently fold the egg whites into the batter.
  9. Preheat your waffle iron.
  10. Once the waffle iron is ready, spray with nonstick spray and scoop 1/2 cup of batter into waffle iron and cook according to your waffle maker instructions.
  11. Serve hot with flaxseed, maple syrup and fruit, enjoy!
  • Prep Time: 15
  • Cook Time: 15
  • Category: Breakfast
  • Method: Waffle Iron
  • Cuisine: American

Nutrition

  • Serving Size: 1 Waffle
  • Calories: 284
  • Sugar: 6g
  • Sodium: 518mg
  • Fat: 10g
  • Saturated Fat: 5g
  • Unsaturated Fat: 4g
  • Carbohydrates: 33g
  • Fiber: 2g
  • Protein: 14g
  • Cholesterol: 131mg
Recipe Card powered byTasty Recipes

Quinoa Greek Salad

Quinoa Greek Salad

Print
clock clock iconcutlery cutlery iconflag flag iconfolder folder iconinstagram instagram iconpinterest pinterest iconfacebook facebook iconprint print iconsquares squares iconheart heart iconheart solid heart solid icon

Quinoa Greek Salad


5 Stars 4 Stars 3 Stars 2 Stars 1 Star

5 from 1 review

  • Author: Amy RD, LDN
  • Total Time: 25 minutes
  • Yield: 8 Servings
  • Diet: Gluten Free

Description

One of my most popular recipes! Quinoa Greek Salad is a great side dish, lunch and excellent to bring to potlucks!


Ingredients

Scale
Salad Ingredients
  • 1 1/2 cups Quinoa
  • 3 cups Water
  • 1 pt Cherry Tomatoes
  • 1 Cucumber
  • 1/2 cup Kalamata Olives
  • 1/2 cup Feta Cheese
Balsamic Dressing Ingredients
  • 1/2 cup Olive Oil
  • 2 tsp Dijon Mustard
  • 1/4 cup Balsamic Vinegar
  • 1/2 tsp Kosher Salt
  • 1/4 tsp Ground Black Pepper

Instructions

For the quinoa and veggies
  1. Rinse the 1 1/2 cups quinoa in a fine mesh strainer. In a medium saucepan, heat 3 cups of water over high heat. Add the rinsed quinoa. Bring quinoa and water to a boil then reduce heat to low and simmer for 15 minutes. The quinoa is done cooking when all the water is absorbed and it is light and fluffy.
  2. Prep and slice veggies.
  3. Peel cucumber and slice off the ends. Cut the cucumber in half lengthwise. Using a small spoon scoop out the seeds. Next, slice each half lengthwise into 1/2 inch long sections. Then stack your long sections together to dice into 1/2 inch dice. Place diced cucumber into a large bowl.
  4. Rinse your cherry tomatoes. Slice each tomato lengthwise (its prettier!). Place into bowl with cucumber.
  5. Slice kalamata olives in half. Place into bowl with cucumber and tomato.
 
For the balsamic dressing
  1. Into a small mixing bowl or mason jar add all dressing ingredients. Whisk until the dressing is fully emulsified. Taste the dressing and adjust seasonings per your preference
Putting the salad together
  1. Once the quinoa has finished cooking add 3/4 of the dressing to the hot quinoa and stir to mix well. This will allow the quinoa to really absorb the dressing.
    Place the quinoa into the refrigerator for at least 1 hour.
  2. Once the quinoa has cooled, place it into a large bowl. Add the cucumber, cherry tomatoes and kalamata olives. Next add the feta and mix together, taking care not to smash your tomatoes. Add the remaining 1/4 of the dressing and mix together. Place the salad back into the refrigerator for 1 more hour. Serve chilled, enjoy!
 
  • Prep Time: 10
  • Cook Time: 15
  • Category: Salad, Mediterranean, Lunch, Sides
  • Cuisine: Greek

Nutrition

  • Serving Size: 1
  • Calories: 173
  • Sugar: 3g
  • Sodium: 392mg
  • Fat: 11g
  • Carbohydrates: 14g
  • Fiber: 1g
  • Protein: 4g
Recipe Card powered byTasty Recipes

Lightened Up Garlic Mashed Potatoes

Lightened Up Garlic Mashed Potatoes

Lightened Up Garlic Mashed Potatoes
Print
clock clock iconcutlery cutlery iconflag flag iconfolder folder iconinstagram instagram iconpinterest pinterest iconfacebook facebook iconprint print iconsquares squares iconheart heart iconheart solid heart solid icon
Lightened Up Garlic Mashed Potatoes

Lightened Up Garlic Mashed Potatoes


5 Stars 4 Stars 3 Stars 2 Stars 1 Star

  • Author: Amy RD, LDN
  • Total Time: 40 minutes
  • Yield: 8 Servings
  • Diet: Gluten Free

Ingredients

Scale
  • 1 Head Cauliflower
  • 5 Garlic Gloves
  • 1 tbsp Olive Oil
  • 1 tsp Kosher Salt
  • 2 lbs Russet Potatoes
  • 1/2 cup Unsweetened Almond Milk
  • 4 tbsp Unsalted Butter

Instructions

Roasted Cauliflower and Garlic
  1. Preheat oven to 400° F. Set a large sheet tray out for roasting.
  2. Rinse the cauliflower. Using a sharp knife cut around the root of the cauliflower to remove the florets. Continue working your way around the cauliflower until all florets are removed. Place cauliflower florets onto the sheet tray. Add the whole garlic cloves to the tray. Sprinkle kosher salt and drizzle 1 tbsp olive oil over top. Using clean hands mix together. Place into the oven and roast for 20-25 minutes until the cauliflower is soft tender.
  3. Allow the cauliflower and garlic to cool slightly. Place cauliflower and garlic into the bowl of a food processor. Add 1/4 cup of milk. Process until smooth. Set aside.
 
Mashed Potatoes
  1. Scrub the potatoes, peel and cut them into large dice.
  2. Fill a large pot with water and heat to boiling. Add the diced potatoes. Cook the potatoes until they are fork tender, about 12-15 minutes.
     
  3. Drain the potatoes and return to same pot you boiled them in.
  4. Using a potato masher, hand held mixer or potato ricer, mash the potatoes until your desired consistency.
  5. Add the cauliflower puree, additional 1/4 cup of milk, 1/2 tsp kosher salt and butter to the potatoes and mix to combine.
  6. Check the seasonings and adjust the salt and pepper as needed. Serve hot and enjoy!
 
  • Prep Time: 10
  • Cook Time: 30
  • Category: Dinner, Sides, Holiday

Nutrition

  • Serving Size: 1
  • Calories: 172
  • Sugar: 2g
  • Sodium: 289mg
  • Fat: 8g
  • Carbohydrates: 24g
  • Fiber: 3g
  • Protein: 4g
  • Cholesterol: 15mg
Recipe Card powered byTasty Recipes

Roasted Brussels Sprouts with Balsamic Glaze

Roasted Brussels Sprouts with Balsamic Glaze

Print
clock clock iconcutlery cutlery iconflag flag iconfolder folder iconinstagram instagram iconpinterest pinterest iconfacebook facebook iconprint print iconsquares squares iconheart heart iconheart solid heart solid icon

Roasted Brussels Sprouts with Balsamic Glaze


5 Stars 4 Stars 3 Stars 2 Stars 1 Star

  • Author: Amy RD, LDN
  • Total Time: 35 minutes
  • Yield: 6 Servings

Description

Roasted Brussels Sprouts with Balsamic Glaze are crispy, caramelized, and coated in a sweet-tangy drizzle that makes veggies feel exciting again. They’re the perfect simple side that adds color, flavor, and a little nourishment to any holiday table.


Ingredients

Scale
Roasted Brussels
  • 1 1/2 lbs Brussels Sprouts
  • 1 tbsp Olive Oil
  • 1 tsp Kosher Salt
  • 1/2 tsp Ground Black Pepper
Balsamic Glaze
  • 1/2 cup Balsamic Vinegar
  • 1 tbsp Sugar

Instructions

For the Brussels Sprouts
  1. Preheat your oven to 400° F. Set a large sheet tray out for roasting the Brussels sprouts.
  2. Rinse the Brussels sprouts. Trim the root end off and discard. Slice each sprout in half and place on the sheet tray. Some leaves will fall off, this okay simply add them to the sheet tray too. Discard any outer leaves that are yellow and not green.
  3. Pour one tablespoon of olive oil, 1 tsp kosher salt and 1/2 tsp ground black pepper over the Brussels. Using your hands mix it all together to coat the Brussels. Place the tray into the oven and roast for 25-30 minutes, stirring halfway. Watch them carefully for the last few minutes as the leaves can burn easily.
For the Balsamic Glaze
  1. While the Brussels sprouts roast, make the balsamic glaze. Heat a sauce pan over medium heat.
  2. Add the balsamic vinegar and sugar. Turn the heat up to medium high and bring the mixture to a low boil.
  3. Once it has reached boil, turn it down and simmer on low for 15-20 minutes. The mixture will cook down and get slightly thicker. You will know its done when the liquid will coat the back of a spoon.
  4. After the 20 minutes turn the heat off and allow the glaze to cool slightly. It will thicken and become glaze like as it cools.
To Serve
  1. Using a spoon drizzle the balsamic glaze lightly over the roasted Brussels sprouts. Enjoy hot!
 
  • Prep Time: 5
  • Cook Time: 30
  • Category: Dinner, Sides, Holiday Sides
  • Method: Roast

Nutrition

  • Serving Size: 1/6
  • Calories: 96
  • Sugar: 9g
  • Sodium: 352mg
  • Fat: 3g
  • Carbohydrates: 16g
  • Fiber: 5g
  • Protein: 3g
  • Cholesterol: 0mg
Recipe Card powered byTasty Recipes

Apple Cinnamon Dutch Baby (Gluten Free)

Apple Cinnamon Dutch Baby (Gluten Free)

Apple Cinnamon Dutch Baby (Gluten-Free)
Print
clock clock iconcutlery cutlery iconflag flag iconfolder folder iconinstagram instagram iconpinterest pinterest iconfacebook facebook iconprint print iconsquares squares iconheart heart iconheart solid heart solid icon
Apple Cinnamon Dutch Baby (Gluten-Free)

Apple Cinnamon Dutch Baby (Gluten-Free)


5 Stars 4 Stars 3 Stars 2 Stars 1 Star

5 from 2 reviews

  • Author: Amy RD, LDN
  • Total Time: 26 minutes
  • Yield: 6 Servings
  • Diet: Gluten Free

Description

This gluten-free dutch baby will fill your kitchen with the warming smell of apple and cinnamon.


Ingredients

Units Scale
  • 3 tbsp Butter, unsalted
  • 3 Eggs
  • 1/2 tsp Ground Cinnamon
  • 2 Apples, thinly sliced
  • 1/4 cup Sugar
  • 1 pinch Salt
  • 2/3 cup Almond Milk (or milk of your preference)
  • 2/3 cup Gluten-Free Flour
  • 1/4 tsp Xantham Gum

Instructions

  1. Preheat your oven to 425° F.
  2. Heat a cast iron pan or large saute pan to medium heat. Add the butter and melt.
  3. Add the sliced apples and 1/2 tsp cinnamon to the pan. Cook for 3-5 minutes until the apples are softened, stirring occasionally.
  4. While the apples are cooking make your batter.
  5. In a large bowl add 3 eggs and whisk vigorously. (This incorporates air into the eggs and helps your dutch baby rise!)
  6. Next, add the sugar, milk, salt, flour and Xantham gum. Whisk until all ingredients are incorporated.
  7. Pour the batter over top of the apples in the pan, spreading it evenly in the pan.
  8. Place the pan into the oven and bake for 18-22 minutes until golden brown.
  9. Remove from the oven and bask in the glory of your puffed dutch baby! (It will deflate quickly after you remove it from the oven.
  10. Sprinkle with powdered sugar if desired, slice and enjoy!
  • Prep Time: 8
  • Cook Time: 18
  • Category: Breakfast, Dessert, Gluten-Free
  • Method: Bake

Nutrition

  • Serving Size: 1/6
  • Calories: 204
  • Sugar: 14g
  • Sodium: 101mg
  • Fat: 8g
  • Saturated Fat: 4g
  • Carbohydrates: 27g
  • Fiber: 2g
  • Protein: 5g
  • Cholesterol: 108mg
Recipe Card powered byTasty Recipes

Spinach & Cheddar Popovers

Spinach & Cheddar Popovers

Spinach & Cheddar Popovers
Print
clock clock iconcutlery cutlery iconflag flag iconfolder folder iconinstagram instagram iconpinterest pinterest iconfacebook facebook iconprint print iconsquares squares iconheart heart iconheart solid heart solid icon
Spinach & Cheddar Popovers

Spinach & Cheddar Popovers


5 Stars 4 Stars 3 Stars 2 Stars 1 Star

  • Author: Amy RD, LDN
  • Total Time: 35 minutes
  • Yield: 16 Popovers

Description

Spinach & Cheddar Popovers are a fun appetizer or side dish to any dinner!


Ingredients

Scale
  • 4 Eggs
  • 1 1/2 cups Almond Milk (or milk or your preference)
  • 1/2 cup Whole Wheat Flour
  • 1 cup All Purpose Flour
  • 1/2 tsp Kosher Salt
  • 3 tbsp Unsalted Butter, melted
  • 1 cup Spinach, raw
  • 1/2 cup Cheddar Cheese, grated

Instructions

  1. Heat oven to 400° F. Grease a muffin tin with butter and place into oven to preheat.
  2. In a blender, combine all ingredients EXCEPT, cheddar cheese. Blend until smooth.
  3. Using a spatula, stir the grated cheese into the batter in the blender.
  4. Remove the muffin pan from the oven (careful, it’s hot!). Pour the batter into each muffin tin, filling 3/4 of the way full.
  5. Place muffin pan into the oven and bake for 30-35 minutes until popovers are puffed and slightly golden. Serve hot and enjoy!
  • Prep Time: 5
  • Cook Time: 30
  • Category: Appetizers, Sides, Snack
  • Method: Bake

Nutrition

  • Serving Size: 1
  • Calories: 99
  • Sugar: 0g
  • Sodium: 123mg
  • Fat: 5g
  • Saturated Fat: 3g
  • Carbohydrates: 9g
  • Fiber: 1g
  • Protein: 4g
  • Cholesterol: 56mg
Recipe Card powered byTasty Recipes

Chocolate Dipped Fruit

Chocolate Dipped Fruit

Chocolate Dipped Fruit
Print
clock clock iconcutlery cutlery iconflag flag iconfolder folder iconinstagram instagram iconpinterest pinterest iconfacebook facebook iconprint print iconsquares squares iconheart heart iconheart solid heart solid icon
Chocolate Dipped Fruit

Chocolate Dipped Fruit


5 Stars 4 Stars 3 Stars 2 Stars 1 Star

  • Author: Amy RD, LDN
  • Total Time: 10 minutes
  • Yield: 8 Servings
  • Diet: Vegetarian

Description

Chocolate dipped fruit is a simple dessert with the wow factor! Pick your favorite fruit and dip away!


Ingredients

Scale
  • 1/2 cup Semi-Sweet Chocolate Chips
  • 1 tbsp Coconut Oil
  • 1 lb Fresh Fruit (Strawberries, Kiwi, Blueberries, Whatever you like!)

Instructions

Prep your Tray
  1. Cover a sheet tray or plate with a silpat or parchment paper and set aside.
Melt Your Chocolate
  1. In a medium sized microwave safe bowl, add the chocolate chips and coconut oil. Microwave for 25-second intervals, stirring after each interval until the chocolate and coconut oil are melted.
Rinse, Dry and Peel Your Fruit
  1. Rinse the strawberries and pat them dry with a clean cloth or paper towel. Peel and slice the kiwis into 1/4 inch slices.
Dip Your Fruit
  1. Holding the stem of the strawberry, dip half of the fruit into the chocolate and then set onto parchment paper. For the kiwis, dip half of each slice into the chocolate and then place onto parchment paper.
  2. For blueberries or other small berries, use a spoon or fork to help cover the fruit in chocolate and then place onto parchment paper.
Set the Chocolate
  1. Once all the fruit has been dipped, place the fruit into the fridge to chill and allow the chocolate to set and harden for 15 minutes.
  2. Dig in and enjoy a sweet and delicious treat!
  • Prep Time: 5
  • Cook Time: 5
  • Category: Dessert, Snack, Mediterranean
  • Cuisine: American

Nutrition

  • Serving Size: 1/8
  • Calories: 83
  • Sugar: 8g
  • Sodium: 2g
  • Fat: 5g
  • Carbohydrates: 11g
  • Fiber: 2g
  • Protein: 1g
  • Cholesterol: 0mg
Recipe Card powered byTasty Recipes

Healthy Banana Nut Muffins

Healthy Banana Nut Muffins

Healthy Banana Nut Muffins
Print
clock clock iconcutlery cutlery iconflag flag iconfolder folder iconinstagram instagram iconpinterest pinterest iconfacebook facebook iconprint print iconsquares squares iconheart heart iconheart solid heart solid icon
Healthy Banana Nut Muffins

Healthy Banana Nut Muffins


5 Stars 4 Stars 3 Stars 2 Stars 1 Star

5 from 1 review

  • Author: Amy RD, LDN
  • Total Time: 30 minutes
  • Yield: 12 Muffins

Description

Healthy Banana Nut Muffins are one of my most popular recipes! They are filled with flavor and potassium to keep you full and satisfy your sweet tooth.


Ingredients

Scale
  • 1/2 cup Oat flour
  • 1/2 cup Wheat flour
  • 1/2 cup All-purpose flour
  • 1/4 cup Flaxseed
  • 1 tsp Cinnamon
  • 1 tsp Baking soda
  • 1/2 tsp Kosher Salt
  • 2 Over Ripe Bananas
  • 1/2 cup Honey
  • 1 Egg
  • 1/4 cup Olive Oil
  • 1/4 cup Almond milk
  • 1/2 tbsp Vanilla Extract
  • 1/2 cup Pecans (chopped)

Instructions

  1. Set out all in Ingredients and equipment for healthy baking!
  2. Preheat your oven to 350° F. Line a muffin tray with paper liners or spray with nonstick spray.
  3. In a large bowl add the flours, flaxseed, baking soda, cinnamon and salt and whisk together. Set aside.
  4. In a medium bowl whisk together the mashed bananas, olive oil, honey, egg, milk, and vanilla.
  5. Slowly add the dry ingredients to the wet ingredients.
  6. Set 2 tbsp of pecans aside. Add the remaining pecans to the batter, mixing with a spatula, Be sure not to over mix! (This produces tough muffins.)
  7. Spoon the batter evenly into 12 muffin cups.
  8. Sprinkle remaining 2 tbsp chopped pecans over top of each muffin batter.
  9. Place muffin tray into the oven and bake for 20-25 minutes until the tops are golden brown and a toothpick inserted in the center of a muffin comes out clean.
  10. Allow muffins to cool on a wire rack for 10 minutes.
 

Notes

*Muffins will last up to 5 days in the refrigerator and up to 3 months in the freezer.

  • Prep Time: 10
  • Cook Time: 20
  • Category: Breakfast, Snack, Dessert
  • Method: Bake

Nutrition

  • Serving Size: 1 Muffin
  • Calories: 205
  • Sugar: 15g
  • Sodium: 235mg
  • Fat: 8g
  • Saturated Fat: 1g
  • Unsaturated Fat: 5g
  • Trans Fat: 0g
  • Carbohydrates: 29g
  • Fiber: 2g
  • Protein: 5g
  • Cholesterol: 76mg
Recipe Card powered byTasty Recipes

Triple Berry Dutch Baby

Triple Berry Dutch Baby

Triple Berry Dutch Baby
Print
clock clock iconcutlery cutlery iconflag flag iconfolder folder iconinstagram instagram iconpinterest pinterest iconfacebook facebook iconprint print iconsquares squares iconheart heart iconheart solid heart solid icon
Triple Berry Dutch Baby

Triple Berry Dutch Baby


5 Stars 4 Stars 3 Stars 2 Stars 1 Star

  • Author: Amy RD, LDN
  • Total Time: 23 minutes
  • Yield: 6

Description

This Triple Berry Dutch Baby is packed with antioxidants and is a show-stopper breakfast, perfect for weekend mornings.


Ingredients

Units Scale
  • 3 Eggs
  • 1/3 cup Sugar
  • 1/2 tsp Lemon Zest
  • Pinch Salt
  • 2/3 cup Unsweetened Almond Milk
  • 1/3 cup All Purpose Flour
  • 1/3 cup Whole Wheat Flour
  • 3 tbsp Unsalted Butter
  • 1 1/2 cups Mix Berries (Blueberries, Blackberries, Raspberries)

Instructions

  1. Preheat your oven to 425° F
  2. Heat a 9-inch cast iron pan over medium low heat. Add the butter and cook until melted. Then turn off heat to pan.
  3. In a medium sized bowl, add the eggs and whisk so the eggs are fully broken down. The sugar, lemon zest and salt. Whisk vigorously until mixture becomes slightly foamy on top.
  4. Next, add the almond milk to the bowl and whisk.
  5. Add the flours and whisk again to combine batter.
  6. Pour the mixture into your pan with melted butter. Top with mixed berries, spread them out so that each bite will get berries!
  7. Place into the oven and bake for 18-22 minutes until nicely golden brown.
  8. Sprinkle powdered sugar over top, slice and enjoy!
 
  • Prep Time: 5
  • Cook Time: 18
  • Category: Breakfast
  • Method: Bake
  • Cuisine: German

Nutrition

  • Serving Size: 1/6
  • Calories: 197
  • Sugar: 13
  • Sodium: 80
  • Fat: 9
  • Saturated Fat: 4
  • Trans Fat: 0
  • Carbohydrates: 25
  • Fiber: 3
  • Protein: 5
  • Cholesterol: 108
Recipe Card powered byTasty Recipes

Sunrise Banana Pancakes

Sunrise Banana Pancakes

Sunrise Banana Pancakes
Print
clock clock iconcutlery cutlery iconflag flag iconfolder folder iconinstagram instagram iconpinterest pinterest iconfacebook facebook iconprint print iconsquares squares iconheart heart iconheart solid heart solid icon
Sunrise Banana Pancakes

Sunrise Banana Pancakes


5 Stars 4 Stars 3 Stars 2 Stars 1 Star

  • Author: Amy RD, LDN
  • Total Time: 20 minutes
  • Yield: 12 Servings

Description

Sunrise Banana Pancakes are the perfect healthy weekend breakfast! Filled with fiber and potassium, plus the anti-inflammatory benefits of turmeric, top with a little maple syrup and enjoy!


Ingredients

Scale
  • 2 Ripe Bananas
  • 2 Eggs
  • 1 cup Almond Milk
  • 2 cups Oat Flour
  • 3 tsp Baking Powder
  • 1 tsp Ground Cinnamon
  • 1/2 tsp Ground Turmeric
  • 1/4 tsp Salt
  • 1 tsp Vanilla Extract
  • 1 tbsp Maple Syrup

Instructions

  1. Add all ingredients into a blender and blend until smooth.
  2. Allow the batter to sit for 5 minutes while you heat up your pan or griddle. (Oats absorb moisture!)
  3. Preheat a griddle to 325° F or a skillet to medium heat. Spray your pan with nonstick spray, or alternatively add 1 tbsp butter or oil to pan.
  4. Pour 1/4 cup of batter onto griddle or pan, then, leaving about 1-inch between, make additional pancakes to fit within your pan.
  5. Allow pancakes to cook 1-2 minutes until the bubbles that have formed on top begin to burst. Then flip and allow to cook an additional 1 to 2 minutes.
  6. Remove pancakes from pan and serve immediately. Or, place on a sheet tray and keep warm in a 180° F oven until you are ready to serve. Enjoy!
 
  • Prep Time: 5
  • Cook Time: 15
  • Category: Breakfast, Snack, Anti-Inflammatory
  • Method: Griddle
  • Cuisine: American, Mediterranean

Nutrition

  • Serving Size: 2
  • Calories: 220
  • Sugar: 8g
  • Sodium: 6mg
  • Fat: 6g
  • Saturated Fat: 2g
  • Carbohydrates: 36g
  • Fiber: 4g
  • Protein: 8g
  • Cholesterol: 62mg
Recipe Card powered byTasty Recipes

Butternut Squash Mac and Cheese

Butternut Squash Mac and Cheese

Print
clock clock iconcutlery cutlery iconflag flag iconfolder folder iconinstagram instagram iconpinterest pinterest iconfacebook facebook iconprint print iconsquares squares iconheart heart iconheart solid heart solid icon

Butternut Squash Mac and Cheese


5 Stars 4 Stars 3 Stars 2 Stars 1 Star

5 from 1 review

  • Author: Amy RD, LDN
  • Total Time: 50 minutes

Description

Creamy, cheesy, and absolutely delicious! Butternut Squash Mac and Cheese is packed with flavor, fiber and nutrients. It is the perfect dish for your holiday meals.


Ingredients

Units Scale
  • 1 Butternut Squash
  • 3 Garlic Cloves
  • 2 tsp Kosher Salt
  • 1 1/2 tsp Ground Black Pepper
  • 1 tbsp Olive Oil
  • 1 cup Vegetable Stock
  • 4 oz Gruyere Cheese, Shredded
  • 8 oz Sharp Cheddar Cheese, Shredded
  • 16 oz Cavatappi Pasta

Breadcrumb Topping:

  • 1/2 cup Whole Wheat Panko Breadcrumbs
  • 1 tbsp Chopped Herbs (Such as Thyme, Sage)
  • 1 tbsp Olive Oil

Instructions

  1. Preheat oven to 400° F. Line a large sheet tray with foil, set aside.
  2. Using a sharp knife, slice the butternut squash in half lengthwise. Be careful as the squash’s skin is quite tough! Using a spoon, scoop out the seeds and bit of flesh from the squash.
  3. Spread 1 tablespoon olive oil over the squash halves. Place garlic cloves into each squash half. Add 1 tsp kosher salt and 1/2 tsp ground black pepper. Place sheet tray into the preheated oven and roast for 40-60 minutes, depending on the size of your butternut squash. You will know the squash is done when you can press it with a fork and it is soft.
  4. While the squash is roasting, cook your pasta. Fill a large pot with water and bring to a boil. Add 2 tsp salt to your water. Add your pasta and cook 1 minute under the recommended time. You want your pasta to be “al dente” and have a little bite to it. Drain the pasta and set the pot aside to use again.
  5. Let the squash cool for at least 10 minutes. After 10 minutes scoop the flesh of the butternut squash out and place into the bowl of a food processor. Be sure to scoop all the flesh and the garlic!
  6. Add 1 cup of stock to the food processor. Process the mixture until it is smooth and creamy.
  7. Place the pot you used for the pasta onto the stove and heat to low. Using a spatula spoon the butternut squash mixture into the pot. Add both the shredded gruyere and cheddar cheeses. Stir the cheeses into the butternut squash mixture until they are melted. At this point check your mixture for seasoning. Add additional salt and pepper to taste.
  8. Add the cooked pasta to your squash and cheese mixture. Mix thoroughly.
  9. Place pasta mixture into a 9×13 dish that has been coated with cooking spray.
  10. Sprinkle 1/2 cup panko breadcrumbs over top of mac and cheese. Then top with herbs and drizzle 1 tbsp olive oil over top.
  11. Bake for 25-30 minutes or until bubbly and golden brown on top. Allow to cool for 5 minutes, enjoy!
 
  • Prep Time: 20
  • Cook Time: 30
  • Category: Comfort Food
  • Method: Bake
  • Cuisine: American

Nutrition

  • Serving Size: 1/8
  • Calories: 395
  • Sugar: 3
  • Sodium: 851
  • Fat: 15
  • Saturated Fat: 8
  • Unsaturated Fat: 7
  • Trans Fat: 0
  • Carbohydrates: 48
  • Fiber: 3
  • Protein: 19
  • Cholesterol: 46
Recipe Card powered byTasty Recipes

Farmer’s Market Panzanella Salad

Farmer’s Market Panzanella Salad

Farmer's Market Panzanella
Print
clock clock iconcutlery cutlery iconflag flag iconfolder folder iconinstagram instagram iconpinterest pinterest iconfacebook facebook iconprint print iconsquares squares iconheart heart iconheart solid heart solid icon
Farmer's Market Panzanella

Farmer’s Market Panzanella Salad


5 Stars 4 Stars 3 Stars 2 Stars 1 Star

  • Author: Amy RD, LDN
  • Total Time: 15 minutes
  • Yield: 8 Servings
  • Diet: Vegetarian

Description

Fresh, flavorful and full of nutrients this salad is always a crowd-pleaser. Add your favorite vegetables to make it your own!


Ingredients

Units Scale

Salad

  • 1 pt Cherry Tomatoes, sliced in half lengthwise
  • 1 Red Bell Pepper, diced into 1-inch pieces
  • 1 Yellow or Orange Bell Pepper, diced into 1-inch pieces
  • 1 Large Cucumber, peeled, seeded and diced into 1-inch pieces
  • 1/2 Red Onion, sliced thinly
  • 10 Basil Leaves, torn
  • 1 Ear of Corn, kernels removed
  • 1/2 Loaf of Sourdough Bread
Vinaigrette
  • 1 tsp Minced Garlic
  • 1/2 tsp Dijon Mustard
  • 3 tbsp Red Wine Vinegar
  • 1/2 cup Olive Oil
  • 1/2 tsp Kosher Salt
  • 1/4 tsp Ground Black Pepper
  • 1 tsp Honey

Instructions

Prepare the Vinaigrette
  1. Combine all vinaigrette ingredients into a mason jar or medium mixing bowl and whisk all the ingredients together. Set aside.
Salad Directions
  1. Slice bread into 1-inch cubes.
  2. Heat large sauté pan over medium heat. Add 4 tablespoons olive oil to pan. Add bread cubes to pan and cook until golden brown, tossing occasionally. Remove from heat and allow to cool.
  3. In a separate bowl add the tomatoes, bell peppers, red onion, basil, and corn. Add the bread cubes to the mixture.
  4. Stir in half of the vinaigrette and mix together. Taste the salad and add more vinaigrette as needed. Enjoy!
 

Notes

*Make this salad your own! Use your favorite vegetables, add feta, fresh mozzarella, whatever you like!

  • Prep Time: 15
  • Category: Mediterranean, Dinner, Salad, Appetizer, Side, Black Forest Farmer’s Market
  • Cuisine: Italian

Nutrition

  • Serving Size: 1
  • Calories: 230
  • Sugar: 4g
  • Sodium: 480mg
  • Fat: 14g
  • Carbohydrates: 23g
  • Fiber: 1g
  • Protein: 4g
  • Cholesterol: 0mg
Recipe Card powered byTasty Recipes