When you use these links, we may earn a small commission at no extra cost to you—thanks for helping us keep things going!
Greek-Style Nachos
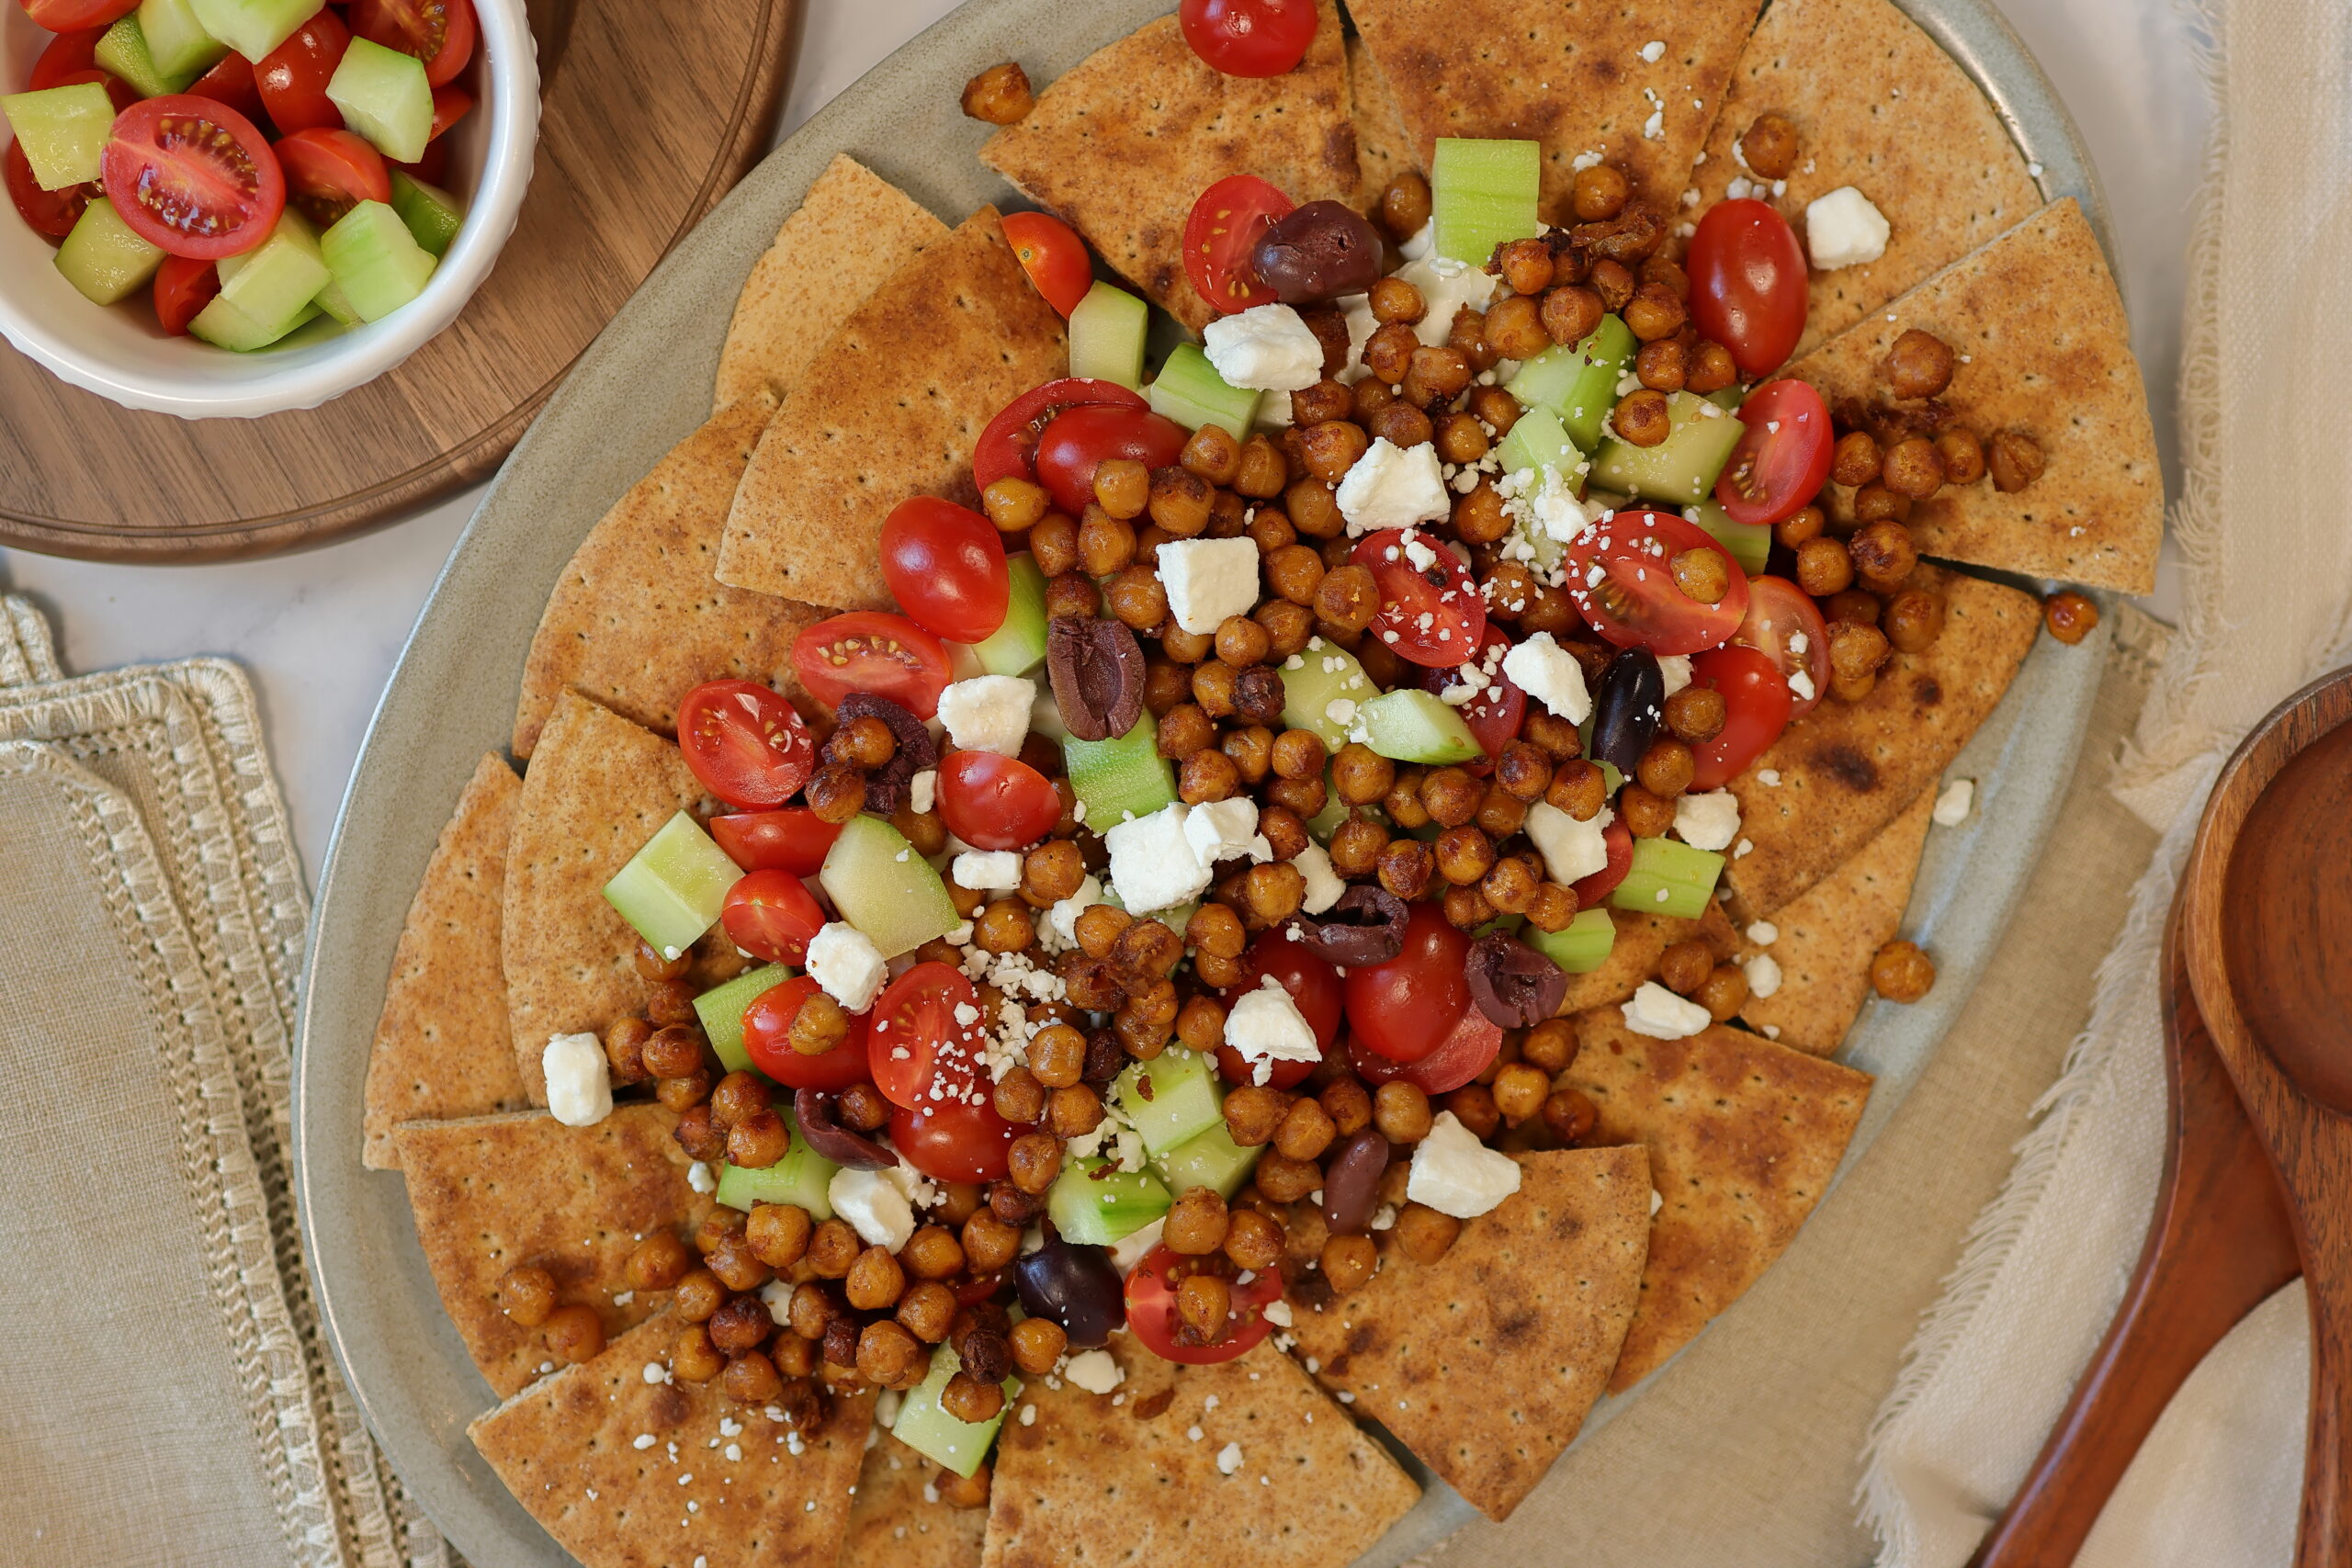

Greek-Style Nachos
- Total Time: 1 hr 50 mins
- Yield: 6 servings 1x
- Diet: Vegetarian
Description
Delicious Greek-Style Nachos with Chickpeas, Feta, Tomato & Olives
Ingredients
Scale
Chickpeas
- 1 lb Dried Chickpeas (See notes for alternative options)
- 1 tbsp Olive OIl
- 1 Onion (medium)
- 4 Garlic cloves
- 2 tsp Paprika
- 2 tsp Ground Cumin
- 1/4 tsp Garam Masala (Optional)
- 1/4 tsp Cayenne Pepper
- 1/2 tsp Lemon Zest
- 2 tsp Kosher Salt
- 4 cups Vegetable Broth
Pita Chips
- 2 Pita Bread
- 2 tbsp Olive Oil
- 1/2 tsp Kosher Salt
Veggie Salad
- 1 Cucumber, peeled, seeded and chopped
- 1 pt Cherry Tomatoes, sliced in half
Toppings
- Greek Yogurt
- Feta Cheese
- Kalamata Olives
- Hot Sauce (Optional)
Instructions
Chickpeas
- Sort and rinse your dried chickpeas. (If using canned skip this step.) Fill a large bowl with 6 cups water, pour chickpeas into bowl and soak overnight.
- Preheat oven to 375° F. Drain your soaked chickpeas, set aside.
- In a large dutch oven or large pot, heat 1 tbsp olive oil over medium heat. Add sliced onion to pan, sautee until slightly browned.
- Lower the heat to medium-low and add minced garlic and sautee for 1-2 minutes until fragrant.
- Add the spices, salt and lemon zest to garlic and onions and sautee for another 30 seconds.
- Add vegetable stock to pot and then the chickpeas (soaked or canned). Using a wooden spoon or spatula, stir mixture together and then bring to a boil. Then, turn the heat off and cover the pot with a lid.
- Next, put the dutch oven into your preheated oven and bake for 45 minutes to 1 1/2 hours, depending on the chickpeas you are using. (If you are using canned, it should take around 45 minutes for the chickpeas to soak up the yummy liquid. If you are using dry, soaked chickpeas it will take closer to an hour to an half and half for the beans to soak up the liquid.)
- Once the liquid has been absorbed by the chickpeas they are done. Remove from the oven and set aside.
Toppings:
- Slice your pita bread into triangles, drizzle 1 tbsp olive oil and 1/8 tsp salt over top and place onto a sheet tray (Skip this step if you bought pre-made pita chips!)
- Bake pita chips in the oven with your chickpeas for 8-10 minutes. Keep an eye on them as they burn easily!
Vegetable Topping:
- Slice 1 pint cherry tomatoes in half lengthwise. Peel, seed and chop cucumber to 1 inch chunks.
- Serve with Greek yogurt, feta cheese, kalamata olives and hot sauce as desired.
To Plate:
- Set pita chips on plate, top with dollops of Greek Yogurt, then the delicious braised chickpeas, cucumber and tomatoes, feta, kalamata olives and hot sauce. Enjoy!!

Notes
Notes:
- You can make this as simple or complicated as you’d like. Using canned chickpeas and store bought pita chips makes this a week-night winner!
- To substitute canned chickpeas use 4 cans, 15 oz each
- *This recipe was inspired by several Greek Nacho style recipes and including SmittenKitchen’s Braised Chickpeas.
- Prep Time: 20min
- Cook Time: 1 hr 30 mins
- Category: Appetizers, Dinner, Lunch, Mediterranean, Salad, Sides
- Method: Braise
- Cuisine: Greek
Nutrition
- Serving Size: 6
- Calories: 541
- Fat: 19g
- Saturated Fat: 5g
- Carbohydrates: 71g
- Fiber: 15g
- Protein: 27g
- Cholesterol: 24mg
Recipe Card powered by